Last Updated on May 21, 2026
Baking is both an art and a science. It requires patience and precision.
Yet, the magic lies in the secrets that elevate simple ingredients into delightful treats. Discovering these baking secrets can transform your culinary creations. Whether you’re a novice or a seasoned baker, understanding the little tricks can make a big difference.
These secrets range from ingredient selection to technique tips. They help ensure your baked goods are not only tasty but also consistent. With a few insights, you can impress family and friends with perfect pastries and cakes. Baking can be more enjoyable and less stressful. Join us as we explore these hidden gems in the world of baking. Get ready to uncover the mysteries behind those mouthwatering aromas and flavors.
Credit: www.goodreads.com
Choosing Ingredients
Choosing the right ingredients is crucial for baking success. Each ingredient plays a role. They define texture, flavor, and rise. Knowing what to choose makes a difference.
Flour Types
Flour is the backbone of baking. All-purpose flour suits most recipes. It balances protein and starch well. Bread flour contains more protein. It gives bread a chewy texture. Cake flour has less protein. It makes cakes soft and light. Whole wheat flour adds a nutty flavor. Each flour type serves a unique purpose. Choose wisely for the best results.
Yeast Varieties
Yeast makes dough rise. Active dry yeast needs dissolving first. It works well for long rises. Instant yeast mixes directly with dry ingredients. It acts fast and saves time. Fresh yeast is soft and moist. It delivers rich flavor but has a short shelf life. Each yeast type offers distinct qualities. Understand them to achieve perfect rise in your bakes.

Credit: www.facebook.com
Essential Tools
Every baker knows that having the right tools can make or break your baking adventure. The secret ingredient isn’t just in the batter—it’s in the utensils and gadgets you use. Imagine whipping up a batch of cookies only to realize your mixer isn’t quite up to the task. Or trying to perfect a cake without the right pans. Let’s dive into the essential tools that every aspiring baker should have in their kitchen arsenal.
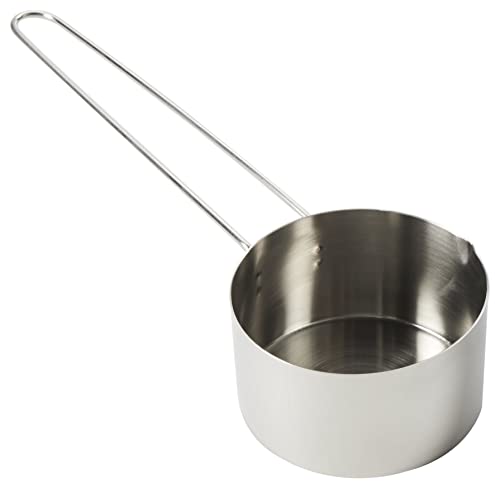
Must-have Utensils
A well-equipped kitchen starts with the basics. Your spatula is your best friend. It helps you scrape every last bit of batter and is perfect for folding delicate mixtures. Don’t forget about measuring cups and spoons. Precision is key in baking, and guessing isn’t an option.
Have you ever tried to whisk by hand? A sturdy whisk is crucial for incorporating air into your mixtures, making your cakes light and fluffy. And when it comes to rolling out dough, a quality rolling pin is indispensable. It gives you the control needed for perfect thickness.
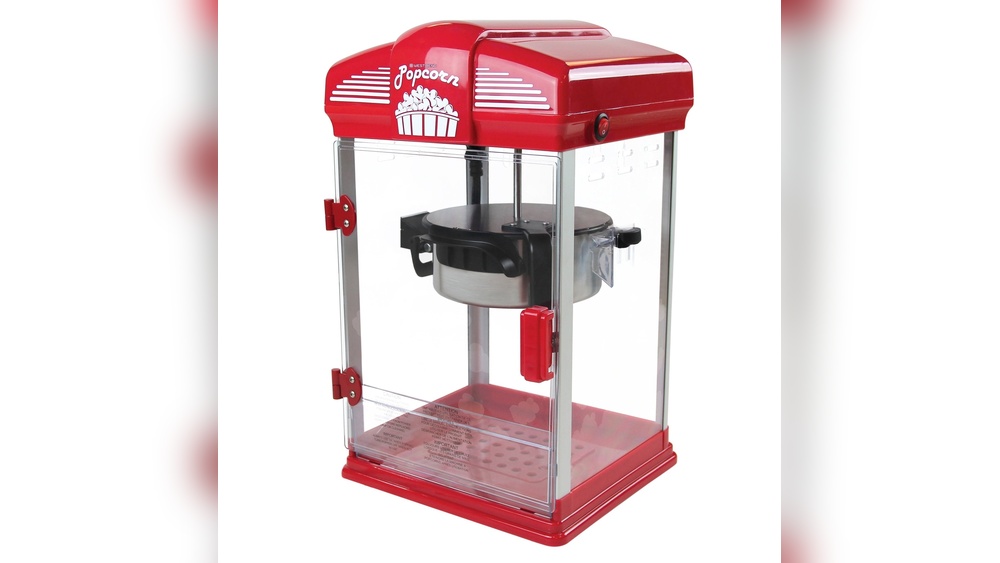
Useful Gadgets
While basic utensils are vital, certain gadgets can elevate your baking game. Ever tried using a stand mixer? It’s a lifesaver for those who love baking but hate the arm workout. It mixes dough, whips cream, and even kneads bread effortlessly.
Consider investing in a digital kitchen scale. Eyeballing ingredients might work for cooking, but baking is a science. A scale ensures you measure ingredients with precision. Plus, many recipes rely on weight rather than volume.
Finally, a timer is your silent kitchen companion. Baking requires exact timing, and distractions happen. A reliable timer ensures you won’t burn your cookies while checking social media.
Have you ever thought about the impact of using the right tools? It’s not just about convenience; it’s about enhancing the quality of your baked goods. What tools can’t you bake without?
Mixing Techniques
Mixing techniques play a crucial role in baking. They determine the texture and flavor of your baked goods. Understanding different methods helps you achieve perfect results. Whether mixing by hand or using a machine, each technique has unique benefits.
Hand Mixing
Hand mixing connects you with the ingredients. It offers more control over the process. This technique is ideal for delicate batters. You can feel the consistency and adjust as needed. Use a spatula or whisk for best results. Avoid overmixing to keep the texture light.
Machine Mixing
Machine mixing speeds up the process. It ensures thorough blending of ingredients. Perfect for larger batches and stiff doughs. Stand mixers and hand mixers are popular choices. They provide consistent results every time. Adjust the speed for different recipes. Start slow to avoid splattering.
Kneading Methods
Baking bread is both art and science. The kneading process plays a vital role. It transforms a simple dough into delicious bread. Understanding different kneading methods can enhance your baking skills. Let’s explore two popular methods: traditional kneading and the no-knead approach.
Traditional Kneading
Traditional kneading requires using your hands. It involves stretching and folding the dough. This method develops gluten in the dough. Gluten is important for bread structure. It gives bread its chewy texture. Kneading by hand connects you to the dough. Feel the change in texture as you knead. It’s a rewarding experience. Timing is key here. Usually, 10 minutes of kneading is enough. Look for a smooth and elastic dough.
No-knead Approach
The no-knead approach is simple and less time-consuming. It relies on a long fermentation period. This method uses time to develop gluten. Mix your ingredients and let the dough rest. Leave it for 12 to 18 hours. The dough rises and gluten forms naturally. No kneading required. This method is perfect for busy bakers. It produces bread with a rustic crust. The inside is soft and airy. A Dutch oven can enhance the crust further. Enjoy this easy method for fresh bread.
Proofing Process
Baking is an art that hinges on precision and patience. One crucial step is proofing. It transforms dough into airy, flavorful bread. Proofing is when yeast ferments dough, creating gas bubbles. This process gives bread its texture and flavor. Let’s explore the secrets of the proofing process.
First Rise
The first rise is about activating the yeast. After mixing ingredients, let the dough rest. This is often in a warm place. During this time, yeast begins to work. It consumes sugars and produces carbon dioxide. This causes the dough to expand. The first rise typically lasts one to two hours. Check the dough for size. It should double during this period. A gentle poke should leave an indentation.
Second Rise
The second rise happens after shaping the dough. It’s shorter but just as crucial. Place the shaped dough in pans or trays. Allow it to rest again, usually for 30 minutes to an hour. This rise adds structure and finalizes the texture. It’s essential for a beautiful crust. The dough should rise slightly but not as much as before. Test with a light touch. It should spring back slowly.

Credit: www.amazon.com
Shaping Tips
Baking is an art that involves more than just mixing ingredients. It requires precision and creativity, especially during the shaping process. Shaping gives baked goods their unique character and appeal. Mastering shaping tips can transform your baking experience. From basic shapes to advanced techniques, each method offers endless possibilities. Let’s explore some essential shaping tips that can elevate your baking skills.
Basic Shapes
Start with simple shapes to gain confidence. Round shapes are the easiest. Roll dough into a ball using your palms. This shape works for bread rolls and cookies. Rectangles are straightforward too. Flatten the dough with a rolling pin. Use a knife or cutter for clean edges. Squares are similar, but cut evenly for uniformity.
Oval shapes are great for baguettes. Gently stretch and roll the dough. Ensure even thickness for proper baking. Heart shapes are popular for special occasions. Fold and pinch dough to form the top curves. A rounded base completes the look. Practice these basic shapes to refine your skills.
Advanced Techniques
Once comfortable with basics, try more complex shapes. Braiding adds elegance to bread. Divide dough into strands and intertwine them. This technique requires patience but is rewarding. Twisting is similar, but simpler. Roll strands and twist into spirals. Perfect for pastries and breadsticks.
Shaping dough into animals or objects can be fun. Use tools like scissors or knives for detailing. Creative cutting adds texture and interest. Flower shapes require more finesse. Use circular cutters and layer petals. Press gently to secure them together. These advanced techniques showcase your creativity and skill.
Baking Techniques
Mastering baking techniques can transform your homemade goodies from basic to brilliant. Whether you’re a beginner or a seasoned baker, understanding the nuances of baking can elevate your creations. Let’s dive into some essential aspects like oven settings and steam effects that can make a significant difference in your baking endeavors.
Oven Settings
Oven settings are crucial in achieving the perfect bake. Do you know the difference between baking with a fan and without? Using a fan, or convection setting, can help distribute heat evenly, resulting in a consistent bake. However, it can sometimes dry out your goods if not monitored carefully.
Temperature accuracy is another key element. Always preheat your oven to the desired temperature before placing your dish inside. A handy tip is to use an oven thermometer to ensure your oven’s temperature is accurate. You might be surprised to find discrepancies between the oven’s display and the actual heat!
Consider the positioning of your baking dish too. Placing it in the center allows for even heat distribution, while positioning it lower or higher can affect the texture and doneness. Have you ever tried experimenting with different oven levels?
Steam Effects
Steam can work wonders in your baking, particularly in bread making. Adding steam can give your bread a beautiful crust and soft interior. Simply placing a pan of water at the bottom of the oven can produce steam that envelops your dough.
Don’t limit steam to bread alone. You can use steam to add moisture to cakes and pastries. But be cautious; too much steam can make some baked goods soggy. Have you ever tested how steam alters the texture of your favorite recipes?
Timing is everything when using steam. Introducing steam at the right moment can enhance the rise of your dough. Typically, it’s best to add steam at the beginning of the baking process. How does timing impact the final result in your experience?
Baking is an art, and with these techniques, you can refine your skills. Try adjusting your oven settings and playing with steam effects to see how they transform your creations. What secrets will your next baking adventure reveal?
Troubleshooting
Discover the art of troubleshooting common baking mishaps with easy tips. Transform soggy cakes into perfect treats with quick fixes. Learn secrets to ensure fluffy bread and crisp cookies every time.
Baking is a delightful art, but even the most experienced bakers can face hiccups in the kitchen. Have you ever pulled out a cake that was too dense or cookies that spread too much? Troubleshooting in baking is essential to turn those kitchen mishaps into delicious triumphs. Let’s dive into common baking mistakes and how you can fix them to ensure your baked goods always impress.Common Mistakes
One common mistake is using cold ingredients, especially butter and eggs. Cold butter doesn’t cream well with sugar, affecting the texture of cakes and cookies. Next time, let your ingredients sit at room temperature for about 30 minutes before starting. Another frequent issue is overmixing the batter. This often results in tough cakes and chewy bread. Mix your ingredients just until combined, and consider using a spatula instead of a mixer for more control. Misjudging oven temperature can also lead to underbaked or overbaked goods. Invest in an oven thermometer to ensure your oven’s temperature is accurate. It could be the difference between a perfectly golden crust and a burnt one.Fixing Issues
If your cake is too dense, it might be because of too much flour or under-beating the eggs. Try weighing your flour instead of using cups for a more accurate measurement. Also, beat your eggs until they’re light and frothy before incorporating them into your batter. Flat cookies can often be revived by chilling the dough before baking. This helps the butter firm up, preventing excessive spreading. You might also want to check your baking powder or baking soda for freshness. Is your bread not rising? It could be due to expired yeast or water that’s too hot, killing the yeast. Use lukewarm water and always proof your yeast to ensure it’s active. Troubleshooting in baking is about understanding what went wrong and knowing how to fix it. Have you experienced any of these issues in your kitchen? What solutions have you found effective? Share your thoughts and let’s make baking a stress-free and rewarding experience!Storing Bread
Storing bread correctly ensures freshness and quality over time. The right methods keep your bread tasty and soft. Different storage methods suit different needs. Let’s explore the best ways to store bread, both short-term and for freezing.
Short-term Storage
For short-term storage, keep bread in a cool, dry place. A bread box works well. It protects bread from air and moisture. Use a paper bag if you don’t have a bread box. Avoid plastic bags. They trap moisture and make bread soggy. Bread stays fresh for 2-3 days this way.
Freezing Tips
Freezing bread extends its life. Wrap bread tightly in aluminum foil. This prevents freezer burn. Use a resealable plastic bag for extra protection. Label the bag with the date. Bread can be frozen for up to three months. Thaw bread at room temperature before use. For faster results, use the microwave or oven. This keeps bread fresh and ready to enjoy.
Frequently Asked Questions
What Is The Secret To Good Baking?
Use fresh ingredients, measure accurately, and maintain the right oven temperature. Follow the recipe closely and avoid overmixing. Practice patience and consistency for the best results.
What Are The 4 Pillars Of Baking?
The four pillars of baking are ingredients, techniques, equipment, and precision. Ingredients include flour, sugar, eggs, and fats. Techniques involve mixing, kneading, and baking. Essential equipment includes ovens, mixers, and measuring tools. Precision ensures consistent results by following recipes accurately.
What Are The 3 Rules Of Baking?
Use precise measurements for ingredients. Maintain correct oven temperature throughout baking. Follow recipe instructions closely for best results.
What Are 5 Facts About Baking?
Baking relies on precise measurements for success. Ingredients interact differently when baked at varied temperatures. Yeast aids dough rise through fermentation. Baking soda and powder create leavening. Proper oven calibration ensures even baking results.
Conclusion
Baking holds many secrets waiting to be explored. Simple tips make a big difference. Practice regularly to improve your skills. Always use fresh ingredients for the best results. Remember, patience is key in baking. Don’t rush the process. Experimenting with flavors can lead to delicious surprises.
Measure ingredients accurately to ensure success. Baking is both art and science. Enjoy the journey and the tasty outcomes. With these secrets, anyone can bake with confidence. Keep the oven warm and your spirits high. Happy baking!