Last Updated on June 27, 2026
If you love creamy, frothy milk in your coffee or latte, learning how to steam milk at home can change your coffee game completely. Imagine crafting café-quality drinks without leaving your kitchen.
You don’t need expensive machines or barista skills—just a few simple steps and the right tools. In this guide, you’ll discover easy tricks to create smooth, velvety steamed milk that makes every sip a treat. Ready to impress yourself and anyone you share your coffee with?
Let’s dive in and make your mornings better, one perfect cup at a time.

Credit: majestycoffee.com
Choosing The Right Milk
Choosing the right milk is the first step to steaming milk at home. The type of milk affects taste, texture, and foam quality. Different milks behave differently when heated and frothed. Knowing which milk to pick helps make better coffee drinks.
Whole Vs. Skim Milk
Whole milk has more fat, giving it a creamy texture. It creates rich, smooth foam perfect for lattes and cappuccinos. Skim milk has little fat, making the foam lighter and airier. It produces bigger bubbles but less creamy foam. Choose whole milk for thick foam. Pick skim milk for a lighter taste.
Non-dairy Alternatives
Non-dairy milks are popular for those avoiding dairy. Almond, oat, soy, and coconut milk are common options. Oat milk steams well and tastes creamy. Almond milk can foam but less stable. Soy milk creates good foam and tastes mild. Coconut milk adds a tropical flavor but may separate. Try different types to find your favorite.
Milk Temperature Tips
Milk should be cold before steaming. Cold milk steams better and creates fine foam. Heat milk to about 150°F (65°C) for best results. Avoid overheating. Milk over 160°F (70°C) tastes burnt and loses sweetness. Use a thermometer or feel the container. Warm, not hot, is the key.
Essential Equipment
Steaming milk at home needs the right tools. These tools help you create smooth, creamy milk for your coffee or latte. Having the essential equipment makes the process easier and the results better. This section covers the main tools you need to steam milk effectively.
Milk Frother Types
Milk frothers come in different styles. Electric frothers heat and froth milk quickly. Manual frothers need you to pump or shake to create foam. Handheld frothers use a small whisk powered by batteries. Choose one based on your budget and space.
Using A Steam Wand
A steam wand is part of many espresso machines. It uses steam to heat and froth milk. Steam wands give control over milk texture and temperature. Hold the wand just below the milk surface for best foam. Practice helps to get smooth, creamy milk.
Alternative Tools
Other tools can steam milk without special machines. A French press can froth milk by pumping the plunger quickly. A microwave and jar can heat and shake milk to create foam. These methods work well for small batches and save money.
Step-by-step Frothing Process
Steaming milk at home is easy with the right steps. The process involves preparing the milk, using the right steaming technique, and creating smooth microfoam. Follow these steps for creamy, frothy milk perfect for coffee.
Preparing The Milk
Start with cold milk. Use fresh milk for best results. Pour milk into a clean pitcher. Fill only halfway to leave space for frothing. Cold milk helps create better foam. Whole milk foams well, but skim milk works too. Make sure your pitcher is dry outside for a good grip.
Steaming Technique
Turn on your steam wand. Purge it to remove water. Place the tip just below the milk surface. Keep the pitcher steady and at a slight angle. Turn on steam slowly. Listen for a gentle hissing sound. This means air is mixing into the milk. Lower the pitcher slowly as the milk rises. Avoid large bubbles by keeping the tip near the surface.
Achieving Microfoam
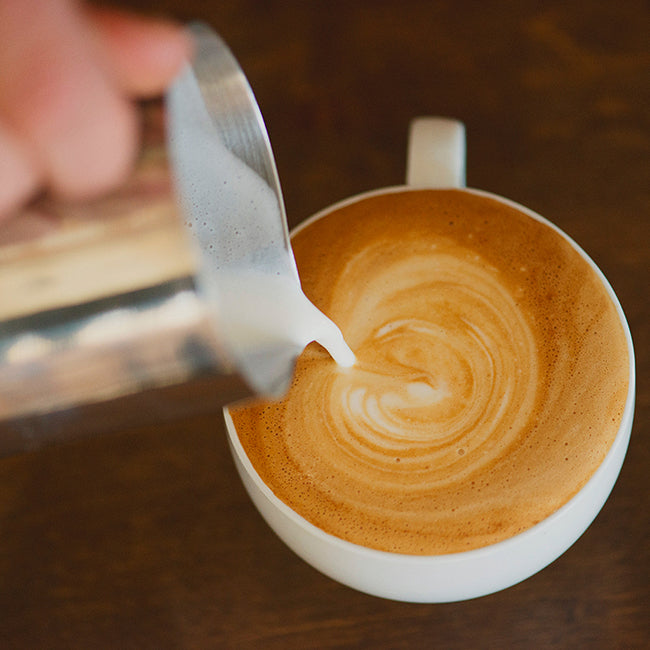
Once the milk reaches about 100°F, submerge the wand deeper. This warms the milk evenly. Keep steaming until the milk reaches 150°F. Stop steaming before it gets too hot. Tap the pitcher on the counter to remove big bubbles. Swirl the milk to make it smooth. The milk should look shiny and creamy. This is microfoam, perfect for latte art and smooth coffee.

Credit: www.nomadcoffeeclub.com
Common Frothing Mistakes
Steaming milk at home can be tricky, especially for beginners. Many people face common mistakes that affect the texture and taste of their milk foam. Knowing these errors helps you improve your frothing skills quickly. Avoiding these mistakes leads to creamier, smoother milk for your coffee drinks.
Overheating Milk
Milk heats fast. Overheating makes it taste burnt and flat. Ideal temperature is between 140°F and 150°F. Use a thermometer or touch the pitcher to check. Stop steaming when the pitcher feels warm but not hot. Overheated milk loses sweetness and froth quality.
Large Bubbles Formation
Big bubbles mean rough foam. This happens if the steam wand is too close to the surface. Keep the wand just below the milk surface. Move the pitcher slowly to create small, even bubbles. Smooth, velvety foam comes from tiny bubbles, not big ones.
Underfrothing Issues
Not enough froth makes milk thin and flat. This occurs when the steam wand is too deep. Froth needs air to mix with milk. Position the wand near the surface for a few seconds. Then submerge it to create creamy foam. Proper frothing adds texture and flavor to your drink.
Tips For Latte Art
Creating latte art at home is fun and adds a special touch to your coffee. Small tips can help you improve your designs. Focus on milk texture, pouring style, and simple shapes to build confidence.
Practice and patience make a big difference. Start with easy steps and watch your skills grow.
Milk Texture For Art
Milk must be smooth and creamy. Avoid big bubbles. Use cold milk and steam it to about 140°F (60°C). The goal is a silky microfoam. This texture helps the milk mix well with espresso. It also makes the surface shiny and easy to draw on.
Pouring Techniques
Pour slowly at first to mix milk with coffee. Then move the pitcher closer to the cup. Use gentle wrist movements. Keep the pour steady and controlled. Try to pour from the center and then shift to make shapes. Practice makes your hand steady and designs clear.
Simple Designs To Try
Start with a heart shape. Pour a circle and then a quick pull through the center. Next, try a rosette by moving the pitcher side to side while pouring. A simple tulip is made by pouring small blobs on top of each other. These easy designs build your skills and confidence.
Cleaning And Maintenance
Keeping your milk steaming tools clean is key for great taste and long life. Dirt and milk residue can cause bad flavors and block your equipment. Regular cleaning stops these problems and keeps your drinks fresh.
Cleaning Steam Wands
Wipe the steam wand with a damp cloth after each use. This removes milk drops before they dry. Always purge the wand by releasing steam for a few seconds. This clears inside milk traces. Deep clean by soaking the wand in warm water with a little detergent once a week. Use a small brush to clean the tip gently. Rinse well before use.
Maintaining Frothers
Empty milk from the frother after steaming. Rinse the container with warm water right away. Clean removable parts like whisks and lids separately. Use mild soap and avoid harsh chemicals. Dry all parts thoroughly before reassembling. Check for wear and tear regularly. Replace parts if they get damaged.
Avoiding Bacterial Build-up
Milk is a perfect place for bacteria. Clean all tools after every use. Don’t leave milk inside the equipment overnight. Store your tools in a dry, clean space. Use vinegar or food-safe sanitizer sometimes. This kills unseen germs. Keeping everything dry and clean stops bacteria from growing.
Credit: levelground.com
Frequently Asked Questions
How Do I Steam Milk Without An Espresso Machine?
You can steam milk at home using a microwave and a jar or a handheld frother. Heat the milk until warm, then shake or froth to create foam. This method is quick and effective for creamy milk without specialized equipment.
What Is The Best Milk For Steaming At Home?
Whole milk steams best due to its fat content, creating creamy, rich foam. However, 2% milk also works well and produces good texture. Non-dairy alternatives like oat milk can foam but may vary in quality.
How Long Should I Steam Milk For Perfect Foam?
Steam milk for about 30 to 45 seconds until it reaches 150°F (65°C). Avoid overheating, as it can burn milk and ruin texture. Proper steaming creates smooth, velvety foam ideal for lattes and cappuccinos.
Can I Use Cold Milk Straight From The Fridge?
Yes, cold milk froths better because it has more air capacity. Start steaming immediately after taking milk from the fridge. Cold milk also helps create denser, creamier foam faster.
Conclusion
Steaming milk at home is simple and fun to learn. It makes your coffee taste fresh and creamy. You only need a few tools and some practice. Start slow, watch the milk, and listen for the right sound. Soon, you will enjoy café-style drinks anytime you want.
Keep trying, and don’t worry about mistakes. Every cup gets better with time. Enjoy your warm, foamy milk and happy sipping!