Last Updated on July 3, 2026
Are you ready to transform your sandwiches into crispy, golden delights? Using a panini press is easier than you think, and it can turn simple ingredients into mouthwatering meals in minutes.
Whether you’re craving a quick lunch or a tasty snack, mastering your panini press will open up a world of delicious possibilities. Keep reading, and you’ll discover simple tips and tricks that will make every bite perfectly toasted and packed with flavor.
Your next favorite sandwich is just a press away!
Credit: thedaringkitchen.com
Choosing The Right Panini Press
Choosing the right panini press makes sandwich making easier and more fun. The right press fits your kitchen space and cooking needs. It helps create crispy, warm paninis every time. Knowing the types and features helps you pick the best one.
Types Of Panini Presses
There are several types of panini presses. Some have floating hinges to fit thick sandwiches. Contact grill presses cook both sides at once. Open grill presses allow you to use it like a flat grill. Vertical presses hold the bread tight for even toasting.
Choose a type that matches how you want to cook. Small presses work well for quick snacks. Larger presses handle multiple sandwiches or bigger bread.
Key Features To Consider
Look for adjustable temperature control to cook bread just right. Non-stick plates make cleaning simple and fast. Removable plates add convenience and safety. A press with a drip tray catches extra grease. Compact size saves kitchen space. Easy-to-use controls help beginners cook with ease.
Weight and handle design affect comfort and pressing strength. Choose a press with sturdy construction for long use. Check if the press stores upright to save space.
Preparing Your Ingredients
Start by washing and chopping all vegetables and herbs. Slice your bread and prepare any meats or cheeses you want to use. Make sure everything is ready before heating the panini press.
Selecting The Best Bread
Start with bread that holds up well under heat. Thick slices work best. Try sourdough, ciabatta, or focaccia. These breads get crispy outside and stay soft inside. Avoid very thin or soft bread. It may become soggy or tear easily. Fresh bread makes a big difference in taste and texture.
Choosing Fillings And Spreads
Pick fillings that melt or warm nicely. Cheese is a must. Mozzarella, cheddar, and provolone work well. Add meats like turkey, ham, or chicken for protein. Use fresh vegetables such as tomatoes, spinach, or peppers. Keep fillings balanced to avoid soggy sandwiches.
Spreads add flavor and moisture. Butter, mayonnaise, or mustard are popular choices. Spread lightly to prevent sogginess. Experiment with pesto or hummus for unique tastes. Layer ingredients evenly for a perfect press every time.
Preheating The Panini Press
Preheating the panini press is the first step for a perfect grilled sandwich. It warms the plates evenly, ensuring your sandwich cooks well. Proper preheating helps avoid soggy bread and uneven cooking.
Taking time to preheat also saves cooking time. The heat seals the bread quickly, keeping the fillings hot and melted inside.
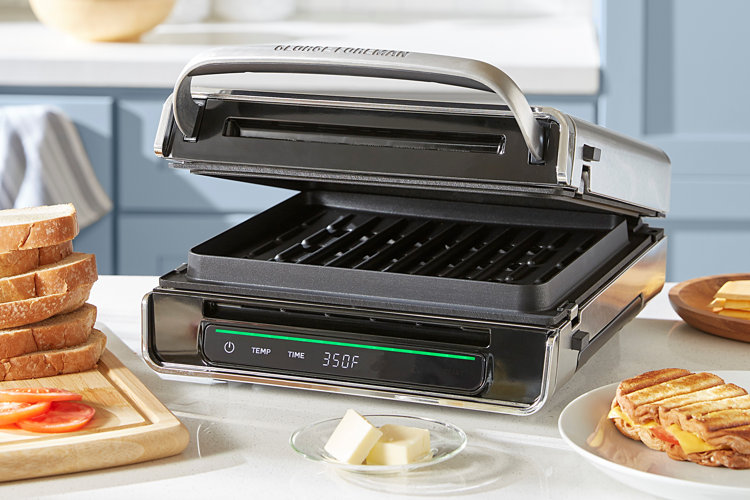
Ideal Temperature Settings
Set the panini press to medium-high heat. Usually, this means around 350°F to 375°F (175°C to 190°C). This range crisps the bread without burning it. Adjust the temperature if your press has no numbers. Use a setting near the middle for good results.
When The Press Is Ready
Wait until the indicator light shows the press is hot. Some models beep or change light color. The plates should feel hot if you touch them briefly. Place a test slice of bread to check. If it browns in 1-2 minutes, the press is ready.

Credit: www.youtube.com
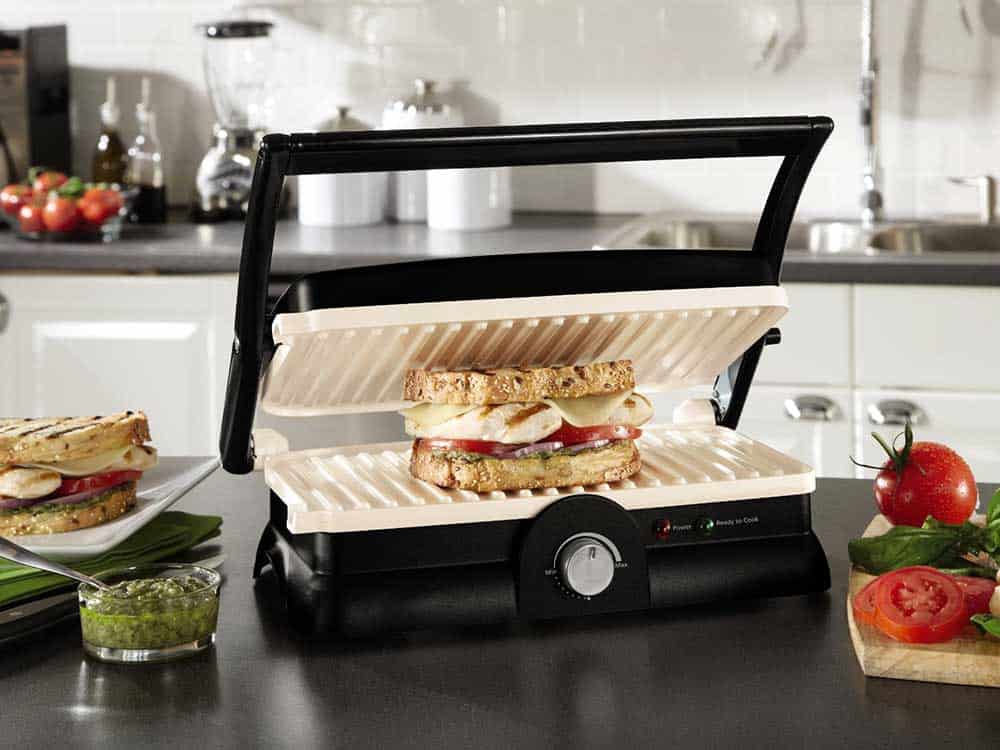
Assembling Your Sandwich
Assembling your sandwich properly is key to great results with a panini press. The way you stack the ingredients affects how well your sandwich cooks and tastes. Taking time to layer carefully helps the heat reach every part evenly. It also keeps the sandwich neat and easy to handle.
Focus on balance. Too much filling or uneven layers can cause problems. Follow simple tips to make your sandwich perfect for pressing. These small steps improve texture and flavor every time.
Layering Tips For Even Cooking
Start with a sturdy base like thick bread slices. Spread sauces or butter on the inside to add moisture. Place cheese directly on bread to help it melt well. Add meats and vegetables in thin, even layers. Keep layers flat to help heat pass through. Avoid clumps that block heat and cause uneven cooking.
Avoiding Overstuffing
Too much filling makes the sandwich hard to close. It also stops heat from reaching the middle. Use just enough ingredients to cover the bread evenly. Leave a small border around edges to prevent spills. Overstuffed sandwiches cook unevenly and can be messy to eat.
Grilling Techniques For Perfect Results
Grilling with a panini press requires simple techniques for tasty, even results. Understanding pressing and timing helps avoid soggy or burnt sandwiches. Managing heat and flipping ensures every bite is crispy and warm. Use these tips to grill like a pro.
Pressing And Timing
Close the panini press gently to avoid squashing the sandwich. Pressing too hard can squeeze out the filling. Let the sandwich grill for about 3 to 5 minutes. Check it often to prevent burning. The bread should be golden brown and crispy. The cheese inside should melt perfectly. Adjust the time based on your sandwich thickness.
Flipping And Adjusting Heat
Some panini presses need flipping to cook evenly. Open the press halfway through grilling. Flip the sandwich if one side cooks faster. Lower the heat if the bread burns quickly. Higher heat cooks faster but can burn edges. Medium heat is best for a balanced cook. Keep an eye on your sandwich while grilling.
Credit: www.wayfair.com
Cleaning And Maintaining Your Panini Press
Cleaning and maintaining your panini press keeps it working well and safe to use. Dirt and food bits can build up and cause problems. Regular care makes your press last longer. It also helps your sandwiches taste better. Follow simple steps to keep your panini press clean and in good shape.
Safe Cleaning Methods
Always unplug the panini press before cleaning. Let it cool down fully to avoid burns. Use a soft cloth or sponge with warm, soapy water. Never use harsh chemicals or abrasive tools. Wipe the plates gently to remove food crumbs. For stuck bits, use a plastic scraper carefully. Avoid putting the panini press in the dishwasher.
Preventing Sticking And Damage
Apply a small amount of cooking spray or oil before heating. This stops food from sticking to the plates. Do not use metal utensils that can scratch the surface. Clean the press soon after use to prevent buildup. Avoid soaking the press in water. Store it in a dry place to keep it safe from damage.
Creative Panini Recipes To Try
Using a panini press is not just for simple sandwiches. It can create a variety of tasty meals. Trying new recipes keeps lunch and dinner fun and exciting. Here are some creative panini ideas to try at home.
Classic Italian Panini
Start with fresh ciabatta bread or baguette. Layer with slices of mozzarella cheese and tomato. Add fresh basil leaves for a burst of flavor. Spread a thin layer of pesto for extra taste. Press until the cheese melts and bread is crisp. Serve with a side of olives or salad.
Vegetarian And Vegan Options
Use whole grain bread or focaccia for a healthy base. Add grilled vegetables like zucchini, bell peppers, and eggplant. Use vegan cheese or avocado slices for creaminess. Spread hummus or tapenade for extra flavor. Press until warm and slightly crispy. Perfect for a light, nutritious meal.
Sweet Panini Ideas
Try spreading peanut butter or almond butter on your bread. Add sliced bananas or strawberries for natural sweetness. Sprinkle a little cinnamon or drizzle honey for flavor. Press gently to warm and soften the fruit. A simple dessert or breakfast treat ready in minutes.
Frequently Asked Questions
How Do I Clean A Panini Press After Use?
Unplug and cool your panini press first. Wipe plates with a damp cloth. Avoid harsh chemicals. Use a soft brush for stuck food. Dry thoroughly before storing.
Can I Use A Panini Press For Other Foods?
Yes, panini presses can grill vegetables, meats, and even quesadillas. They offer quick, even cooking with grill marks. Just adjust the time and temperature accordingly.
What Temperature Is Best For Making Paninis?
Preheat your panini press to medium-high heat, around 375°F (190°C). This temperature crisps bread perfectly without burning. Adjust heat based on bread thickness and filling moisture.
How Long Does It Take To Cook A Panini?
Typically, it takes 3 to 5 minutes for a panini to cook. Cooking time depends on bread type and fillings. Press until bread is golden and cheese melts.
Conclusion
Using a panini press makes cooking quick and simple. You can create tasty sandwiches with little effort. Just prepare your ingredients, set the press, and wait a few minutes. The result is a warm, crispy meal everyone will enjoy. Keep practicing to find your favorite fillings.
This tool saves time and adds fun to cooking. Try it today and enjoy delicious paninis at home.