Last Updated on May 12, 2026
Is your fridge looking a little messy or smelling off? Cleaning your fridge shelves might seem like a hassle, but it’s easier than you think—and the benefits are worth it.
Imagine opening your fridge to find fresh, spotless shelves that keep your food safe and tasty. In this guide, you’ll discover simple steps to clean your fridge shelves quickly and effectively. By the end, you’ll feel confident and ready to keep your fridge fresh all year round.
Ready to get started? Let’s dive in!
Gather Cleaning Supplies
Gathering the right cleaning supplies is the first step to clean fridge shelves well. Having everything ready saves time and makes the job easier. Knowing what tools and cleaning agents to use helps protect your fridge and keeps it fresh.
Essential Tools
Start with soft cloths or sponges to avoid scratches. Use a small brush or old toothbrush for tight corners. A plastic scraper can help remove stuck food without damage. Have a bucket or bowl ready for warm water. Gloves protect your hands from cold water and cleaning agents.
Safe Cleaning Agents
Choose mild soap or dish detergent to clean surfaces gently. White vinegar works well to remove odors and kill germs. Baking soda helps scrub stains without harsh chemicals. Avoid bleach or strong chemicals that can harm fridge parts. Use water mixed with safe cleaners for the best results.

Credit: www.reddit.com
Prepare The Fridge
Preparing your fridge properly is the first step to clean its shelves well. This step helps avoid mess and keeps your food safe. It also makes the cleaning process faster and easier.
Follow these simple steps to get your fridge ready for a thorough cleaning.
Empty The Shelves
Take out all the items on the shelves. Check expiration dates and throw away old food. Use a cooler to keep perishable items cold during cleaning. Removing everything stops spills and stains from spreading. It also gives you space to clean every corner.
Unplug The Fridge
Unplug your fridge before cleaning. This step saves energy and ensures safety. It prevents electric shocks when you use water or cleaning products. Leave the door open to let the fridge air out. This helps remove odors and thaw ice if needed.
Remove Shelves And Drawers
Removing shelves and drawers is the first step to clean your fridge properly. It makes cleaning easier and more effective. Take out all removable parts carefully to avoid damage. Clear shelves let you reach every corner of the fridge.
Handle With Care
Fridge shelves and drawers can be fragile. Use both hands to lift and carry them. Avoid dropping or banging them against hard surfaces. Some glass shelves may crack if handled roughly. Plastic drawers can break if pulled too hard. Place removed parts on a soft towel or surface to prevent scratches.
Check For Dishwasher Safety
Not all shelves and drawers are dishwasher safe. Look for labels or check the fridge manual. Some parts may warp or crack in the dishwasher heat. Wash non-dishwasher-safe parts by hand with warm soapy water. Use a soft sponge to avoid scratches. Dry all parts completely before putting them back into the fridge.
Credit: www.thurstontalk.com
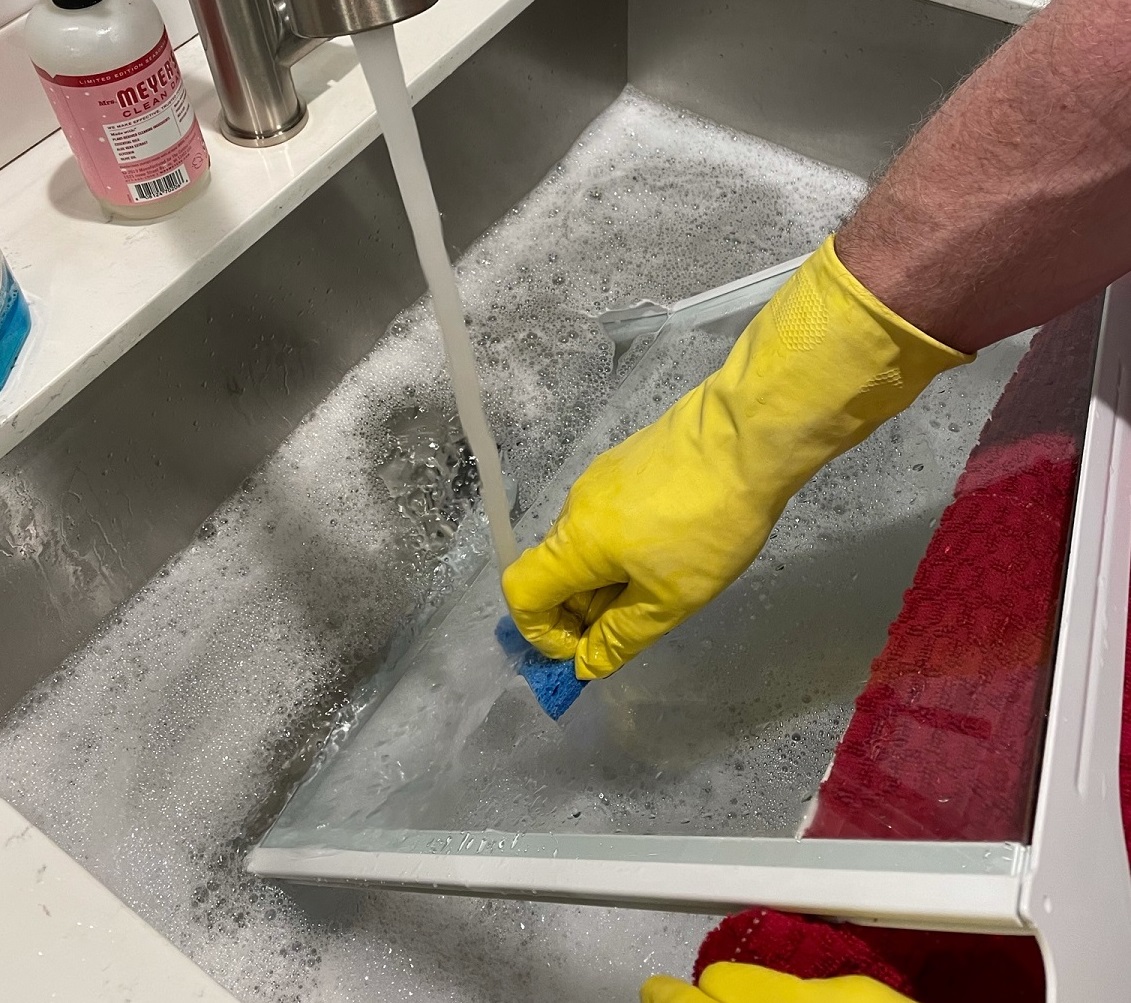
Clean Shelves Thoroughly
Cleaning fridge shelves thoroughly helps keep your fridge fresh and safe. Dirt, spills, and food particles can hide in corners and cracks. Taking time to clean well stops germs and bad smells from growing. Use simple tools and cleaning agents for a deep clean.
Remove shelves carefully before cleaning. This allows you to reach every spot. Clean in a sink or large basin for best results. Use warm water to loosen dirt and grease.
Soak And Scrub
Fill the sink with warm water and mild dish soap. Soak the shelves for 10-15 minutes to soften grime. Use a soft sponge or cloth to scrub gently. Focus on edges and corners where dirt hides.
Rinse with clean water to remove soap. Dry shelves with a clean towel or air dry. Make sure shelves are completely dry before placing them back in the fridge.
Tackle Stubborn Stains
Use baking soda paste for tough stains. Mix baking soda with a little water until thick. Apply the paste on stains and let it sit for 10 minutes. Scrub gently with a soft brush or sponge.
For sticky spills, try white vinegar on a cloth. It helps break down residue without harsh chemicals. Rinse and dry shelves thoroughly after cleaning. Stubborn stains will fade with regular care.
Dry And Reassemble
Drying and reassembling your fridge shelves is a key step after cleaning. Proper drying stops mold and bad smells. It also keeps the shelves safe to use again. Take care to dry each part fully. Then put the shelves back correctly. This helps your fridge work well and stay clean longer.
Air Dry Completely
Place the shelves on a clean towel or rack. Let air dry naturally. Avoid using a cloth that can leave lint. Do not use a hair dryer or heat source. Heat can warp plastic shelves. Wait until the shelves feel cool and dry. Check for any wet spots before moving on.
Reinstall Shelves Properly
Slide each shelf back into its slot carefully. Make sure the shelf fits firmly and straight. Do not force shelves into place. Confirm the shelves are stable and level. This prevents spills and breaks. Close the fridge door gently to avoid shifting shelves.
Clean Fridge Interior
Cleaning the fridge interior keeps your food fresh and your kitchen healthy. Dirt and spills can build up on walls and seals. Regular cleaning stops bacteria and mold from growing inside the fridge. This section shows easy steps to clean your fridge’s inside.
Wipe Walls And Seals
Start by removing all food items from the fridge. Use a soft cloth dipped in warm soapy water. Gently wipe the walls and shelves to remove stains and spills. Pay close attention to corners and edges where dirt hides.
Check the door seals carefully. These rubber seals trap cold air but can collect dust and crumbs. Wipe them with a clean cloth and mild detergent. Dry the seals well to keep them flexible and leak-free.
Eliminate Odors
Odors can spread quickly inside a fridge. To remove bad smells, place an open box of baking soda inside. Baking soda absorbs odors naturally without harsh chemicals.
For stronger smells, wipe the interior with a mix of water and white vinegar. Vinegar kills bacteria that cause odors. Let the fridge air out with the door open for a short time.
Maintain A Sparkling Fridge
A clean fridge is a happy fridge. Keeping your fridge shelves sparkling helps stop smells and spills. It also makes your food last longer. A clean fridge looks good and feels fresh. Simple steps can make a big difference every day.
Regular Cleaning Schedule
Set a day each week to clean fridge shelves. Take out all items and throw away old food. Use warm water and mild soap to wash shelves. Dry them well before putting back. A regular cleaning stops germs and sticky spills.
Organize For Easy Access
Keep items in clear containers or bins. Group similar foods together for quick finding. Place frequently used items at eye level. Label containers to avoid confusion. A well-organized fridge saves time and reduces mess.

Credit: www.youtube.com
Frequently Asked Questions
How Often Should I Clean Fridge Shelves?
Clean fridge shelves every 1 to 2 months to prevent bacteria buildup. Wipe spills immediately to maintain hygiene. Regular cleaning keeps food fresh and odor-free.
What Is The Best Cleaner For Fridge Shelves?
Use a mixture of warm water and mild dish soap. Avoid harsh chemicals that can damage surfaces. Vinegar solution is also effective and safe for cleaning.
Can I Remove Fridge Shelves For Cleaning?
Yes, most fridge shelves are removable for easy cleaning. Take care when lifting to avoid breakage. Clean shelves separately using warm soapy water and dry thoroughly.
How Do I Remove Tough Stains On Fridge Shelves?
Soak shelves in warm soapy water for 15 minutes. Use a soft sponge or cloth to scrub gently. Baking soda paste also works well on stubborn stains.
Conclusion
Cleaning fridge shelves keeps your food fresh and safe. Regular cleaning stops bad smells and germs. Use warm water and mild soap for best results. Take out shelves carefully and dry them well. Clean spills right away to avoid stains.
A clean fridge looks neat and helps you find food fast. Make this task part of your routine. A little effort saves you time and money later. Simple steps lead to a fresh, healthy kitchen space.