Last Updated on June 7, 2026
A crepe frying pan is a specialized pan designed for making thin, delicate crepes. It has a flat, non-stick surface and low sides.
Crepe frying pans are essential for achieving the perfect crepe texture. They ensure even cooking and easy flipping. These pans come in various materials, including stainless steel, cast iron, and non-stick coatings. The low sides of the pan make it easy to spread the batter thinly and evenly.
They are also versatile and can be used for cooking other dishes like pancakes, tortillas, and omelets. Investing in a high-quality crepe frying pan can significantly enhance your crepe-making experience, ensuring consistently delicious results. Choose a pan that suits your cooking style and preferences for the best outcome.
The Art Of Crepe Making
Creating the perfect crepe is a delightful experience. It combines technique, the right tools, and quality ingredients. A crepe frying pan is essential for making thin, even crepes. This guide will help you master the art of crepe making. Let’s dive into the details!
Choosing The Right Batter
The batter is the foundation of your crepes. It should be smooth and lump-free.
- Basic Ingredients: Flour, eggs, milk, water, salt, and butter.
- Flour: Use all-purpose flour for a light texture.
- Eggs: They bind the ingredients together.
- Milk and Water: Provide the right consistency.
- Salt: Enhances flavor.
- Butter: Adds richness.
Mix all ingredients until smooth. Let the batter rest for 30 minutes. This allows the flour to absorb the liquid fully.
The Perfect Crepe Consistency
Consistency is key in making perfect crepes. The batter should be thin but not watery.
| Consistency | Description |
|---|---|
| Too Thick | Crepes will be heavy and chewy. |
| Too Thin | Crepes will be flimsy and tear easily. |
| Just Right | Thin enough to spread easily, yet holds shape. |
To test, dip a spoon into the batter. It should coat the spoon thinly. Adjust with milk or water if necessary.
Using the right crepe frying pan ensures even cooking. Heat the pan over medium-high heat. Pour a small amount of batter and swirl to coat the pan. Cook until edges lift, then flip. Enjoy the process of making delicious crepes!
Selecting The Ideal Crepe Frying Pan
Choosing the ideal crepe frying pan is essential for perfect crepes. The right pan will give you evenly cooked, delicious crepes every time. Here are some key factors to consider:
Material Matters: Non-stick Vs. Cast Iron
Material is crucial for crepe frying pans. Non-stick and cast iron are popular choices.
- Non-Stick Pans: These are easy to clean and require less oil. They are lightweight and great for quick cooking. Non-stick surfaces prevent crepes from sticking.
- Cast Iron Pans: These are durable and distribute heat evenly. Cast iron pans retain heat well, ensuring consistent cooking. They may require seasoning but last a lifetime.
Size And Shape Considerations
Size and shape influence crepe quality. Choose a pan that fits your needs.
| Size | Best For |
|---|---|
| Small (8 inches) | Single servings and small portions |
| Medium (10 inches) | Standard size crepes for most recipes |
| Large (12 inches) | Family-sized crepes and more significant portions |
The shape also matters. Flat pans with low edges are best. They allow easy flipping and spreading of the batter. Round pans ensure even cooking and perfect crepe shapes.
Key Features Of A Quality Crepe Pan
Crepe pans make delicious and thin crepes. Choosing the right crepe pan matters. Here are key features to look for.
Surface Coating And Heat Distribution
A quality crepe pan has a non-stick surface. This ensures crepes don’t stick. It also makes cleaning easier. Non-stick coatings can be ceramic or Teflon.
Another key feature is heat distribution. A good pan heats evenly. This helps cook crepes perfectly. Uneven heat can burn crepes. Look for a pan with a heavy base. This helps distribute heat well.
Handle Design For Safety And Comfort
The handle design is very important. It should be ergonomic. This means it feels good in your hand.
A good handle is also heat-resistant. You won’t burn your hand while cooking. Handles can be made of wood, silicone, or metal. Each material has its pros and cons.
Lastly, the handle should be securely attached. A wobbly handle can be dangerous. Ensure it is riveted or screwed tightly.
| Feature | Details |
|---|---|
| Surface Coating | Non-stick, easy to clean |
| Heat Distribution | Even, heavy base |
| Handle Design | Ergonomic, heat-resistant, secure |
Credit: juliasalbum.com
Prepping Your Pan For The First Use
Before making your first crepe, it’s crucial to prep your pan properly. This ensures the pan lasts long and performs well. Below, we cover the essential steps.
Seasoning Your Pan
Seasoning your pan protects its surface and enhances its non-stick quality. To begin, gather the following items:
- Cooking oil (vegetable or canola)
- Paper towels
- Stovetop
Follow these steps:
- Wash the pan with warm, soapy water.
- Dry it thoroughly with a clean towel.
- Apply a thin layer of oil to the pan’s surface.
- Heat the pan on medium heat for 10 minutes.
- Let it cool, then wipe off excess oil.
Initial Cleaning Tips
Before your first use, clean the pan to remove any factory residues. Here’s how:
- Use mild dish soap and warm water.
- Scrub gently with a soft sponge.
- Rinse thoroughly to remove all soap.
- Dry immediately to prevent rust.
Avoid using harsh chemicals or abrasive sponges. These can damage the pan’s surface.
| Step | Action |
|---|---|
| 1 | Wash with mild soap. |
| 2 | Rinse thoroughly. |
| 3 | Dry immediately. |
Following these steps will ensure your crepe frying pan is ready for use. Enjoy making delicious crepes with ease!
Temperature Mastery For Perfect Crepes
Creating the perfect crepe demands precise temperature control. The right temperature ensures even cooking and a delicious texture. Let’s dive into the nuances of mastering temperature for your crepe frying pan.
Finding The Sweet Spot
The ideal temperature for cooking crepes is around 375°F (190°C). This setting allows the batter to cook evenly without burning. Preheat your pan for about 5 minutes before adding the batter.
To test the heat, sprinkle a few drops of water on the pan. If they sizzle and evaporate, the pan is ready. Use a reliable thermometer to maintain the temperature.
| Temperature | Result |
|---|---|
| Below 350°F (175°C) | Batter sticks, uneven cooking |
| 375°F (190°C) | Perfect crepes, golden and crispy edges |
| Above 400°F (200°C) | Burnt edges, undercooked center |
Adjusting Heat During Cooking
Maintain a consistent temperature throughout the cooking process. If the pan gets too hot, reduce the heat slightly. If the crepes take too long to cook, increase the heat a bit.
- Start at medium-high heat.
- Adjust the heat based on cooking time and crepe color.
- Use a non-stick pan to prevent sticking.
Tip: Keep the pan well-oiled to ensure easy flipping and even cooking.

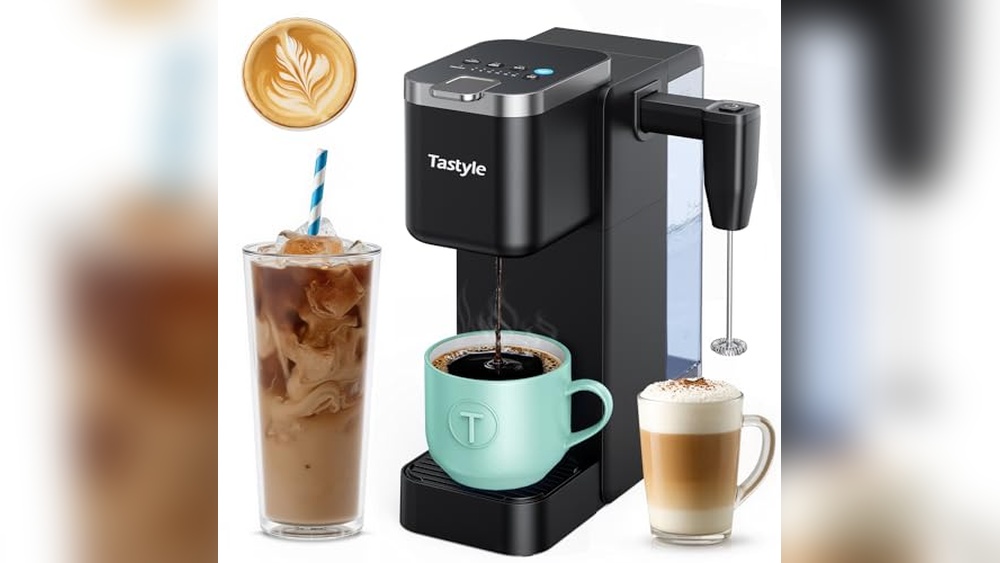
Credit: www.amazon.com
The Sizzle And Flip Technique
Mastering the crepe frying pan requires knowing the Sizzle and Flip Technique. This method ensures your crepes are thin, crispy, and golden. Follow these steps to achieve crepe perfection.
Pouring And Spreading The Batter
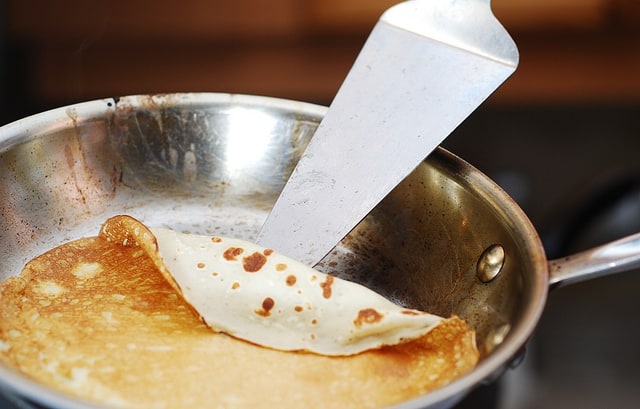
First, heat your crepe frying pan on medium heat. Pour a small amount of batter into the center. Quickly lift the pan and tilt it in a circular motion. This spreads the batter evenly across the surface. Use a spatula or a crepe spreader if needed. The batter should form a thin, even layer.
Timing The Flip
Watch for the edges of the crepe to turn golden. This usually takes about 1-2 minutes. Gently lift the edge with a spatula. If it easily lifts, it’s time to flip. Use a swift, confident motion to flip the crepe. Cook the other side for another 30 seconds to 1 minute. Both sides should be golden brown.
Maintenance And Care For Longevity
Proper care of your crepe frying pan ensures it lasts for many years. Follow these simple steps to keep your pan in top condition. Maintenance is easy with regular cleaning and proper storage.
Cleaning Post-use
After using your crepe frying pan, let it cool down first. Once cool, rinse it with warm water. Use a soft sponge and mild detergent to clean it. Avoid abrasive scrubbers to prevent damage.
For stubborn food residue, fill the pan with water and let it soak. After soaking, gently scrub the residue off. Dry the pan thoroughly with a soft cloth. Never leave it wet to avoid rust.
For non-stick pans, avoid using metal utensils. They can scratch and damage the coating. Wooden or silicone utensils are best for non-stick surfaces.
Storing Your Pan Properly
Store your crepe frying pan in a dry place. Ensure it’s completely dry before storing. Moisture can cause rust and affect the pan’s quality.
Use a protective pad or cloth between stacked pans. This prevents scratches and preserves the non-stick coating. Hanging the pan is another good storage option. It saves space and keeps the pan in good condition.
Regularly inspect your pan for any signs of wear. Replace it if the coating is damaged or if it shows rust. Proper storage and maintenance ensure your pan lasts longer.
:max_bytes(150000):strip_icc()/LeCreuset-crepe-pan-HERO-SQ-261a695936c044f5b05f0a2da2c4e4ec.jpg)
Credit: www.thespruceeats.com
Advanced Crepe Making Tips
Are you ready to take your crepe-making skills to the next level? This guide offers advanced crepe making tips that will make your crepes the talk of the town. Mastering these techniques ensures perfect crepes every time, whether you’re cooking for breakfast, lunch, or dessert.
Filling And Folding Tricks
Filling and folding crepes properly can make a big difference. Here are some tips:
- Evenly Spread the Filling: Use a spatula to spread fillings evenly.
- Avoid Overstuffing: Too much filling can break the crepe.
- Different Folds for Different Fillings:
- Simple Fold: Fold in half, then in quarters for thin fillings.
- Envelope Fold: Fold the sides and bottom, then roll for thicker fillings.
Creative Recipes To Try
Want to mix things up? Try these creative crepe recipes:
- Nutella Banana Crepes: Spread Nutella and add banana slices. Fold and top with whipped cream.
- Spinach and Feta Crepes: Fill with sautéed spinach and crumbled feta. Fold and serve warm.
- Strawberry Cheesecake Crepes: Spread cream cheese and add strawberry slices. Fold and drizzle with honey.
| Recipe | Ingredients | Instructions |
|---|---|---|
| Nutella Banana Crepes | Nutella, Banana, Whipped Cream | Spread Nutella, add banana, fold, and top with whipped cream. |
| Spinach and Feta Crepes | Spinach, Feta Cheese | Sauté spinach, crumble feta, fill crepe, and fold. |
| Strawberry Cheesecake Crepes | Cream Cheese, Strawberries, Honey | Spread cream cheese, add strawberries, fold, and drizzle with honey. |
Frequently Asked Questions
What Is The Best Type Of Pan To Fry Crepes In?
The best pan for frying crepes is a non-stick skillet. It ensures even cooking and easy flipping. Opt for a pan with a flat, shallow surface for best results.
What Is The Difference Between A Crepe Pan And A Regular Pan?
A crepe pan has low sides and a non-stick surface for easy flipping. Regular pans have higher sides and varied surfaces.
What Is The Purpose Of A Crepe Pan?
A crepe pan’s purpose is to cook thin, even crepes. Its flat, non-stick surface ensures easy flipping and perfect results.
Do You Have To Grease A Crepe Pan?
Yes, you should grease a crepe pan lightly. Use butter or oil for best results. This prevents sticking and ensures even cooking.
Conclusion
Choosing the right crepe frying pan can elevate your cooking experience. A quality pan ensures perfect crepes every time. Consider factors like material and size. Invest in a good pan for delightful, evenly cooked crepes. Your kitchen will benefit from this versatile, essential tool.
Enjoy delicious crepes with ease and confidence.