Last Updated on May 21, 2026
Bread baking is a craft loved by many. It offers warmth and satisfaction.
The allure of homemade bread lies not just in the taste, but also in the process. Kneading dough and watching it rise can be a calming experience. Fresh bread fills the home with a comforting aroma. It’s a skill that can be perfected with practice.
Whether you are a novice or have some experience, baking bread can be rewarding. You can explore different types, like sourdough or whole wheat, and experiment with flavors. The ingredients are simple, but the results can be extraordinary. This journey into bread baking promises joy and delicious rewards. Ready to start your bread baking adventure? Let’s dive in together!
Credit: www.tasteofhome.com
Choosing The Right Ingredients
Selecting high-quality flour and fresh yeast makes a big difference in bread baking. Adding the right amount of salt enhances flavor. Ensure that water is at the right temperature for better dough consistency.
Choosing the right ingredients is crucial for successful bread baking. Each component adds its own unique flavor and texture. Selecting quality ingredients can transform a simple loaf into a gourmet masterpiece. Do you know what makes your bread rise or gives it that perfect crust? Understanding your ingredients can make all the difference.Flour Varieties And Their Effects
Flour is the foundation of your bread. The type you choose affects the texture, taste, and appearance of your loaf. Bread flour, with its high protein content, creates a chewy texture perfect for rustic breads. All-purpose flour offers versatility and works well for softer loaves. Have you ever tried whole wheat flour? It adds a nutty flavor and dense texture, rich in nutrients. Experimenting with different flour types can lead to delightful surprises. You might find a new favorite!The Role Of Yeast And Other Leaveners
Yeast is the magic behind rising dough. It ferments the sugars in flour, creating gas bubbles that make your bread airy. Instant yeast is convenient and reliable, while active dry yeast needs proofing but offers a robust rise. Ever thought about using sourdough starter? It not only leavens your bread but also adds a tangy flavor. Baking powder and baking soda can also act as leaveners in quick breads. Each choice impacts your bread’s rise and taste. Choosing the right leavener can elevate your baking. Which type will you try next to achieve that perfect rise?Tools For Bread Baking
Baking bread requires the right tools for success. A quality bread knife slices easily, while a sturdy mixing bowl is essential for combining ingredients. Measuring cups ensure accuracy, and a reliable oven thermometer helps maintain precise baking temperatures.
Bread baking is a delightful journey that starts with the right tools. Whether you’re a novice or an experienced baker, the equipment you use can greatly impact your baking success. From basic essentials to advanced gadgets, the right tools can simplify the process and ensure your bread turns out delicious every time.Essential Baking Equipment
Every baker needs a few key tools to get started. A sturdy mixing bowl is a must; it gives you space to combine ingredients smoothly. Look for one that’s easy to clean and durable. A reliable measuring set is crucial too. Accurate measurements can make or break your bread’s texture and flavor. Invest in a set that includes both cups and spoons for versatility. Don’t forget a quality bread pan. Opt for one with a non-stick surface to ensure easy removal and perfect crusts. Silicone options can be a game-changer for hassle-free baking.Advanced Tools For Artisan Bakers
Once you master the basics, you might be curious about tools that elevate your baking. A dough scraper can be invaluable for kneading and portioning dough with precision. It also helps clean your work surface effortlessly. Consider a baking stone for authentic artisan bread. It mimics a brick oven, providing even heat distribution for a crispy crust. You may find your loaves have that professional touch when using one. A digital thermometer is another advanced tool worth having. It ensures your bread reaches the perfect temperature, giving you confidence in its readiness.Have you ever wondered how professional bakers achieve such impeccable results? Advanced tools might hold the secret. They offer precision and efficiency that can transform your home baking experience.
Whether you’re just starting out or looking to enhance your skills, the right tools can make all the difference. What’s the next tool on your baking wishlist?
The Science Of Dough
Bread baking is as much an art as it is a science. The magic happens when flour, water, yeast, and salt come together to create dough. Understanding the science behind dough can transform your bread from a basic loaf to a culinary masterpiece. Let’s dive into the fascinating world of dough and explore how gluten development, hydration levels, and more play crucial roles in the process.
Understanding Gluten Development
Gluten is the protein that gives bread its structure. It’s the backbone of your dough, providing elasticity and strength. When you knead your dough, you’re helping gluten proteins align and form a network.
Think of kneading as waking up your dough. The more you knead, the stronger the gluten network becomes, helping your bread rise beautifully. But how do you know when you’ve kneaded enough? Look for smooth, elastic dough that springs back when poked.
Ever wondered why some breads are chewier than others? It’s all about gluten development. More kneading equals chewier bread. Experiment with kneading times and see how your bread texture changes.
Hydration Levels And Their Impact
Hydration refers to the amount of water in your dough. It’s a game changer for your bread’s texture and appearance. Higher hydration levels mean softer, airier bread with larger holes, like ciabatta.
Adjusting hydration levels can be tricky. Too much water and your dough becomes sticky and hard to handle. Too little, and your bread turns dense and heavy. Finding the right balance is key.
Why not try a hydration experiment? Make two batches of dough with different hydration levels and compare the results. Notice the difference in texture and crumb structure. Which do you prefer?
In the world of bread baking, every detail matters. Whether you’re adjusting hydration or perfecting gluten development, remember that small changes can lead to big results. Now, what will you tweak in your next baking session?
Kneading Techniques
Kneading techniques are essential in bread baking, shaping dough and developing gluten for texture. Each method, whether fold or stretch, contributes to the final bread’s structure and flavor. Proper kneading transforms flour and water into a cohesive, elastic dough, ready for rising and baking.
Kneading Techniques: The Heart of Bread Baking Kneading is the soul of bread baking. This essential step transforms simple ingredients into a cohesive dough with a smooth texture. It helps develop gluten, giving your bread its structure and chewiness. Whether you’re a seasoned baker or a curious beginner, understanding different kneading techniques can elevate your baking game. Let’s dive into the world of kneading and see what suits you best.Traditional Kneading Methods
The traditional kneading method is time-tested and effective. It typically involves pushing the dough away from you with the heel of your hand, folding it over, and turning it. Repeat this process until the dough becomes elastic and smooth. This method can be therapeutic and rewarding. You can feel the dough change under your hands, a sensory experience that connects you to bakers of the past. It’s also a great workout for your arms, making it a win-win situation. But it requires time and patience. Are you willing to spend 10-15 minutes kneading by hand? If you enjoy the process, this method is perfect. But if you’re short on time or energy, you might want to consider modern alternatives.Modern Alternatives To Kneading
Not a fan of the manual labor involved in traditional kneading? You’re in luck. Modern alternatives offer quicker and sometimes more efficient ways to knead dough. One popular option is using a stand mixer with a dough hook. This method saves time and is perfect for bakers with limited mobility. Set it on a low speed, and let it do the hard work for you. Another innovative technique is the no-knead method. It relies on time rather than effort. Mix your ingredients and let the dough sit for 12-18 hours. The gluten develops on its own, resulting in a chewy, flavorful loaf. These modern techniques cater to different lifestyles and schedules. They make bread baking accessible to all, even if you’re juggling a busy day. Which method will you try next?Proofing And Fermentation
Bread baking is a delightful journey. Proofing and fermentation are crucial steps. They transform dough into airy, flavorful bread. These processes involve yeast activity. Yeast consumes sugars, producing carbon dioxide and alcohol. This helps dough rise and develop complex flavors. Let’s explore ideal conditions for proofing and slow fermentation for flavor enhancement.
Ideal Conditions For Proofing
Proofing requires a warm, humid environment. Yeast thrives in these conditions. The ideal temperature is around 75°F to 80°F. Maintain humidity at 75% for optimal results. Cover dough with a damp cloth or plastic wrap. This keeps moisture in and prevents drying. A slightly warmer spot in your kitchen works well. Avoid direct sunlight and drafts.
Slow Fermentation For Flavor Enhancement
Slow fermentation enhances bread flavor. It allows yeast to produce more complex compounds. Longer fermentation breaks down starches more thoroughly. This results in a richer taste and better texture. Use a cool environment for slow fermentation. Refrigeration is effective for slowing yeast activity. This extends the fermentation period. Allowing dough to rest overnight is ideal. Patience is key for achieving depth in flavor.
:max_bytes(150000):strip_icc()/__opt__aboutcom__coeus__resources__content_migration__serious_eats__seriouseats.com__recipes__images__2014__08__20140810-workhorse-bread-vicky-wasik-3-3a86ee51da2e4a7b8239ceb62d8d8d17.jpg)
Credit: www.seriouseats.com
Shaping And Scoring
Shaping and scoring bread are crucial steps in baking. Shaping forms the dough into its final shape before baking. Scoring creates cuts on the surface, allowing the bread to expand and develop a beautiful crust. These techniques enhance both appearance and texture.
Shaping and scoring are crucial steps in bread baking that transform a simple dough into a masterpiece. These techniques not only enhance the appearance of your bread but also influence its texture and flavor. Getting it right can make a significant difference in your baking outcomes. ###Techniques For Shaping Loaves
Shaping your dough is where your bread begins to find its identity. A well-shaped loaf will have an even structure and rise beautifully in the oven. Start by gently deflating your dough to remove excess air. This helps in forming a consistent crumb. Once deflated, fold the dough into itself, creating tension on the surface. This tension is key for a good rise. If you’ve ever watched a baker at work, you might recall their hands moving in a rhythmic dance, folding and turning the dough with precision. Have you ever noticed how some loaves seem perfectly symmetrical while others are more rustic? It all comes down to how they’re shaped. Try experimenting with different shapes like boules, batards, or even baguettes. Each shape offers a different eating experience. ###The Art Of Scoring Patterns
Scoring is where creativity meets functionality in bread baking. It’s not just about aesthetics; it helps control how the bread expands as it bakes. Without scoring, your loaf might burst unpredictably. Use a sharp blade or a lame to score your dough. The depth and angle of your cuts can vary, but generally, a 1/4-inch deep incision works well. Consider the pattern you want to create. Classic single cuts, intricate leaf designs, or even a simple cross—each tells a different story. Did you know that some bakers use scoring to mark their signature on their bread? Scoring is your opportunity to put a personal touch on your loaf. It’s also a chance to engage with the bread baking community. Share your patterns online, and you might just inspire others to try something new. Have you tried shaping or scoring your bread recently? What challenges did you face, and what did you learn?Baking For Perfection
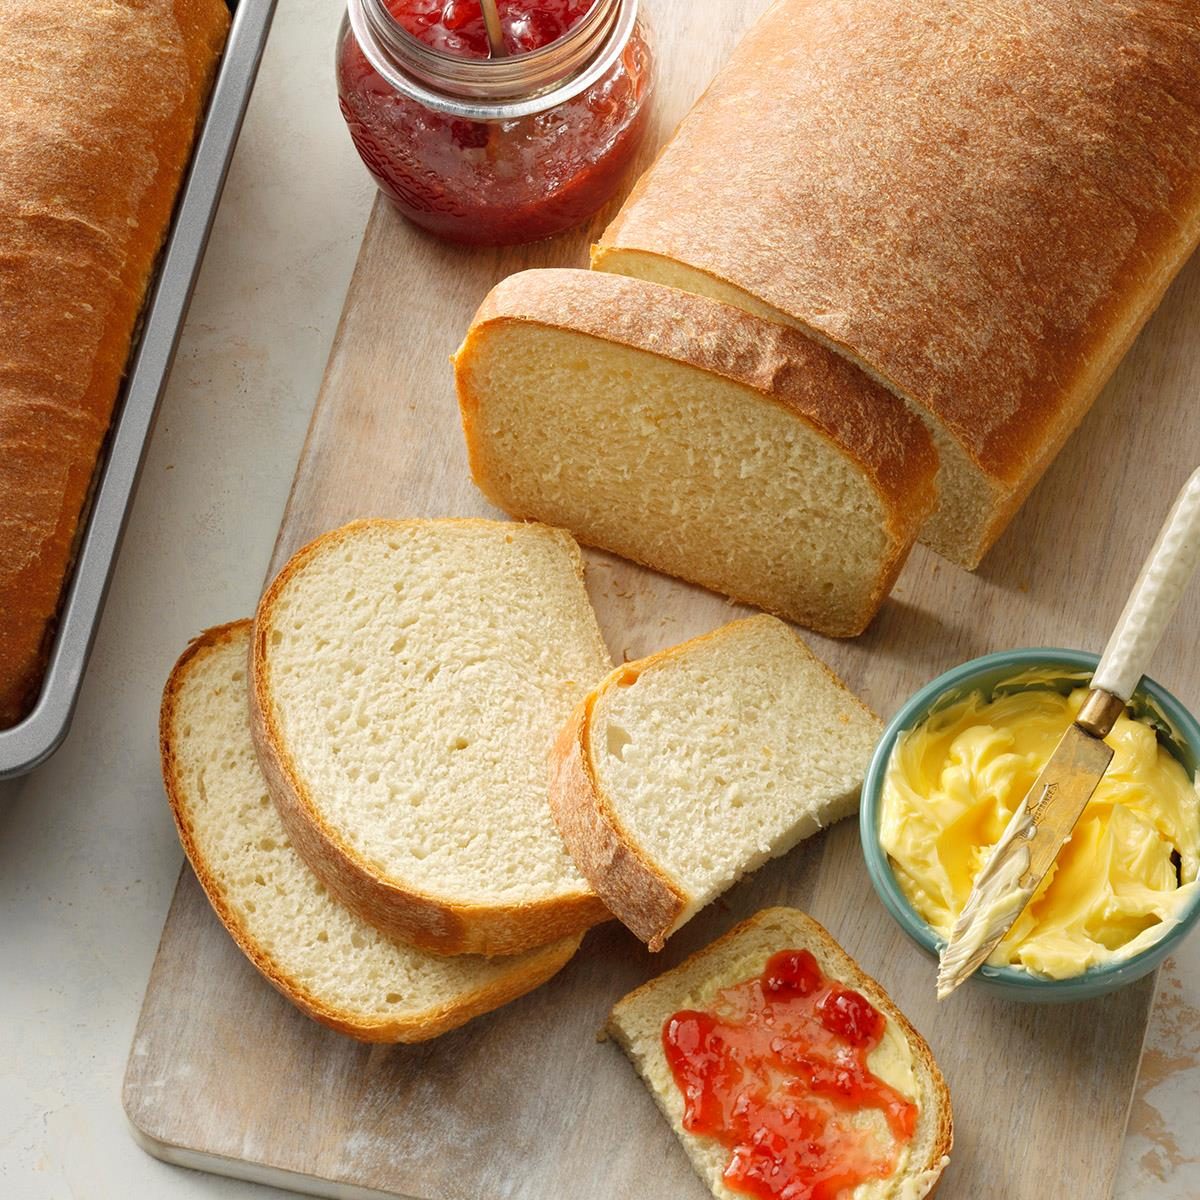
Crafting the perfect loaf requires patience and practice. Freshly baked bread delights with its aroma and taste. Simple ingredients like flour, water, and yeast come together to create magic in the kitchen.
Baking for perfection is an art that anyone can master with a little patience and practice. The journey to the perfect loaf is filled with small discoveries and adjustments. Each bake teaches you something new, helping you inch closer to that flawless crust and airy crumb. Whether you’re a beginner or a seasoned baker, understanding the nuances of the process is key. Let’s dive into some specifics that can elevate your bread baking to new heights.Understanding Oven Temperatures
The oven is your canvas. It’s vital to know that different bread types require specific temperature settings. A common mistake is using a one-size-fits-all approach, which can lead to uneven baking. For a crispy crust, a high temperature at the start helps. But remember, not all ovens are the same. Testing your oven’s heat with a thermometer can ensure accuracy. Have you noticed your loaves coming out dense? It might be the oven temperature. Sometimes, lowering the heat slightly allows the dough to rise properly before setting the crust.Steam And Its Role In Crust Formation
Steam is the secret ingredient for a perfect crust. When you add steam during the initial baking phase, it helps the dough expand fully before the crust sets. This results in a light, airy inside with a crispy outer layer. One simple trick is to place a pan of hot water at the bottom of your oven. This method is easy and effective. If you’ve ever wondered why bakery bread has a glossy crust, it’s the steam. The moisture interacts with the dough’s surface, creating a beautiful shine. Try experimenting with different amounts of steam to see how it affects your bread. You’ll be surprised at the difference it makes.Troubleshooting Common Issues
Bread baking can be an art and a science. Many home bakers face challenges. These common issues can affect the final product. Understanding them helps improve your skills. Let’s explore solutions to texture and flavor problems in bread baking.
Solving Texture Problems
Texture issues in bread are frustrating. Dense bread often results from too much flour. Use a kitchen scale for accuracy. Sticky dough is another common problem. It indicates high water content. Reduce water or add more flour gradually. Over-kneading can make bread tough. Knead until the dough is smooth and elastic. If the bread is crumbly, hydration might be low. Increase the water slightly for better cohesion.
Fixing Flavor Inconsistencies
Flavor inconsistencies can ruin the experience. Bland bread may need more salt or yeast. Salt enhances taste and controls yeast activity. Yeasty flavor is overpowering. It suggests over-fermentation. Reduce fermentation time or temperature. If the bread tastes sour, the dough might have fermented too long. Shorten the rising time or use less starter. Lack of aroma could mean fresh ingredients are missing. Ensure flour and other components are fresh for the best flavor.
:max_bytes(150000):strip_icc()/27023-best-basic-sweet-bread-mfs-4-3f0ff692a57145fa847dc8d2250f4d72.jpg)
Credit: www.allrecipes.com
Frequently Asked Questions
Should I Bake Bread At 350 Or 375?
Bake bread at 350°F for softer crust. Choose 375°F for a crispier crust. Adjust time based on bread type. Experiment to find your ideal texture. Always follow your recipe’s specific instructions for best results.
What Are The 7 Common Bread Making Mistakes And How Do You Prevent Them?
Common mistakes include using cold ingredients, incorrect kneading, insufficient proofing, over-proofing, baking at wrong temperature, not scoring, and cutting too early. Prevent them by using room temperature ingredients, kneading properly, proofing correctly, maintaining optimal baking temperature, scoring before baking, and allowing bread to cool fully before slicing.
What Are The Steps In Bread Baking?
Bread baking involves mixing ingredients, kneading the dough, allowing it to rise, shaping, and baking until golden brown.
Is It Cheaper To Bake Bread Or Buy It?
Baking bread at home is often cheaper. Ingredients like flour, water, and yeast cost less than store-bought bread. Homemade bread also offers freshness and customization. Initial costs for equipment may apply, but savings grow over time. Consider time investment and electricity costs when calculating total savings.
Conclusion
Bread baking is a rewarding experience. Each loaf brings joy and comfort. With practice, skills improve. Enjoyment increases. Fresh bread fills homes with warmth. Baking teaches patience and creativity. A simple mix of flour, water, and yeast creates magic. Homemade bread is nutritious and satisfying.
Share it with family and friends. Inspire others to bake. A tradition worth keeping alive. Experiment with flavors and techniques. Find what works best for you. Celebrate each successful bake. Bread baking connects us to history and culture. Dive into this timeless craft.
Enjoy every delicious slice.