Last Updated on May 23, 2026
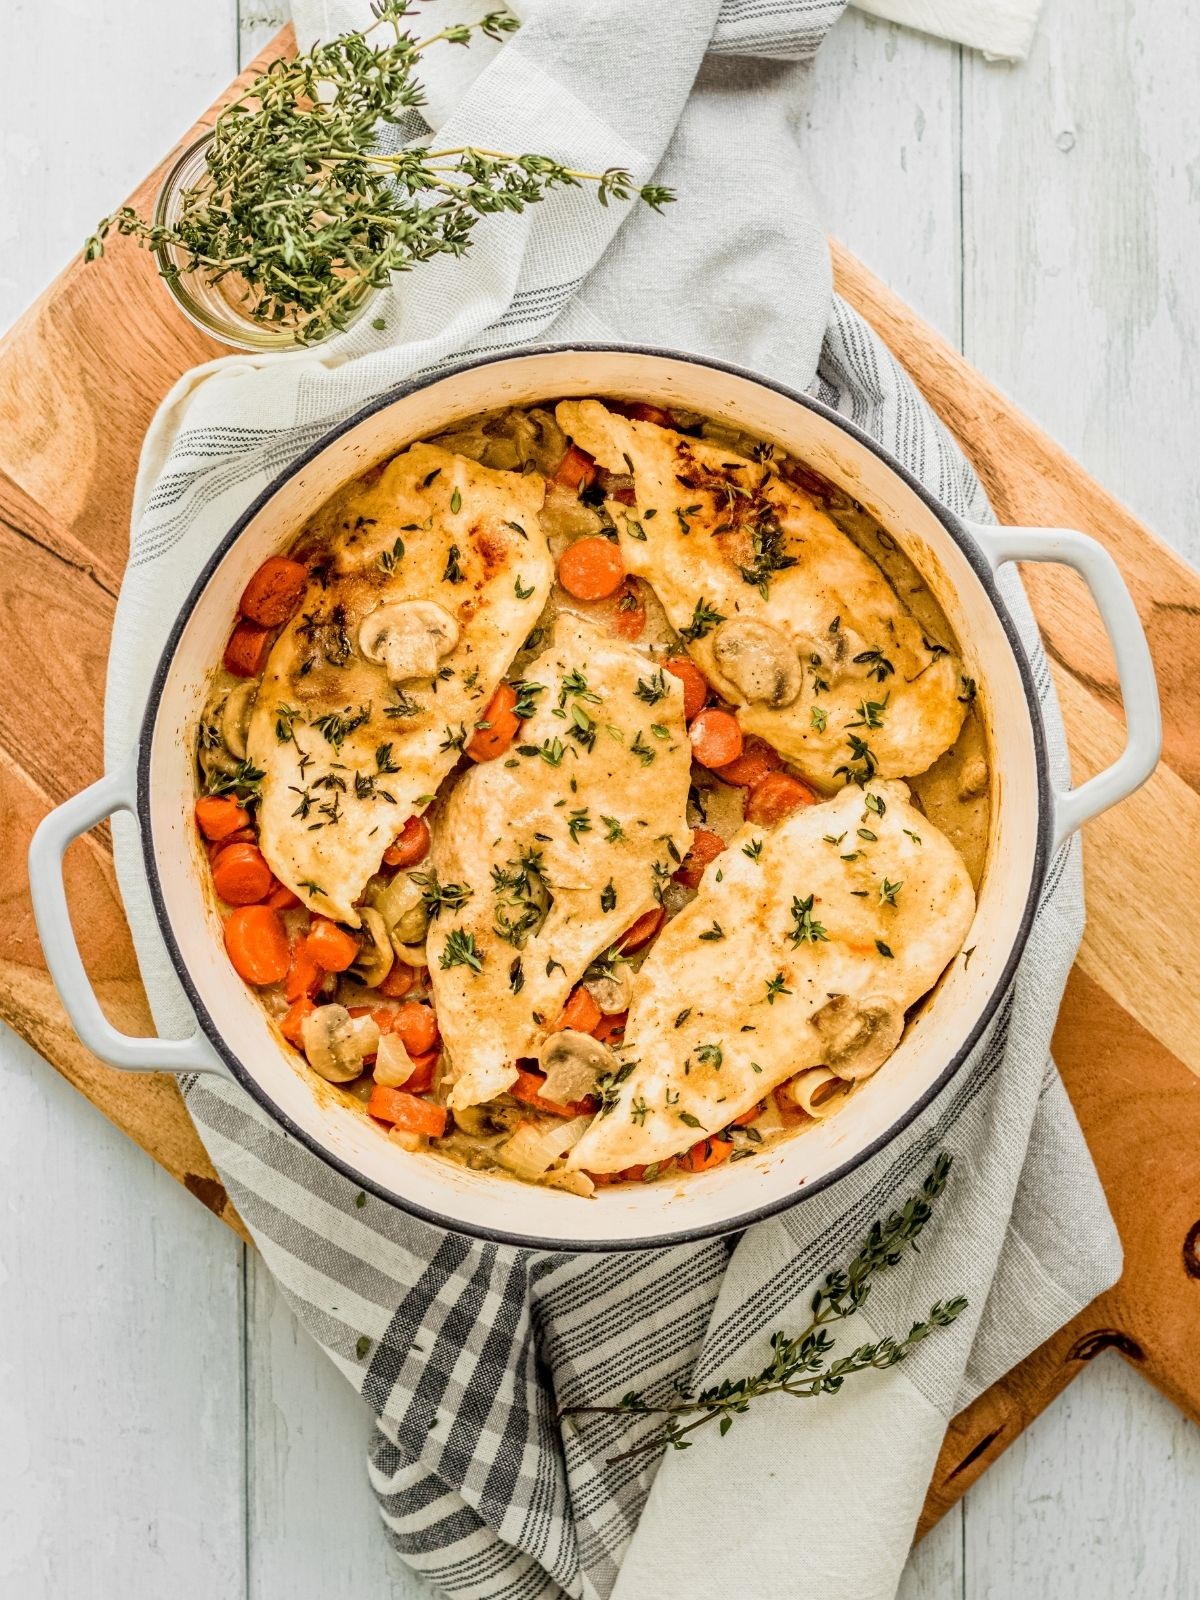
Dutch Oven Chicken Breast is a flavorful, moist, and easy-to-make dish perfect for weeknight dinners. It combines simple ingredients for a delicious meal.
Cooking chicken breast in a Dutch oven ensures it remains juicy and tender. The heavy lid traps moisture, enhancing flavors and creating a rich, savory dish. This method is perfect for those who prefer a hands-off approach, as it requires minimal attention once the ingredients are combined.
The Dutch oven also allows for even cooking, preventing dry or overcooked chicken. Pair it with vegetables, herbs, and spices for a complete, nutritious meal. This versatile dish can be customized to suit various tastes, making it a favorite among home cooks. Enjoy a satisfying, well-rounded dinner with minimal effort.

Credit: nibbleanddine.com
Ingredients
Cooking Dutch Oven Chicken Breast is a delightful experience. The right ingredients ensure a flavorful and juicy dish. This section covers both essential components and optional add-ins to make your meal perfect.
Essential Ingredients
These ingredients are crucial for preparing a mouth-watering Dutch Oven Chicken Breast:
- Chicken Breasts: Fresh, boneless, and skinless for the best results.
- Olive Oil: Adds richness and helps in browning the chicken.
- Garlic: Minced garlic cloves bring out a delicious aroma.
- Onion: Finely chopped onions enhance the dish’s flavor.
- Chicken Broth: Keeps the chicken moist and adds depth to the taste.
- Salt and Pepper: Basic seasoning to enhance all flavors.
Optional Add-ins
These add-ins can make your chicken more flavorful and interesting:
- Lemon: Sliced lemon adds a fresh, tangy flavor.
- Thyme: Fresh or dried thyme complements the chicken well.
- Carrots: Chopped carrots add sweetness and color.
- Potatoes: Baby potatoes make the meal heartier.
- Bell Peppers: Sliced bell peppers add a crunchy texture.
- Paprika: Adds a smoky, spicy kick to the dish.
With these ingredients, your Dutch Oven Chicken Breast will be both delicious and satisfying.
Preparation
Preparing your Dutch Oven Chicken Breast correctly ensures a delicious, juicy result. Follow these easy steps for a perfect meal.
Prepping The Chicken
First, gather all your ingredients. Clean the chicken breasts under cold water. Use a paper towel to pat them dry. This helps the seasoning stick better. Trim any excess fat or skin if necessary.
Use a sharp knife to cut small slits in the chicken. This allows the flavors to penetrate deeper. Make sure the slits are not too deep. You want the chicken to stay juicy.
Seasoning Tips
Seasoning is key for flavorful chicken. Start with a base of salt and pepper. Use a generous amount to cover both sides. You can add garlic powder, onion powder, and paprika for more flavor.
Consider using fresh herbs like rosemary or thyme. Chop them finely and sprinkle over the chicken. Olive oil helps the herbs stick and adds richness.
Marinate the chicken for at least 30 minutes. For best results, let it marinate overnight in the fridge. This makes the chicken more tender and flavorful.
Cooking Process
Cooking chicken breast in a Dutch oven is a delightful experience. The Dutch oven retains heat well, ensuring your chicken breast stays juicy and full of flavor. Follow this simple cooking process for the best results.
Preheating The Dutch Oven
Start by preheating your Dutch oven. Set your oven to 375°F. Place the Dutch oven inside and let it heat for 20 minutes. This ensures even cooking.
Cooking Techniques
Begin by seasoning your chicken breast. Use salt, pepper, and your favorite herbs. Coat the chicken breast with olive oil for added flavor.
Remove the preheated Dutch oven carefully. Add a small amount of oil to the bottom. Place the chicken breast inside the Dutch oven.
Cover the Dutch oven with its lid. Place it back in the oven. Cook the chicken breast for 25-30 minutes.
Use a meat thermometer to check the internal temperature. It should reach 165°F. This ensures the chicken is fully cooked.
Once done, remove the Dutch oven. Let the chicken breast rest for 5 minutes. This keeps the juices inside, making the chicken tender.
| Step | Action |
|---|---|
| 1 | Preheat Dutch oven at 375°F for 20 minutes |
| 2 | Season chicken breast with salt, pepper, and herbs |
| 3 | Coat chicken breast with olive oil |
| 4 | Add oil to preheated Dutch oven |
| 5 | Place chicken breast inside Dutch oven |
| 6 | Cover and cook for 25-30 minutes |
| 7 | Check internal temperature (165°F) |
| 8 | Let rest for 5 minutes |
Flavor Enhancements
Enhancing the flavor of Dutch Oven Chicken Breast can turn a simple meal into a gourmet experience. By using the right combinations of herbs, spices, marinades, and sauces, you can create a dish bursting with flavor. Below are some tips and tricks to elevate your chicken breast to the next level.
Herbs And Spices
Herbs and spices are essential for flavor enhancement. Here are some popular choices:
- Thyme: Adds a subtle earthy flavor.
- Rosemary: Pairs well with chicken, adding a pine-like aroma.
- Paprika: Gives a smoky and sweet taste.
- Garlic Powder: Enhances the savory elements.
- Oregano: Introduces a hint of Mediterranean flair.
Marinades And Sauces
Marinades and sauces can deeply infuse flavor into your chicken breast. Here are some ideas:
| Marinade/Sauce | Key Ingredients | Flavor Profile |
|---|---|---|
| Lemon Herb Marinade | Lemon juice, olive oil, garlic, thyme | Fresh and zesty |
| Honey Mustard Sauce | Honey, Dijon mustard, apple cider vinegar | Sweet and tangy |
| Teriyaki Marinade | Soy sauce, brown sugar, ginger, garlic | Sweet and savory |
For best results, let the chicken marinate for at least 30 minutes. This allows the flavors to penetrate deeply. You can also baste the chicken with the sauce during cooking for extra flavor.
Serving Suggestions
After preparing your delicious Dutch Oven Chicken Breast, serving it beautifully enhances the dining experience. This section explores various ways to serve this dish with style and flavor.
Side Dishes
Pairing the right side dishes with your Dutch Oven Chicken Breast can elevate the meal. Here are some great options:
- Roasted Vegetables: Carrots, potatoes, and bell peppers add color and taste.
- Garlic Mashed Potatoes: Creamy and flavorful, they complement the chicken well.
- Quinoa Salad: A light, healthy option with a touch of lemon.
- Steamed Asparagus: Simple yet elegant, perfect for a balanced meal.
Presentation Tips
Presenting your Dutch Oven Chicken Breast beautifully is key. Follow these tips:
- Use a Large Platter: Showcase the chicken and sides together.
- Garnish with Fresh Herbs: Add parsley or thyme for a fresh look.
- Slices and Layers: Slice the chicken breast and layer it neatly.
- Color Contrast: Place colorful vegetables around the chicken.
Here is a simple table to summarize the tips:
| Tip | Description |
|---|---|
| Use a Large Platter | Showcase the chicken and sides together. |
| Garnish with Fresh Herbs | Add parsley or thyme for a fresh look. |
| Slices and Layers | Slice the chicken breast and layer it neatly. |
| Color Contrast | Place colorful vegetables around the chicken. |
Follow these serving suggestions to impress your guests. Enjoy your Dutch Oven Chicken Breast with style and flavor!
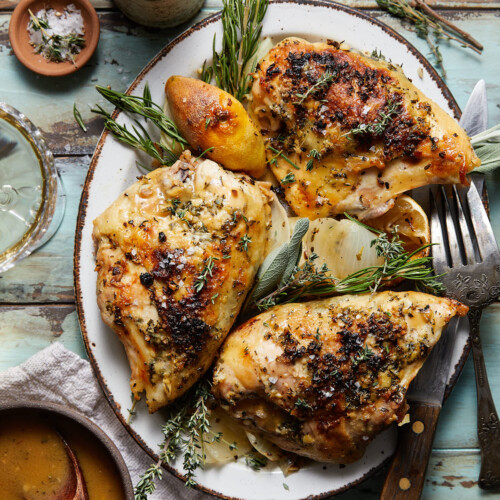
Credit: biteswithbri.com
Storage And Reheating
Proper storage and reheating are crucial for enjoying your Dutch Oven Chicken Breast leftovers. Follow these tips to keep your chicken fresh and tasty.
Storing Leftovers
Ensure your chicken breast cools down before storing. Place it in an airtight container. Store it in the refrigerator for up to four days.
- Use a glass or plastic container with a tight lid.
- Label the container with the date.
- Keep the container at the back of the fridge.
Reheating Methods
Reheating properly ensures your chicken stays moist and flavorful. Here are some methods:
Oven Reheating
- Preheat your oven to 350°F (175°C).
- Place the chicken in an oven-safe dish.
- Cover the dish with aluminum foil.
- Heat for 20 minutes or until warmed through.
Microwave Reheating
- Place the chicken on a microwave-safe plate.
- Cover it with a microwave-safe lid or damp paper towel.
- Heat on medium power for 2-3 minutes.
- Check and heat in 30-second intervals if needed.
Stovetop Reheating
- Use a non-stick skillet or pan.
- Add a tablespoon of water or broth.
- Place the chicken in the pan and cover it.
- Heat on low for about 5-7 minutes, turning occasionally.
Troubleshooting
Cooking chicken breast in a Dutch oven can sometimes pose challenges. Don’t worry! Here are solutions to common issues and some pro tips to ensure perfect results.
Common Issues
| Issue | Solution |
|---|---|
| Dry Chicken | Check the cooking time. Overcooking makes chicken dry. Ensure internal temperature reaches 165°F. |
| Undercooked Chicken | Use a meat thermometer. Ensure the center is cooked. Cook longer if needed. |
| Burnt Skin | Reduce the heat. Use medium heat to avoid burning. Check frequently. |
| Sticking to Pot | Use enough oil or butter. Preheat the Dutch oven properly. |
Pro Tips
- Marinate the chicken for added flavor and moisture.
- Preheat the Dutch oven to ensure even cooking.
- Use a meat thermometer to check doneness.
- Rest the chicken after cooking for juicy results.
- Add vegetables for a complete meal in one pot.
Following these tips can help you achieve delicious, perfectly cooked Dutch oven chicken breast every time.
Credit: theoregondietitian.com
Frequently Asked Questions
How To Cook Chicken Breast In A Dutch Oven?
Cooking chicken breast in a Dutch oven is simple. Sear the chicken first, then cook it covered with your favorite seasonings and vegetables.
Can I Use Boneless Chicken Breast?
Yes, you can use boneless chicken breast. It cooks faster and absorbs flavors well.
What Temperature For Dutch Oven Chicken Breast?
Cook your chicken breast in a preheated oven at 375°F (190°C) for best results.
Do I Need To Add Liquid?
Yes, adding a little broth or water prevents the chicken from drying out.
Conclusion
Cooking chicken breast in a Dutch oven ensures a juicy, flavorful meal. This method is simple and efficient. Your family will love the tender, delicious results. Try different seasonings to keep the dish exciting. Enjoy easy, healthy, and tasty meals with this versatile cooking technique.