Last Updated on December 26, 2025
Are you tired of dealing with messy trash cans cluttering your kitchen floor? Installing a garbage can under your sink can save space and keep your kitchen looking neat.
But how do you do it without spending a fortune or hiring a pro? You’ll learn simple, step-by-step tips to install a hidden garbage can that fits perfectly under your sink. By the end, you’ll have a cleaner, more organized kitchen—and it’s easier than you think.
Ready to transform your space? Let’s get started!
Credit: www.youtube.com
Choose The Right Garbage Can
Choosing the right garbage can for under your sink is important. It helps keep your kitchen neat and makes waste disposal easier. The right bin fits well and lasts long. It also matches your kitchen style. Let’s explore how to pick the best one.
Measure Your Cabinet Space
Start by measuring the space under your sink. Check width, depth, and height carefully. Allow room for pipes and cleaning supplies. A tight fit makes installation hard. Leave some space for easy access and removal.
Select Size And Style
Pick a size that matches your household’s waste output. Small bins suit one or two people. Bigger bins work for families. Choose a style that fits your kitchen look. Slide-out bins save space and are easy to use. Simple bins work if space is wide open.
Consider Material And Durability
Choose a material that lasts and is easy to clean. Plastic bins are light and budget-friendly. Metal bins are strong and resist stains. Check for rust-resistant coatings. A durable bin saves money over time. Make sure the lid seals well to control odors.
Gather Necessary Tools
Before installing a garbage can under your sink, gather all the necessary tools. This step saves time and avoids interruptions during installation. Having everything ready makes the process smooth and efficient.
List Of Tools Needed
- Measuring tape
- Electric drill with drill bits
- Screwdriver (Phillips and flathead)
- Stud finder
- Level
- Mounting brackets or rails (usually included with the garbage can)
- Pencil or marker
- Safety gloves
- Cleaning cloth
Safety Precautions
Wear safety gloves to protect your hands from sharp edges. Keep the workspace clean and dry. Use the drill carefully to avoid injuries. Check for electrical wires or plumbing before drilling. Take your time to avoid mistakes or accidents.
Prepare The Cabinet Area
Preparing the cabinet area is the first step to install a garbage can under your sink. A clean and clear space makes the installation easier and safer. Take time to get this area ready before starting the setup.
Proper preparation helps avoid damage and ensures the garbage can fits well. Follow these simple steps to prepare your cabinet space.
Clear Out Existing Items
Remove all items from under the sink. Empty cleaning supplies, tools, or bags. Clearing the space gives you room to work safely. It also helps you see the full area for installation.
Keep these items in a safe place. This prevents accidents and makes moving easier.
Clean The Surface
Wipe the cabinet floor and walls with a damp cloth. Remove dirt, dust, and spills. A clean surface helps the garbage can stay in place. It also prevents damage to the cabinet over time.
Allow the area to dry fully before installing the garbage can. Moisture can cause slipping or damage.
Check For Plumbing And Obstacles
Look under the sink for pipes and plumbing fixtures. Note their position and size. Make sure the garbage can will not block or touch them. Check for any obstacles like hoses or valves.
Measure available space carefully to fit the garbage can. Avoid tight spots that could cause leaks or damage.
Mark The Installation Spot
Marking the installation spot is a key step for a neat garbage can setup. This step ensures the can fits perfectly under the sink and stays secure. Take your time to find the best position before drilling any holes. Proper marking saves effort and prevents mistakes.
Position The Garbage Can
Place the garbage can where you want it under the sink. Check for enough space to open and close the lid easily. Avoid blocking pipes or cabinet doors. Make sure the can does not touch the walls or plumbing. Adjust the spot until the can sits flat and stable.
Mark Drill Points
Use a pencil to mark where you will drill holes for mounting. Mark the points on the cabinet wall or door based on the can’s mounting brackets. Double-check the marks to confirm they align with the brackets. Clear, accurate marks help you drill straight and steady. This prevents damage and ensures the can stays firmly fixed.
Install Mounting Brackets
Installing mounting brackets is a key step to secure your garbage can under the sink. These brackets hold the can firmly in place. Without proper installation, the can might fall or move, causing mess and trouble.
Take your time to position the brackets correctly. They should fit the size of your garbage can and the space under your sink. Precise placement ensures the can is easy to slide in and out.
Drill Pilot Holes
Start by marking the spots for screws on the cabinet wall. Use a pencil to make small marks where the brackets will go. This helps in drilling straight and accurate holes.
Pick a drill bit smaller than the screws. Drill pilot holes at the marked spots. These holes guide the screws and prevent the wood from splitting.
Attach Brackets Securely
Align each bracket over the pilot holes. Push the bracket firmly against the cabinet wall. Use a screwdriver or drill to fasten screws tightly.
Check the brackets for stability after screwing. They should not wiggle or move. Tight brackets keep the garbage can steady and safe.
Attach The Garbage Can
Attaching the garbage can under the sink is the next important step. This step holds the can in place. It keeps your kitchen tidy and trash out of sight. Follow each instruction carefully to avoid mistakes. A well-attached can stays secure and easy to use.
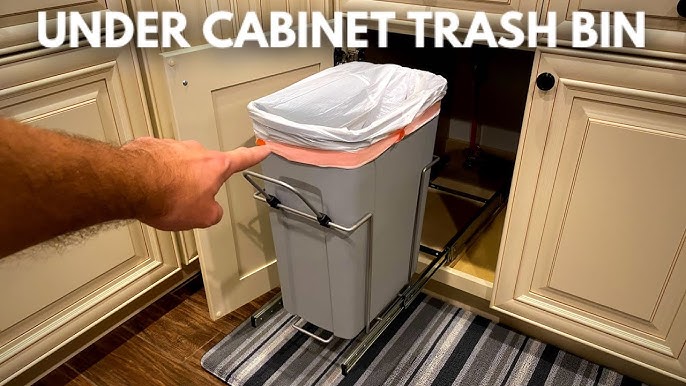
Slide Can Into Brackets
Start by sliding the garbage can into the brackets fixed under the sink. Align the can with the brackets for a smooth fit. Push it gently but firmly until it clicks or feels secure. Ensure the can moves easily without falling out. Check that the can’s handle or lid clears the cabinet door.
Test Stability
After sliding the can, test its stability. Pull the can out slightly and push it back in. Wiggle it lightly to check for any loose movement. The can should not tilt or fall. If unstable, adjust the brackets or reposition the can. A stable garbage can improves safety and convenience.
Adjust And Finalize Setup
After installing the garbage can under the sink, it is important to adjust and finalize the setup. This step ensures the can fits well and works smoothly. Proper adjustments make daily use easier and keep your space neat. Follow these simple tips for the best results.
Make Height Adjustments
Check the height of the garbage can frame. Adjust it so the can sits comfortably below the sink. Make sure the lid opens without hitting the cabinet or pipes. Use screws or brackets to secure the frame at the right height. This prevents the can from moving or tipping over.
Ensure Easy Access
Test the garbage can pull-out mechanism. It should slide out smoothly and fully. Leave enough space around the can for your hand to grab the bag easily. Avoid tight spots that block access. Proper access saves time and keeps the area clean.

Credit: elektrowaeger.ch
Maintain Your Under-sink Garbage Can
Maintaining your under-sink garbage can is key for a clean kitchen. A well-kept bin lasts longer and keeps bad smells away. Simple care habits make a big difference every day.
Regular Cleaning Tips
Clean the garbage can at least once a week. Use warm water and mild soap for washing. Rinse it well and let it dry before use. Wipe the lid and surrounding area often. This stops dirt and germs from building up.
Prevent Odors
Place a small baking soda box inside the bin. It helps absorb bad smells naturally. Change the baking soda every month for best results. Use trash bags that fit well and seal tightly. Remove trash regularly to keep the area fresh.
Check For Wear And Tear
Look at the garbage can for cracks or holes. Damaged bins can leak and cause messes. Check the lid hinges and handles for looseness. Tighten or fix parts to keep the can working well. Replace the bin if damage is too much.

Credit: thepalettemuse.com
Frequently Asked Questions
How Do I Choose The Right Garbage Can Size?
Measure your under-sink space carefully before buying. Choose a compact, slim garbage can that fits easily without blocking plumbing or cabinet doors.
What Tools Are Needed For Installation?
You typically need a drill, screws, screwdriver, measuring tape, and mounting brackets. Some garbage cans include all required hardware.
Can I Install A Trash Can Under Any Sink?
Most sinks can accommodate an under-sink trash can if space is available. Check for plumbing obstacles and cabinet dimensions first.
How Do I Mount The Garbage Can Securely?
Use mounting brackets or slides included with the can. Attach firmly to cabinet walls or doors for stability and easy access.
Conclusion
Installing a garbage can under the sink saves space and keeps your kitchen tidy. Follow each step carefully for a secure fit. Choose the right size to fit your cabinet well. Use basic tools and take your time during installation.
This setup makes waste disposal easier every day. A neat kitchen helps you feel more organized. Try it yourself and enjoy a cleaner space. Simple changes can make a big difference.