Last Updated on October 11, 2026
Are you tired of using worn-out or cheap cutting boards that dull your knives and look plain in your kitchen? Imagine having a beautiful, sturdy cutting board made by your own hands—one that lasts for years and adds a personal touch to your cooking space.
Making your own cutting board is easier than you think, and it can save you money while giving you a sense of pride every time you chop veggies or carve a roast. In this guide, you’ll discover simple steps and insider tips to create a cutting board that’s both functional and stylish.
Ready to transform your kitchen tools? Let’s get started!
Choosing The Right Wood
Choosing the right wood is the first step to making a great cutting board. The wood affects the board’s look, durability, and safety. Picking the best wood can make your cutting board last for years. It also helps keep your kitchen clean and safe.
Best Wood Types For Cutting Boards
Hardwoods are the best choice for cutting boards. Maple is very popular because it is hard and has a smooth surface. Walnut is another good option with a rich, dark color. Cherry wood offers a warm tone and good durability. These woods resist knife marks and do not dull knives quickly.
Wood Grain And Durability
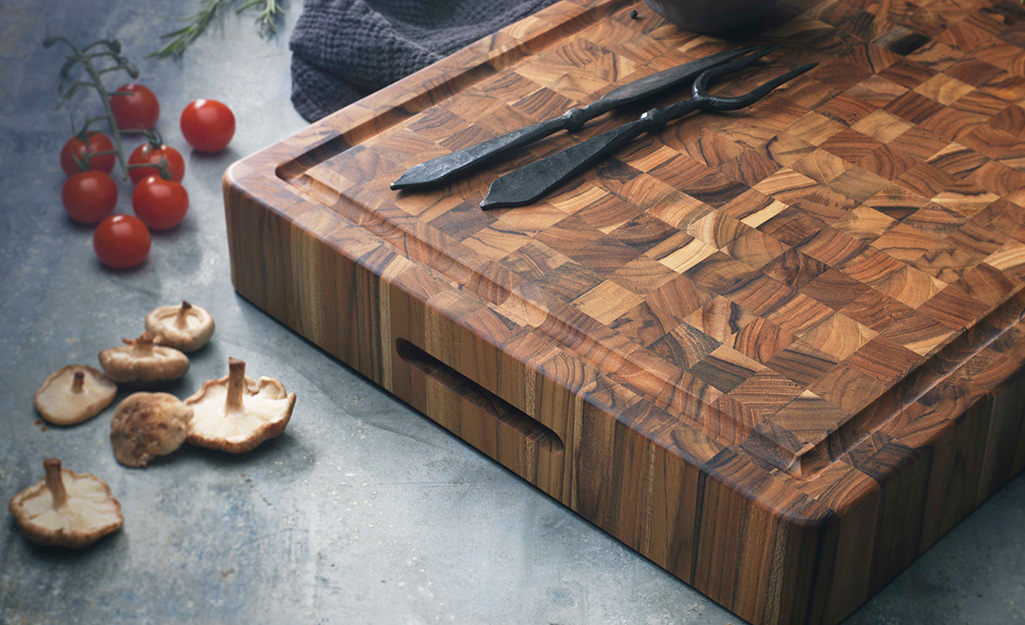
Wood grain affects how long the cutting board lasts. End grain boards show the wood fibers standing up. They are softer on knives and self-healing. Face grain boards have a flat surface and are easier to make. But they may show knife marks faster. Choose a tight grain wood for more durability.
Avoiding Harmful Woods
Some woods are not safe for cutting boards. Softwoods like pine can absorb bacteria easily. Woods with strong odors or toxins, like cedar, should be avoided. Always pick woods labeled as food-safe. This ensures your cutting board will be safe for preparing food.
Credit: www.homedepot.com
Essential Tools And Materials
Making a cutting board requires the right tools and materials. These items help you create a sturdy and safe board. Using proper supplies ensures a smooth process and a great final product. Below are the key tools and materials you will need.
Basic Woodworking Tools Needed
Start with a good saw to cut the wood pieces. A table saw or handsaw works well. Use a chisel to remove small wood bits. A clamp holds wood steady during work. A measuring tape or ruler keeps cuts accurate. A wood glue helps join pieces together firmly. Sandpaper or a sanding block smooths rough edges. These tools form the foundation for your cutting board.
Sanding And Finishing Supplies
Sanding is important to make the surface smooth. Use different sandpaper grits, from coarse to fine. Sand all sides, including corners and edges. A sanding sponge can help reach tight spots. Clean the board with a damp cloth after sanding. Finishing supplies protect the wood and make it shine. Use a clean cloth to apply finishes evenly.
Food-safe Oils And Sealants
Choose oils safe for food contact. Mineral oil is a popular choice. It prevents the wood from drying out. Beeswax adds extra protection and a nice shine. Avoid toxic or non-food-safe finishes. Apply oil or sealant in thin layers. Let each layer soak in before adding more. This keeps your cutting board safe for daily kitchen use.
Preparing The Wood
Preparing the wood is an important first step in making a cutting board. Good preparation helps the board last longer and look better. It also makes sure the board is safe to use for food. This step involves cutting the wood to the right size, making the surfaces smooth and flat, and joining pieces of wood together tightly. Each task needs care and attention to detail.
Cutting Wood To Size
Start by measuring the wood carefully. Use a pencil and ruler for accuracy. Cut the wood into pieces that match your design. Use a saw to make clean, straight cuts. Make sure all pieces are the same length and width. This helps the board stay even and strong.
Planing And Flattening Surfaces
After cutting, the wood surfaces may be rough or uneven. Use a plane or sanding block to smooth them out. Flatten the wood by removing bumps or high spots. Smooth surfaces prevent knife damage and make cleaning easier. Check the wood often to keep it flat and even.
Joining Wood Pieces
To make a wider board, join several wood pieces side by side. Apply wood glue to the edges. Press pieces tightly together. Use clamps to hold the wood while the glue dries. Make sure no gaps appear between pieces. Strong joints keep the board sturdy and safe for cutting.
Shaping The Board
Shaping the board is a key step in making a cutting board. This process gives the board its final look and feel. It makes the board safer and easier to use. You can choose simple shapes or add extra features. Each choice changes the board’s style and function.
Rounding Edges And Corners
Sharp edges can hurt hands or catch on cloth. Rounding edges and corners makes the board smooth. Use sandpaper or a router to soften all edges. This step also helps the board last longer. Rounded edges feel nice to hold and use.
Creating Juice Grooves
A juice groove catches liquids from fruits or meat. It stops spills on your countertop. To create a groove, use a router or chisel. Make a shallow channel near the board’s edge. This simple feature keeps your kitchen cleaner and your work neater.
Adding Handles Or Inlays
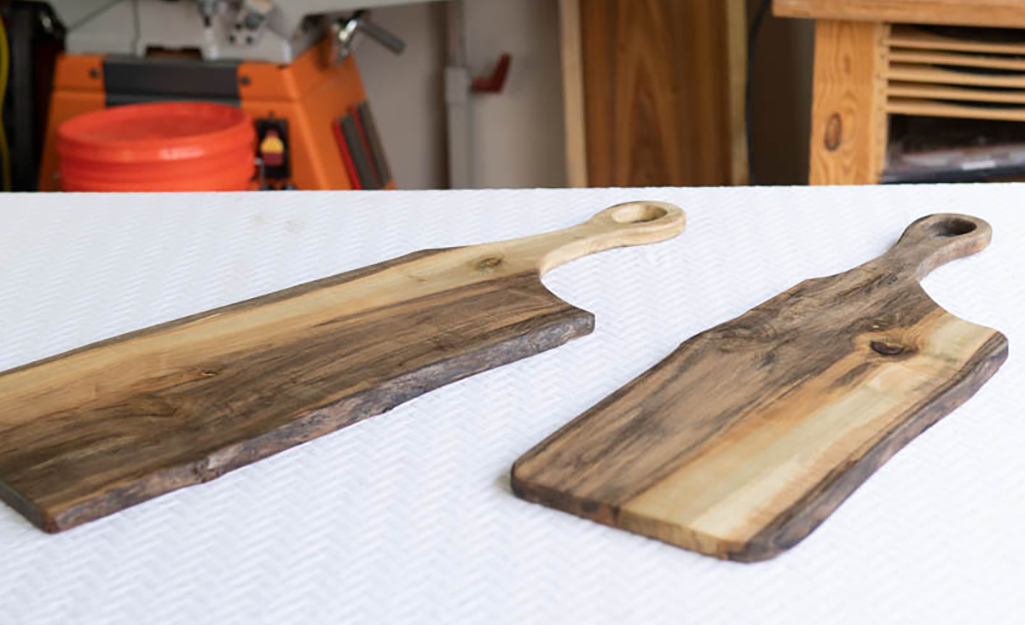
Handles make the board easy to carry and move. Cut holes or slots on the sides for a firm grip. Inlays add style and personality to the board. Choose different woods or shapes for the inlay. Both handles and inlays improve the board’s look and use.
Sanding And Smoothing
Sanding and smoothing are key steps in making a cutting board. This process removes rough spots and sharp edges. It also prepares the wood for sealing or oiling. A smooth surface feels good to touch and helps keep knives sharp longer. Proper sanding gives your board a clean, polished look.
Choosing The Right Grits
Start with coarse sandpaper to remove big rough spots. Use 80 or 100 grit for this job. Next, switch to medium grit like 120 or 150. This helps to smooth the surface further. Finish with fine grit, such as 220 or 320. Fine grit leaves the wood soft and ready for finishing.
Sanding Techniques For A Smooth Finish
Always sand along the wood grain. This prevents scratches and makes the surface even. Use light, even pressure to avoid digging into the wood. Move the sandpaper in long strokes. Check the board often to see your progress. Sand edges and corners carefully to round them slightly.
Cleaning The Surface
After sanding, wipe the board with a damp cloth. This removes dust and tiny wood particles. Let the board dry completely before applying any finish. Clean surfaces help finishes stick better. A dust-free board looks smooth and feels nice.
Applying Finishes
Applying a finish to your cutting board protects the wood and makes it safe for food use. This step helps the board last longer and keeps it looking good. A proper finish also prevents water and bacteria from soaking into the wood.
Selecting Food-safe Finishes
Choose finishes that are safe for food contact. Mineral oil is popular because it is non-toxic and easy to apply. Beeswax mixed with mineral oil adds extra protection and a smooth feel. Avoid finishes with chemicals or toxins that can harm health.
Oiling And Sealing Steps
Start with a clean, dry board. Apply mineral oil using a soft cloth or paper towel. Rub the oil into the wood, covering all surfaces. Let it soak for at least a few hours or overnight. Wipe off any extra oil with a clean cloth. For better sealing, apply a beeswax and oil mix once the oil dries. Buff the surface to a soft shine.
Maintenance Tips For Longevity
Reapply oil regularly, especially after washing. Avoid soaking the board in water. Use mild soap and dry it quickly. Store in a dry place to prevent warping. Regular care keeps the wood healthy and your board safe to use.
Caring For Your Cutting Board
Caring for your cutting board keeps it strong and safe for food prep. Proper care stops damage and extends its life. Small daily steps make a big difference. Learn how to clean, dry, and oil your board right.
Cleaning And Drying Tips
Clean your cutting board after each use. Use warm water and mild soap. Scrub gently with a soft sponge. Avoid harsh chemicals that can harm the wood. Rinse well to remove soap residue.
Dry the board immediately with a clean towel. Do not soak it in water. Standing water can cause the wood to swell and crack. Let the board air dry fully before storing it.
Avoiding Warping And Cracks
Keep your board away from direct heat sources. Avoid placing it near stoves or heaters. Heat causes the wood to dry too fast and warp. Store the board flat or upright in a dry place.
Never put your wooden cutting board in the dishwasher. The high heat and water can crack the wood. Use both sides of the board to prevent uneven wear.
Regular Re-oiling Schedule
Oil your cutting board regularly to protect the wood. Use food-safe mineral oil or cutting board oil only. Apply a thin coat and let it soak in overnight.
Oiling stops the wood from drying and cracking. Do this at least once a month or when the board looks dry. Well-oiled boards resist stains and smells better.

Credit: www.youtube.com
Credit: www.homedepot.com
Frequently Asked Questions
What Materials Are Best For Making A Cutting Board?
Hardwoods like maple, walnut, and cherry are ideal. They are durable, knife-friendly, and resist bacteria. Avoid softwoods, as they can scar easily and harbor germs.
How Do You Properly Finish A Homemade Cutting Board?
Use food-safe mineral oil or beeswax to seal the wood. This protects the board, enhances durability, and prevents cracking or warping.
Can I Use Power Tools To Make A Cutting Board?
Yes, power tools like saws and sanders speed up the process. They help achieve smooth edges and a professional finish safely.
How Long Does It Take To Make A Cutting Board?
Making a basic cutting board typically takes a few hours. Drying and finishing steps may extend total time to days for best results.
Conclusion
Making a cutting board can be a fun and useful project. You only need a few tools and some wood. Follow the steps carefully and take your time. This will help you create a strong and beautiful board. Enjoy using it in your kitchen or give it as a gift.
Remember, practice makes better results. Keep trying, and your skills will grow. Happy woodworking!