Last Updated on January 12, 2026
Making bread is a rewarding task. It requires patience and simple ingredients.
Bread has been a staple food for centuries. It offers comfort and nourishment. Baking bread at home can be fun and satisfying. You control the ingredients and flavors. Many people find joy in kneading dough. The aroma of fresh bread is delightful.
Homemade bread brings a sense of achievement. It connects us to traditional practices. Baking your own bread allows creativity. You can experiment with different types and textures. Whether you want a crusty loaf or soft rolls, the process is simple. The ingredients are basic: flour, water, yeast, and salt. With a little practice, anyone can learn to bake bread. It’s not just about food; it’s an experience. Let’s explore the steps to make your own bread.
Ingredients
Baking bread is an art that starts with choosing the right ingredients. It’s essential to understand what each ingredient contributes to the final loaf. The basic ingredients create the foundation, while additional items enhance flavor and texture. Let’s delve into what you need for a perfect bread.
Essential Items
Flour is the backbone of any bread recipe. It provides structure. Most recipes call for all-purpose or bread flour. Yeast is crucial for the dough to rise. It acts as a leavening agent. Water binds the ingredients and activates the yeast. Salt adds flavor and strengthens the dough. These elements are vital for any bread recipe.
Optional Additions
Optional ingredients can personalize your bread. Sugar can enhance sweetness and aid yeast fermentation. Milk or butter adds richness and softens the texture. Eggs can provide structure and tenderness. Herbs and spices offer unique flavors. Nuts and seeds add crunch and nutritional value. These additions create variety and make your bread unique.
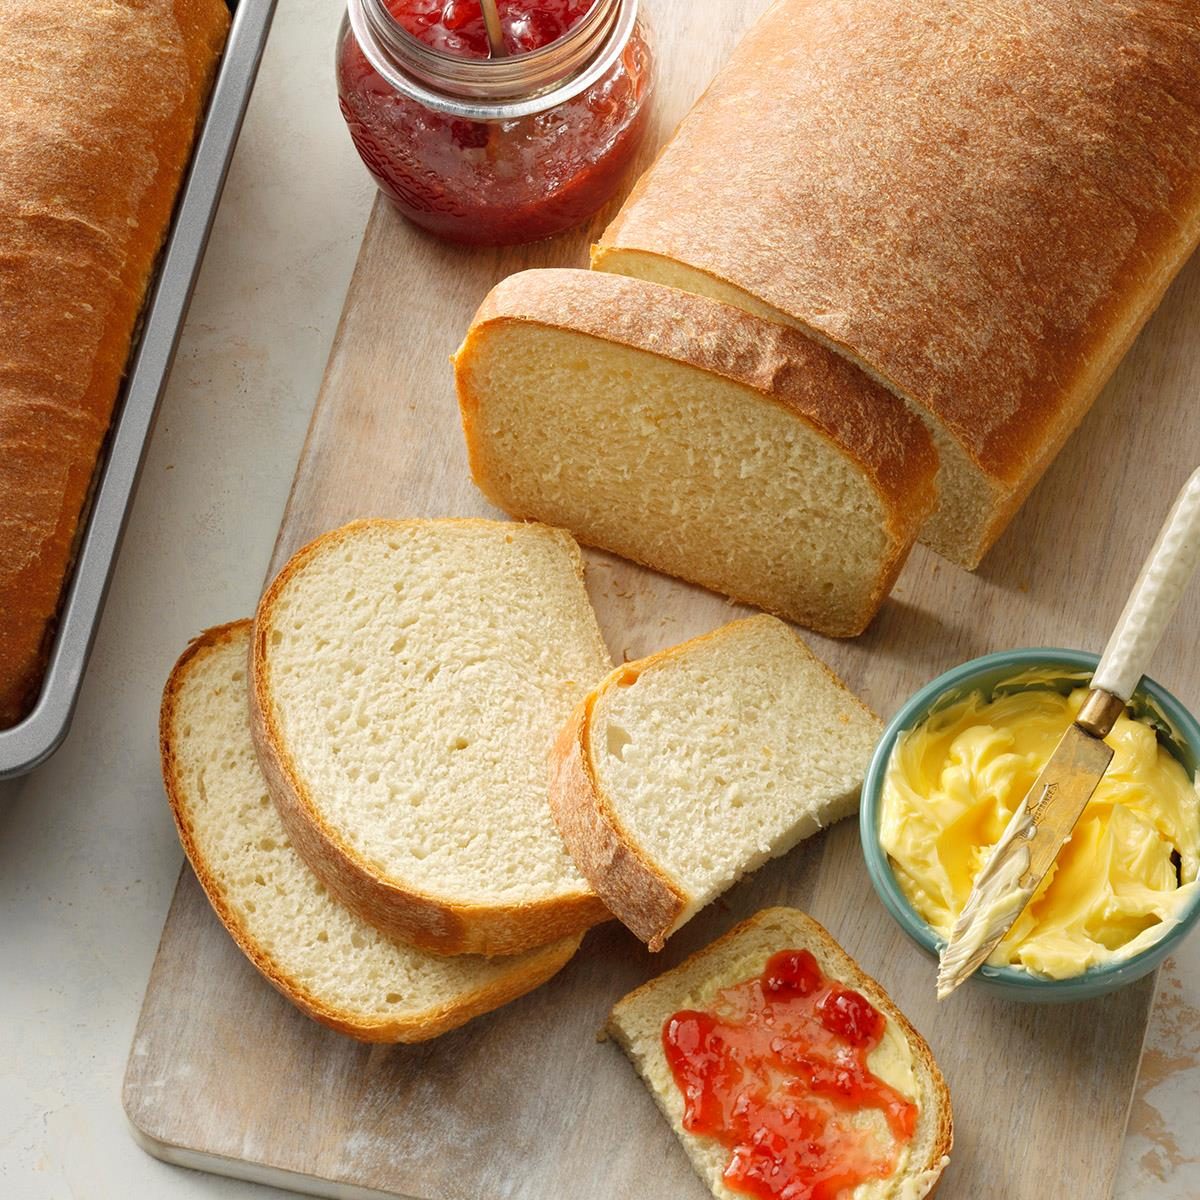
Credit: www.tasteofhome.com
Tools Needed
Baking bread at home can be a delightful experience. To start, you need the right tools. This section covers all the tools needed for making bread. From basic equipment to more advanced tools, having the right gear makes the process smoother and more enjoyable.
Basic Equipment
To begin, you need some basic equipment. A large mixing bowl is essential. Use it to mix your ingredients properly. A wooden spoon helps with mixing dough. It is sturdy and easy to use. A measuring cup and spoon set is vital for accuracy. Measuring ingredients correctly ensures good results.
A kitchen scale is also important. It helps measure flour and other ingredients by weight. This ensures consistency in your bread. A dough scraper is useful for handling sticky dough. It helps keep your work surface clean. You also need a clean kitchen towel. Use it to cover your dough as it rises.
Lastly, a loaf pan is necessary. It shapes your bread as it bakes. If you prefer free-form loaves, a baking stone is a good alternative.
Advanced Tools
For those who want to go further, some advanced tools can help. A stand mixer with a dough hook attachment is a great investment. It saves time and effort in kneading dough. A proofing basket, or banneton, helps shape your dough as it rises. It also adds a beautiful pattern to your bread.
A bench knife, or dough cutter, is useful for dividing dough. It also helps in shaping your dough. A kitchen thermometer is crucial for checking the temperature of your dough and water. It ensures the best rise and texture. A bread lame is a small tool for scoring dough. It allows steam to escape and gives your bread a professional look.
Lastly, a cooling rack is essential. It prevents your bread from getting soggy as it cools. These advanced tools can elevate your bread-making experience.
Mixing The Dough
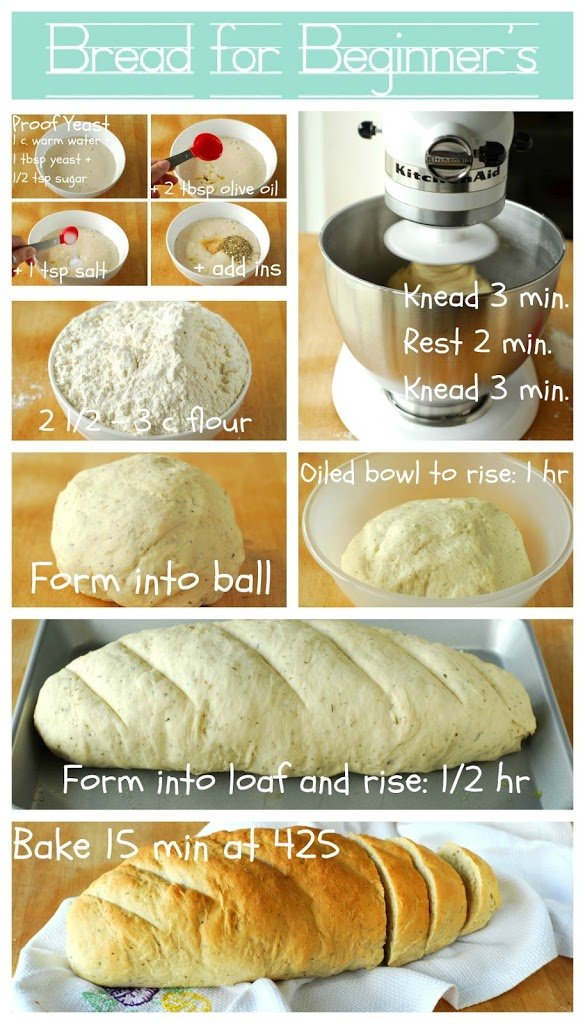
Mixing the dough is a key step in making bread. Combine flour, water, yeast, and salt until smooth. Knead well for the best texture.
Mixing the dough is a crucial step in bread making. It sets the foundation for your bread’s texture and flavor. A well-mixed dough leads to a delicious loaf, full of character. Let’s dive into the art of mixing dough, ensuring every loaf turns out perfect.Combining Ingredients
Start by gathering all necessary ingredients. You’ll need flour, water, yeast, and salt. Measure each component accurately for best results. Place the flour in a large mixing bowl. Create a well in the center. Add yeast and salt, keeping them separate. Pour in the water slowly. Use a wooden spoon to mix everything. Stir until a shaggy dough forms. This initial mix helps hydrate the flour. It also begins gluten development.Kneading Techniques
Kneading is essential for developing gluten. It gives bread its structure. Begin by turning the dough onto a floured surface. Use the heel of your hand to push the dough away. Fold it over, then turn it. Repeat this process for about 10 minutes. The dough should become smooth and elastic. If it’s sticky, add a little flour. Be careful not to add too much. Over-kneading can make the bread tough. Practice makes perfect in kneading. Feel the dough transform under your hands. It’s a satisfying process. Enjoy the tactile nature of kneading. Let the rhythm guide you.First Rise
The first rise is crucial in bread making. This step allows the dough to develop flavor and texture. The dough rests and ferments, increasing in size. During this period, yeast activity is at its peak. Let’s explore the ideal conditions and time requirements for a successful first rise.
Ideal Conditions
The dough needs a warm environment for the first rise. A temperature around 75°F (24°C) is perfect. This warmth encourages yeast activity. Avoid cold spots as they slow the rise. A damp cloth over the bowl keeps the dough moist. A draft-free area ensures consistent temperature.
Time Requirements
The first rise usually takes one to two hours. Time depends on the room’s temperature and yeast freshness. The dough should double in size. Check after one hour by gently pressing the dough. If it springs back, give it more time. A fully risen dough holds an indentation.
Shaping The Loaf
Gently shape the dough into a loaf by tucking the sides underneath. Ensure it holds its form. This step helps the bread rise evenly in the oven, creating a beautiful crust.
Shaping the loaf is a crucial step in bread-making that can transform your homemade bread from good to great. It’s not just about aesthetics; the shape can affect the texture and even the flavor of your bread. Have you ever wondered how those perfectly formed loaves at your local bakery get their shape? The secret lies in mastering a few simple techniques that can make your homemade bread look and taste just as professional.Different Shapes
Bread can be shaped in a variety of ways, each offering a unique visual appeal and texture. The classic boule is a round loaf that is both rustic and charming. It’s perfect for soups and stews. If you’re looking for something more elegant, try shaping your dough into a batard, an oval loaf that slices well for sandwiches. For a family dinner, a braided loaf not only looks impressive but also pulls apart easily for sharing. And don’t forget the baguette, the long, thin loaf that’s a staple in French cuisine. Each shape has its own personality and purpose, so explore them all to find your favorite.Techniques For Shaping
Shaping bread dough isn’t just about forming it with your hands; it’s about creating tension on the surface of the dough. This tension helps the bread rise properly and develop a beautiful crust. Start by lightly flouring your work surface to prevent sticking. Gently press your dough into a rectangle, then fold it into thirds like a letter for a basic loaf shape. For a boule, tuck the edges of the dough under itself, rotating it as you go, until you have a smooth, tight ball. To shape a batard, pull the edges of your rectangle toward the center and pinch to seal, then roll it into an oval. If you’re feeling adventurous, try a three-strand braid. Divide your dough into three equal parts, roll them into ropes, and braid them as you would hair. Pinch the ends to secure the braid. Each of these techniques creates a different experience, both visually and in the eating. Remember, the key to shaping is confidence and practice. Don’t be afraid to experiment and make mistakes. What’s your favorite bread shape to try at home?
Credit: aducksoven.com
Second Rise
Let the dough rest for a second rise. This step is crucial in making bread fluffy and light.
The ‘Second Rise’ in bread making is a crucial step that impacts the texture and flavor of your final loaf. This stage is all about allowing your dough to develop its structure and achieve that perfect balance of airiness and chewiness. Many home bakers often overlook the importance of this phase, rushing through it without realizing that patience here pays off in delicious dividends.Preparing For The Oven
Before your dough gets its second rise, make sure your baking environment is just right. A warm, humid setting encourages your dough to expand beautifully. You might use your oven with the light on or a warm spot in your kitchen. Consider the tools at your disposal. A baking stone or a Dutch oven can enhance your bread’s crust and overall shape. Are you ready with parchment paper or cornmeal to prevent sticking? These small preparations make a big difference.Final Proofing
Now, let’s focus on final proofing. This step is where your dough gets its last chance to rise before baking. It’s critical to watch your dough closely; it should double in size but not overproof. An overproofed dough can collapse when baked. Here’s a tip: gently press a finger into your dough. If the indentation slowly fills back up, it’s ready. If it doesn’t, wait a little longer. Final proofing is as much about intuition as it is about timing, so trust your instincts. Are you tempted to skip this part? Remember, each minute spent here enhances the bread’s aroma and texture. What’s your favorite bread moment? That first bite into a freshly baked loaf? Let the final proofing be the secret ingredient to that perfect experience.Baking The Bread
Ready to bake your bread? Let’s turn that dough into a golden loaf. Baking is more than just heat. It’s about timing and temperature. Each step matters. Proper settings and time bring out the best flavors. Let’s dive into the details.
Oven Settings
Start by preheating your oven. Set it to 375°F (190°C) for most bread types. Ensure the oven racks are in the middle. This helps even baking. You want consistent heat distribution. Use an oven thermometer for accuracy. It’s your best friend in the kitchen.
Baking Time
Baking time varies. Most bread bakes in 25 to 30 minutes. Watch for a golden crust. Tap the bread’s bottom. A hollow sound means it’s done. Don’t rely only on time. Check color and texture. Let the bread cool on a wire rack. This prevents soggy bottoms. Enjoy the aroma as it fills your kitchen.
Cooling And Storing
After baking, bread needs proper cooling and storing. This ensures it stays fresh and delicious. Cooling and storing are essential steps for maintaining your bread’s quality. Let’s dive into the best practices.
Proper Cooling
Place your bread on a wire rack. This allows air to circulate. Cooling should take at least one hour. It helps the crust set and prevents sogginess. Never rush this step. Hot bread can crumble and lose flavor. Patience pays off here.
Storage Tips
Keep bread fresh by storing it properly. Use a bread box or cloth bag. These options allow the bread to breathe. Avoid plastic bags. They trap moisture and can make bread soggy.
Freezing is great for long-term storage. Slice the bread before freezing. This makes it easier to defrost only what you need. Wrap it in foil or freezer bags. This protects it from freezer burn.
Always store bread at room temperature. Refrigeration dries it out. Bread stays freshest for about 2-3 days. Enjoy your homemade bread while it’s fresh and tasty.
Common Mistakes
Making bread at home is a rewarding experience. Yet, many face common mistakes that can affect the outcome. Understanding these pitfalls helps in creating delicious, fluffy bread. Let’s explore some usual errors and how to fix them.
Avoiding Pitfalls
One common mistake is using the wrong flour. Bread flour has more protein. It helps in gluten development. Another mistake is inaccurate measurements. Always use a kitchen scale for precision. Dough that is too sticky or too dry can result in dense bread. Kneading is crucial, but over-kneading can make bread tough. Under-kneading, on the other hand, leads to flat bread.
Troubleshooting Tips
If your dough is sticky, add a little flour. But do it gradually. For dry dough, add water. Just a tablespoon at a time. If bread doesn’t rise, check yeast freshness. Old yeast won’t rise well. Place dough in a warm spot for proofing. Drafty areas can slow down the process. If bread is dense, consider longer kneading next time. Check oven temperature if the crust is too hard. Use an oven thermometer for accuracy.
Credit: aducksoven.com
Variations And Enhancements
Bread making offers endless possibilities for creativity. You can add unique flavors or change the texture. These variations make your bread special. Let’s explore some exciting ideas to try at home.
Flavor Additions
Adding flavors transforms basic bread into something delightful. Herbs like rosemary or thyme add a fresh taste. Garlic or onion give a savory kick. For a sweet touch, try cinnamon or nutmeg. Add nuts like walnuts or almonds for crunch and taste. Cheese lovers can mix in cheddar or parmesan for rich flavor. Dried fruits like raisins or cranberries add sweetness and color.
Texture Modifications
Changing texture creates different eating experiences. Adding oats or seeds gives a hearty feel. Whole grains make bread dense and nutritious. For a lighter loaf, use more yeast or let it rise longer. A splash of milk or butter adds softness. For a crispy crust, brush with water before baking. Experiment with these to find your perfect texture.
Frequently Asked Questions
What Are The Ingredients For Bread Making?
Bread making requires flour, water, yeast, and salt. Optionally, you can add sugar, oil, or eggs for flavor and texture.
Can I Make Bread With Plain Flour?
Yes, you can make bread with plain flour. It may not rise as much as bread flour, but it works.
How To Make Flour From Scratch?
To make flour from scratch, grind whole grains like wheat using a grain mill or blender. Sift to remove bran for finer texture. Store in airtight containers to maintain freshness. Homemade flour provides a nutritious, customizable alternative to store-bought options.
Enjoy baking with your freshly milled flour!
How Bread Is Made In 5 Steps?
Bread is made in five steps: Mix flour, water, yeast, and salt. Knead the dough until smooth. Allow the dough to rise until doubled. Shape the dough and let it rise again. Bake in a preheated oven until golden brown.
Enjoy your freshly baked bread!
Conclusion
Baking bread is a simple joy. Fresh bread fills your home with warmth. You don’t need fancy tools or skills. Just follow these steps carefully. Enjoy the process. Kneading dough is relaxing. Watching it rise is rewarding. The smell of baking bread is delightful.
Homemade bread tastes better than store-bought. It’s a great way to share love. Serve it at dinner or breakfast. Friends and family will appreciate the effort. Start baking today. Discover the pleasure of homemade bread. It’s a skill worth learning.
Simple ingredients, big satisfaction. Try it, and enjoy every bite.