Last Updated on December 11, 2025
Are you tired of waiting hours to enjoy fresh, homemade yogurt? What if you could skip the long heating process and still get creamy, delicious yogurt right from your Instant Pot?
The Instant Pot Yogurt Cold Start method lets you do just that. It’s simple, quick, and perfect for anyone who wants great-tasting yogurt without the hassle. Keep reading, and you’ll discover how this easy trick can transform your yogurt-making routine and bring fresh flavor straight to your table.
Why Choose Instant Pot For Yogurt
Choosing the Instant Pot for making yogurt brings many advantages. It simplifies the process and delivers great results every time. The Instant Pot controls temperature precisely, which is important for good yogurt. It also saves time and effort compared to traditional methods.
Benefits Of Using Instant Pot
The Instant Pot offers a set-and-forget method. You add ingredients, select the yogurt setting, and wait. It maintains the right warmth for bacterial growth. This helps yogurt develop flavor and thickness naturally. The device also keeps the environment clean, reducing contamination risks.
Consistency And Texture Advantages
Yogurt made in an Instant Pot has a smooth, creamy texture. The steady heat avoids curdling or separation. Each batch comes out evenly thick and firm. Cold start settings allow better control over fermentation time. This results in yogurt that tastes fresh and feels rich.
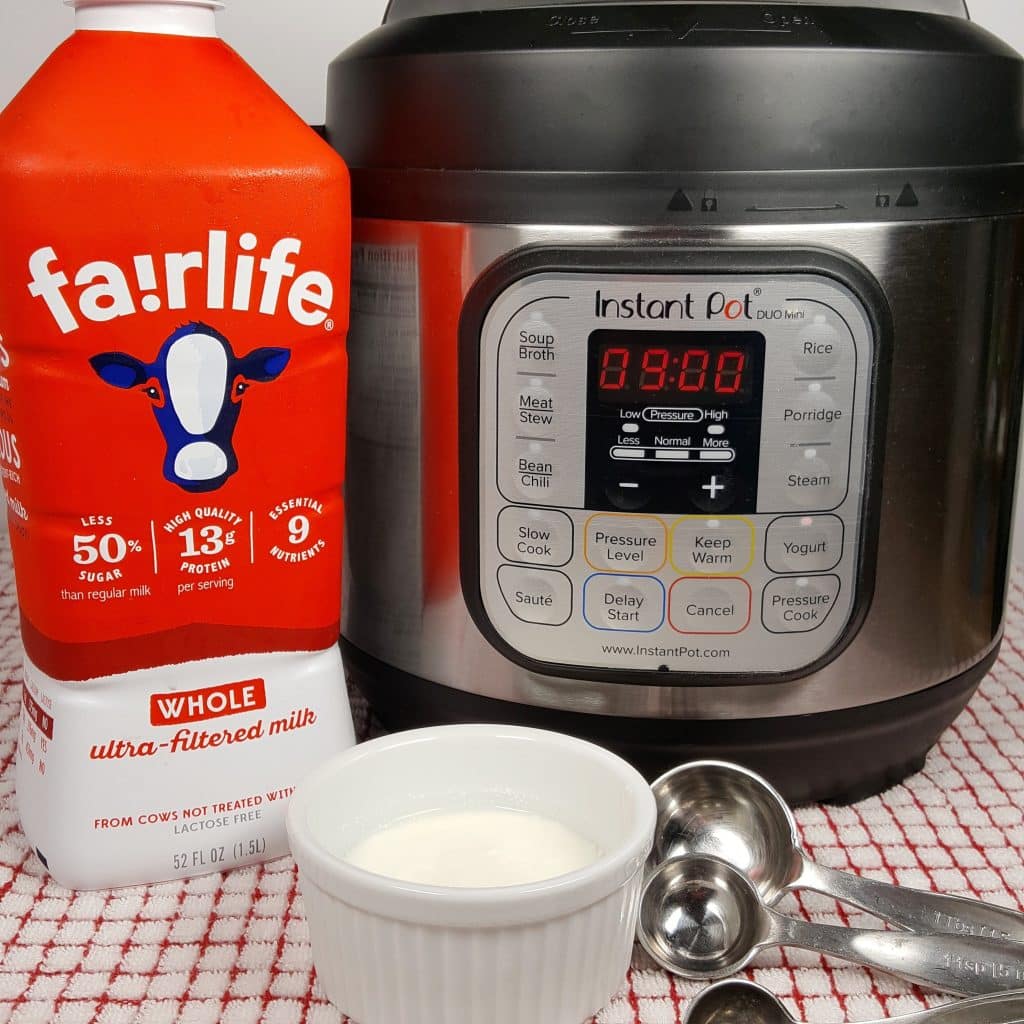
Ingredients Needed
Making yogurt in an Instant Pot Cold Start requires just a few simple ingredients. These basics create a healthy and tasty yogurt at home. Knowing the right ingredients helps you get creamy and smooth results every time.
Milk Options
Choose fresh milk for best results. Whole milk gives rich and creamy yogurt. You can use 2% or skim milk for lighter options. Avoid ultra-pasteurized milk as it may not set well. Organic milk works great if you prefer natural choices. Heating milk before culturing is not needed with Cold Start method.
Starter Cultures
The starter culture contains good bacteria needed to ferment milk. Use plain yogurt with live active cultures as a starter. Check the label for “live” or “active” cultures. Powdered yogurt starter is another option and works well. Use about two tablespoons of starter per quart of milk. Fresh starter ensures thick and tangy yogurt.
Preparing The Milk
Preparing the milk is the first key step in making yogurt with an Instant Pot Cold Start method. The quality and temperature of the milk affect the yogurt’s texture and taste. Proper preparation ensures the milk is ready to support the good bacteria needed for fermentation. Follow these simple steps to prepare milk perfectly.
Heating Process
Start by pouring fresh milk into the Instant Pot. Use whole milk for creamier yogurt or low-fat milk for a lighter version. Select the “Yogurt” mode and press “Adjust” until it shows “Boil.” This step heats the milk to about 180°F (82°C). Heating kills unwanted bacteria and helps milk proteins change. This change helps the yogurt set thicker and smoother.
Stir occasionally during heating to avoid burning. The Instant Pot will beep when the milk reaches the right temperature. Do not rush this step. Proper heating sets the stage for good yogurt texture.
Cooling To Right Temperature
After heating, the milk must cool to about 110°F (43°C). This temperature is perfect for adding yogurt starter cultures. Use a thermometer to check the milk temperature. If too hot, the bacteria will die. If too cold, fermentation will slow down or stop.
Remove the inner pot from the Instant Pot base. Leave the milk to cool naturally or place the pot in a cold water bath. Stir gently to speed cooling and prevent skin from forming. Cooling takes about 30 to 60 minutes. Wait patiently to ensure the best yogurt results.
Credit: thisoldgal.com
Cold Start Method Explained
The Cold Start Method is a unique way to make yogurt in your Instant Pot. It skips the usual heating step. This method uses already warm milk and starter culture. It lets the yogurt ferment more gently. The result is creamy, smooth yogurt with less fuss.
This technique works well with fresh milk or milk heated on the stove. It can save time and energy. Also, it gives you more control over yogurt texture and taste.
How Cold Start Differs
The Cold Start Method does not heat milk inside the Instant Pot. Instead, you warm milk separately to about 110°F (43°C). Then, you mix in the yogurt starter. This mix goes directly into the Instant Pot for fermentation.
Traditional yogurt making heats milk inside the pot first. That step kills bad bacteria. Cold Start relies on clean milk and careful temperature control outside the pot. It is gentler and often results in a smoother yogurt.
Step-by-step Cold Start Procedure
Heat fresh milk on the stove to 110°F (43°C). Use a thermometer to check temperature.
Add plain yogurt or starter culture to the warm milk. Stir gently to mix well.
Pour the mixture into the Instant Pot insert. Close the lid but leave the vent open.
Press the “Yogurt” button and set the time for 8 to 12 hours. Longer time means thicker yogurt.
After fermentation, move the pot to the fridge. Chill for at least 4 hours before serving.
Enjoy fresh homemade yogurt with your favorite toppings or recipes.
Fermentation Tips
Fermentation is the key to making creamy and tangy yogurt with your Instant Pot. The process needs care and attention. Small changes can affect the taste and texture. Understanding the right time and temperature helps you get the best results every time.
Let’s explore some tips to help your yogurt ferment perfectly using the cold start method.
Optimal Fermentation Time
The best fermentation time is usually between 8 and 12 hours. Shorter times give mild flavor and softer texture. Longer times make yogurt thicker and tangier. Avoid fermenting over 24 hours. It can cause a sour taste and grainy texture. Start with 10 hours and adjust based on your taste.
Maintaining Temperature
Temperature must stay steady for good fermentation. The ideal range is 105°F to 110°F (40°C to 43°C). Too cold slows fermentation and gives weak yogurt. Too hot kills the good bacteria. Use the Instant Pot’s yogurt mode to keep temperature stable. Avoid opening the lid during fermentation. It causes temperature drops and uneven results.
Credit: www.friedalovesbread.com
Storing And Serving
After making yogurt with the Instant Pot Cold Start method, proper storing and serving are important. Good storage keeps the yogurt fresh and tasty. Serving ideas help enjoy the yogurt in many ways. Below are simple tips for refrigeration and flavoring.
Refrigeration Guidelines
Store the yogurt in a clean, airtight container. Keep it in the fridge at or below 40°F (4°C). Yogurt lasts about 1 to 2 weeks when refrigerated properly. Avoid leaving it out at room temperature for long. Stir the yogurt before serving to keep a smooth texture. Check for any off smell or mold before eating.
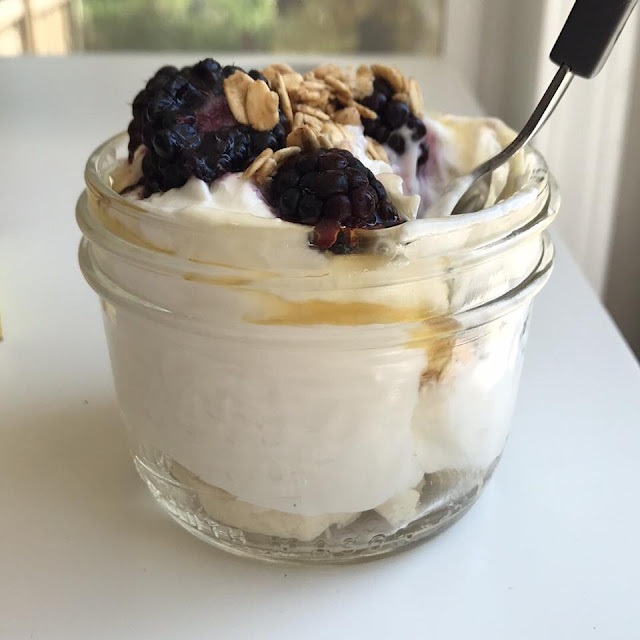
Flavor Enhancements
Add fresh fruit like berries or sliced bananas for natural sweetness. Mix in a spoon of honey or maple syrup for extra flavor. Sprinkle nuts or granola for crunch and texture. Try cinnamon or vanilla extract for a warm taste. Use yogurt as a base for smoothies or salad dressings. These simple ideas make cold start yogurt delicious and fun to eat.
Troubleshooting Common Issues
Making yogurt in an Instant Pot is simple, but sometimes issues happen. This section helps solve common problems with the cold start yogurt method.
Getting thick, tasty yogurt takes care. Small mistakes can change the texture or taste. Follow these tips to fix usual problems.
Why Yogurt Might Be Runny
Runny yogurt often means it did not set right. The temperature may have been too low or too high. Make sure the Instant Pot stays at 110°F to 115°F during incubation.
Using old or weak starter yogurt can cause runniness. Fresh, live-culture yogurt works best. Also, avoid stirring the milk too much after adding the starter. Gentle mixing helps the yogurt firm up.
Short incubation time leads to runny yogurt. Try letting it ferment for 8 to 12 hours. The longer it incubates, the thicker it becomes.
Dealing With Off Flavors
Off flavors can come from bad milk or dirty utensils. Always use fresh milk and clean tools. This prevents unwanted bacteria from spoiling the taste.
Using flavored or sweetened starter yogurt can change the flavor. Use plain, natural yogurt with live cultures as your starter.
Over-fermentation can cause sour or sharp tastes. Keep incubation under 12 hours. If the yogurt tastes too strong, shorten the next batch’s time.
Creative Variations
Creative variations make Instant Pot Yogurt Cold Start exciting. You can change flavors and textures with simple additions. These changes suit your taste and keep yogurt fresh and fun. Explore ideas to make homemade yogurt unique.
Adding Fruits And Sweeteners
Fresh fruits add natural sweetness and texture. Berries, mango, or peaches work well. Mix fruits after cooling yogurt to keep them fresh. Sweeteners like honey, maple syrup, or agave enhance flavor. Stir them gently for even taste. Avoid adding sugar before fermentation to protect live cultures.
Using Different Milk Types
Milk type changes yogurt’s texture and taste. Whole milk makes yogurt creamy and rich. Skim milk produces lighter, tangier yogurt. Plant-based milks like almond, coconut, or soy create dairy-free options. Some need added thickeners like agar or gelatin. Experiment to find your favorite milk base.

Credit: meditaenvalladolid.org
Frequently Asked Questions
What Is Instant Pot Yogurt Cold Start Function?
The cold start function allows making yogurt without preheating milk. It incubates milk and starter culture at a controlled temperature. This method saves time and simplifies the yogurt-making process in the Instant Pot.
How Long Does Yogurt Take With Cold Start?
Yogurt made using cold start typically takes 8 to 12 hours. Incubation time depends on desired tartness and thickness. Longer fermentation yields tangier, thicker yogurt.
Can I Use Any Milk For Instant Pot Yogurt?
Yes, you can use whole, 2%, or skim milk. Whole milk produces creamier yogurt, while skim yields thinner results. Avoid ultra-pasteurized milk for best culturing results.
Do I Need A Yogurt Starter For Cold Start?
Yes, a yogurt starter with live cultures is essential. Use plain yogurt with active cultures or commercial starter packets. This ensures proper fermentation and yogurt texture.
Conclusion
Making yogurt with the Instant Pot Cold Start is simple and quick. You control the ingredients and flavors easily at home. It saves money and reduces waste from store-bought yogurt. The texture is creamy and fresh every time you make it.
Try it yourself and enjoy a healthy snack anytime. Small effort, big taste. Give it a go and see how easy it can be!