Last Updated on April 20, 2026
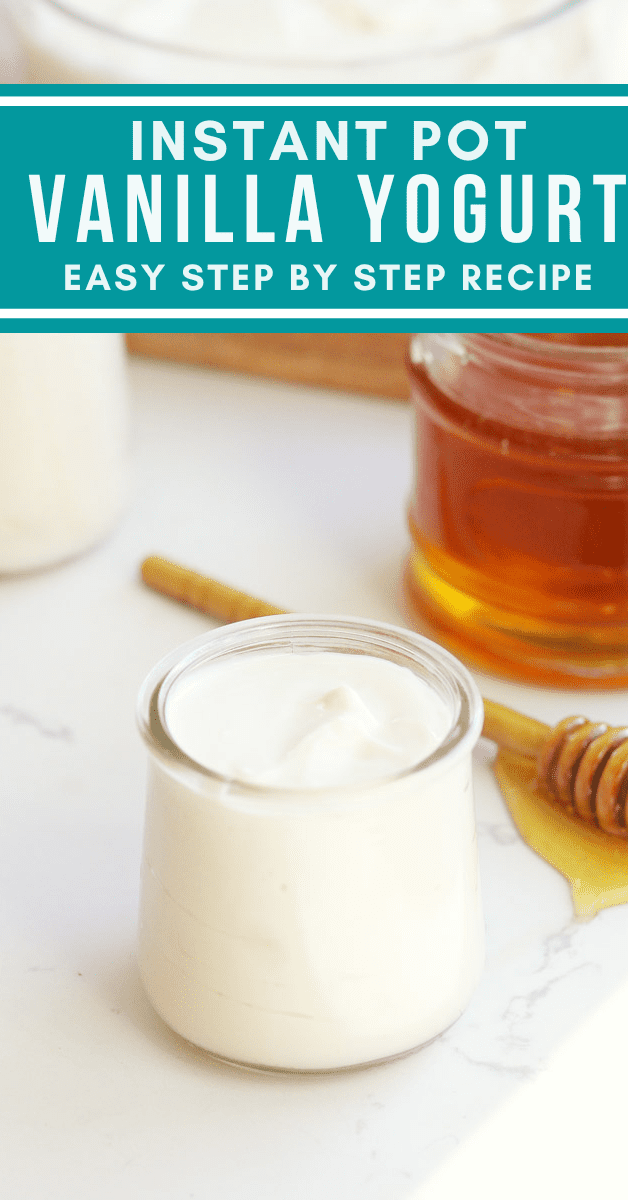
Are you ready to make creamy, delicious vanilla yogurt right in your kitchen with almost no effort? Imagine having fresh, homemade yogurt that’s smooth, flavorful, and perfectly sweetened—without any preservatives or added junk.
With your Instant Pot, this is not just possible, it’s easy and fun! Whether you’re looking for a healthy snack, a breakfast boost, or a versatile ingredient for your recipes, this guide will show you exactly how to create your own vanilla yogurt at home.
Keep reading, and discover how simple it is to turn everyday ingredients into a tasty treat you’ll love.
Why Choose Instant Pot For Yogurt
Instant Pot makes yogurt at home simple and fast. It offers control over the process and consistent results. This method fits well into busy daily routines. The appliance keeps the temperature steady, which is key for good yogurt.
Using an Instant Pot reduces guesswork. It helps anyone create creamy, fresh yogurt without much effort. Homemade yogurt tastes better and is free from preservatives and additives.
Benefits Of Instant Pot Yogurt
Instant Pot yogurt is creamy and thick. The pot keeps the perfect heat for the bacteria to grow. This creates a smooth texture and rich flavor.
You can customize the yogurt’s tartness by changing fermentation time. It also saves energy compared to traditional stovetop methods. Cleanup is easy because the pot is non-stick and dishwasher safe.
Comparison With Traditional Methods
Traditional yogurt making needs constant temperature control. It takes more time and attention to avoid spoilage. Stovetop or oven methods can be tricky and less reliable.
Instant Pot automates temperature and timing, cutting down mistakes. It requires less watching and stirring. The process is faster and more user-friendly, especially for beginners.
Ingredients You Need
Making vanilla yogurt in an Instant Pot is simple and fun. The ingredients are easy to find and natural. Using the right ingredients ensures creamy, tasty yogurt every time.
Let’s explore the basic items needed to create this delicious treat at home.
Milk Options
Whole milk works best for thick, creamy yogurt. You can also use 2% milk for a lighter option. Avoid ultra-pasteurized milk as it may not set well. Organic milk gives a fresh, natural taste. For lactose-free yogurt, use lactose-free milk. The choice of milk affects texture and flavor.
Starter Cultures
Starter cultures are live bacteria that turn milk into yogurt. Plain yogurt with live active cultures works perfectly as a starter. You only need about two tablespoons per batch. You can also buy powdered yogurt starter for convenience. Make sure the starter is fresh for best results. These cultures create the tangy flavor and thick texture.
Optional Add-ins
Vanilla extract is the key to classic vanilla yogurt flavor. Use pure vanilla extract for the best taste. Sweeteners like honey, maple syrup, or sugar can be added after incubation. You may add a pinch of salt to enhance flavor. For extra creaminess, add a small amount of powdered milk. These additions are optional but enhance your yogurt experience.
Step-by-step Preparation
Making vanilla yogurt in an Instant Pot is simple and fun. This step-by-step guide helps you make smooth, creamy yogurt at home. Follow each step carefully to get the best results. Let’s start with setting up your Instant Pot.
Setting Up The Instant Pot
Place the Instant Pot on a flat surface. Make sure the inner pot is clean and dry. Plug in the device and check the lid. Remove the steam release handle or set it to “venting.” Your Instant Pot is now ready for use.
Heating The Milk
Pour fresh milk into the inner pot. Use whole milk for creamier yogurt. Close the lid and seal the vent. Select the “Yogurt” setting and press “Adjust” until it reads “Boil.” Wait for the milk to heat. It should reach about 180°F (82°C).
Cooling The Milk
Remove the inner pot from the Instant Pot. Let the milk cool to 110°F (43°C). Stir occasionally to cool faster. Use a kitchen thermometer to check. This step is important for good yogurt texture.
Adding The Yogurt Starter
Take a small amount of plain yogurt with live cultures. Mix it with a cup of cooled milk in a bowl. Stir well until smooth. Pour this mixture back into the inner pot. Stir gently to combine everything evenly.
Incubation Process
Place the inner pot back into the Instant Pot. Close the lid and seal the vent again. Select the “Yogurt” function and set the time to 8 hours. The yogurt will incubate and thicken. After incubation, refrigerate before serving.
Flavoring With Vanilla
Vanilla adds a warm, sweet taste to Instant Pot yogurt. It changes plain yogurt into a tasty treat. The right vanilla flavor makes yogurt smooth and rich.
Choosing Vanilla Extract
Pick pure vanilla extract for the best taste. Avoid imitation vanilla, as it may taste artificial. Pure vanilla has deep, natural flavor. It blends well with creamy yogurt.
When To Add Vanilla
Add vanilla after cooking, during the cooling stage. Adding vanilla too early may reduce its flavor. Stir it gently into yogurt for even taste. This keeps the vanilla fresh and strong.
Enhancing Flavor Naturally
Use a vanilla bean for natural, intense flavor. Split the bean and scrape the seeds into yogurt. This adds tiny black specks and rich aroma. You can also add a little honey for sweetness. Natural flavors make yogurt more enjoyable and healthy.
Tips For Creamy Texture
Getting creamy texture in Instant Pot vanilla yogurt is simple. Small changes can make a big difference in the final product. Focus on the type of milk, how you strain the yogurt, and avoid common errors. These tips help create smooth and thick yogurt every time.
Milk Fat Content
Milk fat affects yogurt creaminess. Whole milk gives richer, thicker yogurt. Use at least 3.25% milk fat for best results. Low-fat or skim milk makes thinner yogurt. Cream can be added to increase thickness. Choose milk with higher fat for creamier texture.
Straining Techniques
Straining removes excess whey to thicken yogurt. Use a cheesecloth or fine mesh strainer. Strain yogurt in the fridge for a few hours or overnight. The longer you strain, the thicker the yogurt becomes. Don’t press the yogurt; let it drain naturally for best texture.
Avoiding Common Mistakes
Do not rush cooling after cooking yogurt. Cool it gently at room temperature first. Avoid stirring yogurt while it sets; it breaks texture. Use fresh, live yogurt starter for better results. Clean utensils prevent bad bacteria from spoiling yogurt.

Credit: nowcookthis.com
Storing And Serving
Storing and serving Instant Pot vanilla yogurt properly keeps it fresh and tasty. Knowing how to store it right helps maintain its creamy texture and flavor. Serving it well makes each bite enjoyable and satisfying.
Refrigeration Guidelines
Store the vanilla yogurt in a clean, airtight container. Keep it in the refrigerator at or below 40°F (4°C). Avoid leaving yogurt out at room temperature for more than two hours. Always use a clean spoon to scoop yogurt to prevent contamination.
Shelf Life
Instant Pot vanilla yogurt lasts about 1 to 2 weeks in the fridge. Check for any sour smell or mold before eating. Fresh yogurt tastes smooth and has a mild vanilla scent. Discard yogurt if it develops an off smell or changes color.
Serving Suggestions
Enjoy vanilla yogurt plain or with fresh fruits like berries or banana. Add a drizzle of honey or maple syrup for extra sweetness. Sprinkle granola or nuts for a crunchy texture. Use it as a topping for pancakes or waffles. Mix it into smoothies for a creamy boost.
Troubleshooting Common Issues
Making vanilla yogurt in an Instant Pot is simple, but some issues may arise. Understanding common problems helps fix them fast. This guide covers easy fixes for yogurt not setting, grainy texture, and sour taste.
Yogurt Not Setting
The yogurt may stay liquid if the temperature is off. The Instant Pot must be at 110°F to 115°F for good bacteria growth. Use fresh starter culture for best results. Avoid moving the pot during incubation. Let it sit undisturbed for 8 to 12 hours. A longer time can help set the yogurt better.
Grainy Texture
Grainy yogurt feels rough and uneven. It happens when milk proteins separate too much. Use whole milk for creamier yogurt. Heat milk slowly before cooling it to 110°F. Stir gently during incubation to avoid breaking the texture. Cooling yogurt quickly in the fridge also helps smooth it out.
Sour Taste Fixes
Sour yogurt means it fermented too long or at too high a temperature. Try shortening the incubation time to 6 to 8 hours. Check the temperature; keep it steady between 110°F and 115°F. Using a fresh starter keeps the taste mild. Sweeten yogurt after making it, not before. This way, the flavor stays balanced.

Credit: stephanieleenutrition.com
Credit: athomeontheprairie.com
Frequently Asked Questions
How Long Does Instant Pot Vanilla Yogurt Take?
Instant Pot vanilla yogurt typically takes 8 to 12 hours to ferment. The time varies based on temperature and desired tartness. Longer fermentation results in tangier yogurt. Using the “Yogurt” function simplifies timing and maintains consistent heat for perfect results.
Can I Use Non-dairy Milk For Instant Pot Yogurt?
Yes, you can use non-dairy milk like almond or coconut. However, thickening agents may be needed for creamy texture. Non-dairy yogurts may require specific starter cultures. Experimenting ensures the best flavor and consistency for your Instant Pot vanilla yogurt.
What Type Of Starter Is Best For Yogurt?
Use plain, live-culture yogurt as a starter for best results. It contains active bacteria needed for fermentation. Avoid flavored or sweetened yogurts to keep taste pure. Store-bought or homemade starters both work well in Instant Pot vanilla yogurt recipes.
How Do I Store Instant Pot Vanilla Yogurt?
Store yogurt in an airtight container in the refrigerator. It stays fresh for up to 1-2 weeks. Avoid cross-contamination by using clean utensils. Proper storage maintains flavor, texture, and safety of your homemade vanilla yogurt.
Conclusion
Making vanilla yogurt in an Instant Pot is simple and fun. You control the ingredients and make it fresh at home. The creamy texture and sweet vanilla flavor please many tastes. It saves money and reduces waste from store-bought yogurt.
Try different milk types or add fruit for variety. Enjoy a healthy snack anytime without extra effort. This easy recipe fits well in busy daily routines. Give it a try and taste the difference yourself.