Last Updated on May 20, 2026
Bread and butter are a classic duo. They create comforting aromas and delicious flavors.
Making bread with butter adds richness and softness. It’s a delightful twist on traditional recipes. Imagine warm, buttery bread straight from your oven. It’s perfect for breakfast or a cozy snack. This recipe brings joy to your kitchen and taste buds.
Baking bread can seem daunting, but it doesn’t have to be. With simple ingredients and steps, anyone can bake this at home. Butter not only enhances taste but also texture. It makes the bread moist and tender. Ready to fill your home with the smell of fresh bread? Let’s explore how butter transforms a simple loaf into something extraordinary.
Ingredients For Butter Bread
Creating delicious butter bread at home starts with the right ingredients. Understanding what you need is key to baking success. Below, we break down the essential components and optional add-ins for your perfect loaf.
Essential Components
These ingredients are must-haves for any butter bread recipe. They ensure your bread turns out soft, flavorful, and golden brown.
- Flour: All-purpose flour works well. It gives the bread structure.
- Butter: Unsalted butter is best. It adds rich flavor and moisture.
- Sugar: Adds a touch of sweetness. Helps with browning.
- Yeast: Active dry yeast makes the bread rise. Essential for a fluffy texture.
- Salt: Enhances flavor. Balances sweetness and richness.
- Milk: Whole milk works best. Adds moisture and richness.
- Eggs: Bind the ingredients together. Add moisture and richness.
Optional Add-ins
These add-ins can enhance your butter bread. They bring extra flavor and texture. Feel free to experiment with your favorites.
- Herbs: Fresh or dried. Adds a savory twist.
- Cheese: Grated cheese. Adds richness and a savory note.
- Garlic: Minced garlic. Adds a bold flavor.
- Honey: A natural sweetener. Adds a unique sweetness.
- Nuts: Chopped nuts. Adds crunch and flavor.
- Seeds: Sunflower or sesame seeds. Add texture and a nutty flavor.
Credit: www.bvintagestyle.com
Preparing The Dough
Preparing the dough is a crucial step in making bread. The process determines the texture and flavor of your loaf. Using butter in your dough can add richness and a tender crumb. Let’s explore the techniques that will help you make the perfect dough.
Mixing Techniques
First, gather all your ingredients. Combine flour, yeast, sugar, and salt in a large bowl. Mix them well to ensure even distribution. In another bowl, melt the butter until it’s liquid but not hot. Add the melted butter to the dry ingredients. Slowly pour in warm water or milk. Stir continuously as you add the liquid. This helps form a cohesive dough. Use a wooden spoon or your hands to mix thoroughly. Stop mixing when the dough comes together and pulls away from the sides of the bowl.
Kneading Tips
Flour a clean surface to prevent sticking. Turn the dough out onto this surface. Start kneading by folding the dough in half. Push it away from you with the heel of your hand. Turn the dough a quarter turn and repeat. Continue this process for about 10 minutes. Well-kneaded dough should be smooth and elastic. If the dough is too sticky, add a little more flour. If it’s too dry, add a few drops of water. Remember, practice makes perfect. Your dough will improve with experience.
First Dough Rise
Butter adds rich flavor to bread dough. Allow the dough to rise until it doubles in size. This first rise helps develop texture and taste.
The first dough rise is a crucial step in making bread with butter. This stage allows the yeast to work its magic, creating a soft, fluffy texture. Getting it right can make all the difference in the final product.Ideal Conditions
To achieve the best rise, consider your environment. A warm, draft-free area is ideal for the dough to expand. Aim for a temperature around 75°F (24°C). You might be surprised how a warm kitchen can speed up the process. If it’s too cold, your dough might not rise as expected. A simple trick is to place the dough in an oven with the light turned on for gentle warmth.Time Management
How long should the first rise take? Typically, 1 to 2 hours is sufficient. However, the actual time may vary depending on the room temperature and yeast activity. Set a timer to remind yourself, but also keep an eye on the dough. It should double in size, which is a better indicator than time alone. Have you ever been impatient and rushed this step? If so, you might have ended up with dense bread. Give it time; your patience will be rewarded with a perfect loaf. By understanding these ideal conditions and managing your time effectively, you’ll set the stage for a successful baking experience. Do you have any tips for the perfect dough rise? Share them in the comments!
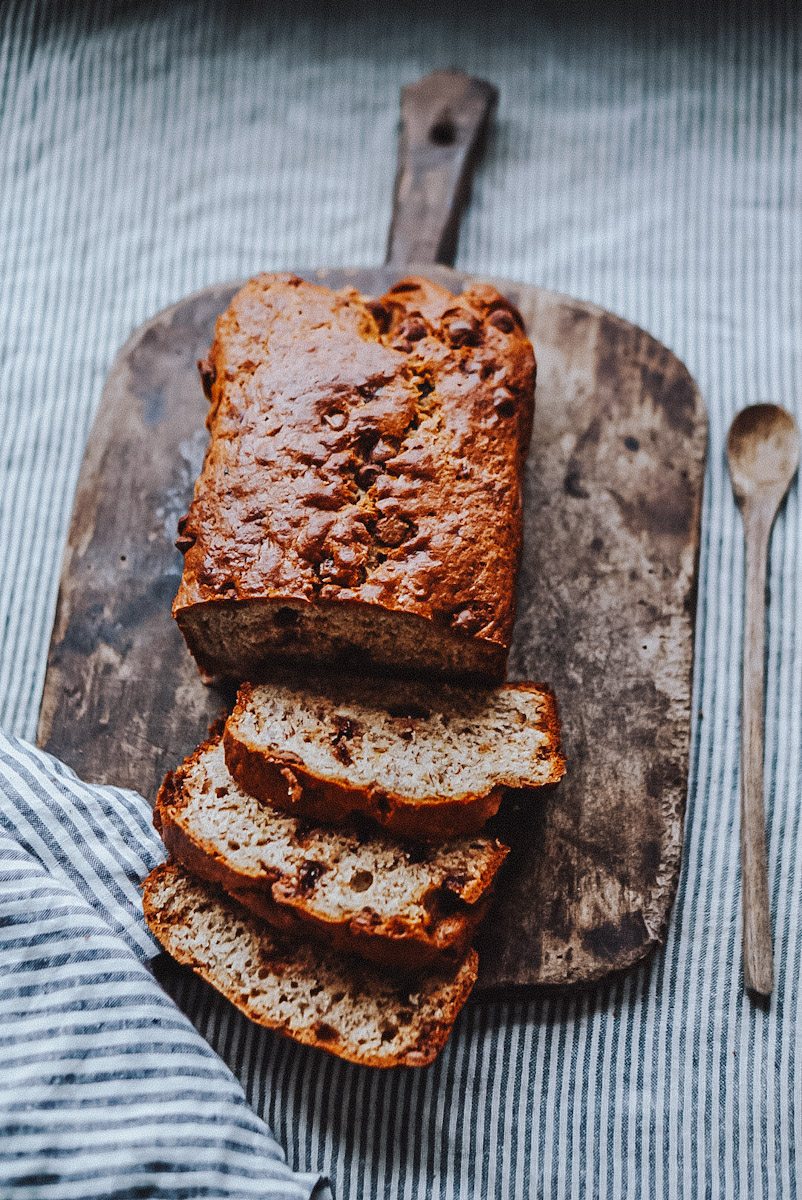
Credit: 30seconds.com
Shaping The Loaf
Butter adds richness and flavor to homemade bread. Shaping the loaf carefully ensures even baking and a perfect crust. The dough becomes soft and pliable, making it easy to mold into a beautiful loaf.
Shaping the loaf is a crucial step in baking bread that directly impacts the texture and appearance of your final product. This is the moment when you transition from a lump of dough to a beautifully crafted loaf. It’s an opportunity to express creativity and technique, turning your baking session into a satisfying experience. Have you ever found yourself struggling with how to shape your bread effectively? Let’s dive into some practical insights that will help you master the art of shaping your loaf.Forming Techniques
Different techniques can create varied textures and flavors in your bread. A popular method is the classic round shape, which is great for rustic, artisan-style breads. To achieve this, you can gently stretch the dough outwards and then tuck it back into the center, repeating until you form a smooth ball. If you prefer a more elongated loaf, try the batard shape. This involves folding the dough in half, sealing the edge, and then rolling it out gently to the desired length. The batard is perfect for sandwiches or crostinis. For an engaging twist, you might explore braiding your dough. It adds a decorative touch and is surprisingly simple once you get the hang of it. What shape will you choose to express your baking flair?Using A Loaf Pan
A loaf pan is a fantastic tool for achieving a consistent shape and size, especially if you’re aiming for a classic sandwich loaf. Begin by flattening your dough into a rectangle, ensuring it’s slightly shorter than the length of your pan. This helps in achieving even rising and baking. Roll the dough tightly from one short end to the other, pinching the seam to seal it. Place it seam-side down in the greased loaf pan. This method ensures a uniform shape and helps the bread rise evenly. Using a loaf pan can also give you a perfectly golden crust. It’s an excellent choice if you’re looking for convenience without compromising on quality. Have you tried using different pans to see how they affect your bread’s outcome? Shaping your loaf is more than just a step in the recipe—it’s a chance to imprint your signature on your bake. By experimenting with various techniques and tools, you can elevate your bread-making skills to new heights. So, which method will you experiment with next time?Second Dough Rise
Let the dough rest for a second rise to achieve a soft, fluffy texture. The butter adds richness and flavor to the bread.
The second dough rise is a crucial step in bread making. This phase allows the dough to develop flavor, texture, and volume. It can be the difference between a dense loaf and a fluffy, airy masterpiece. As you prepare to let your dough rise again, understanding the nuances can elevate your baking skills.Achieving Perfect Height
The goal is to have your dough double in size. This ensures the bread is light and tender. To achieve this, place your dough in a warm, draft-free area. A tip is to use your oven with the light on, as it provides a consistent environment. Timing is key. Typically, the second rise takes about 30 minutes to 1 hour. But it can vary depending on the conditions. Keep an eye on the dough, not the clock. You want it to rise just enough without going overboard. When the dough has reached the desired height, it’s ready to bake. This might be a good time to ask yourself: Is my dough rising as expected? If not, adjust the temperature or location to encourage growth.Handling Overproofing
Overproofing can lead to a deflated loaf with less flavor. It’s crucial to prevent this by monitoring the dough closely. Press a finger into the dough; if it springs back slowly, it’s ready. If it doesn’t spring back, it may be overproofed. You can salvage overproofed dough by gently reshaping it and allowing it a short rise again. But be cautious—overproofing twice can be tricky. Consider setting a timer as a reminder. This prevents distractions from leading to an overproofed loaf. Have you ever found your bread flat and disappointing? Then managing the second rise more closely can make all the difference. Embrace the journey of mastering the second dough rise. With practice, you’ll achieve that perfect balance every time, creating bread that delights the senses and warms the heart.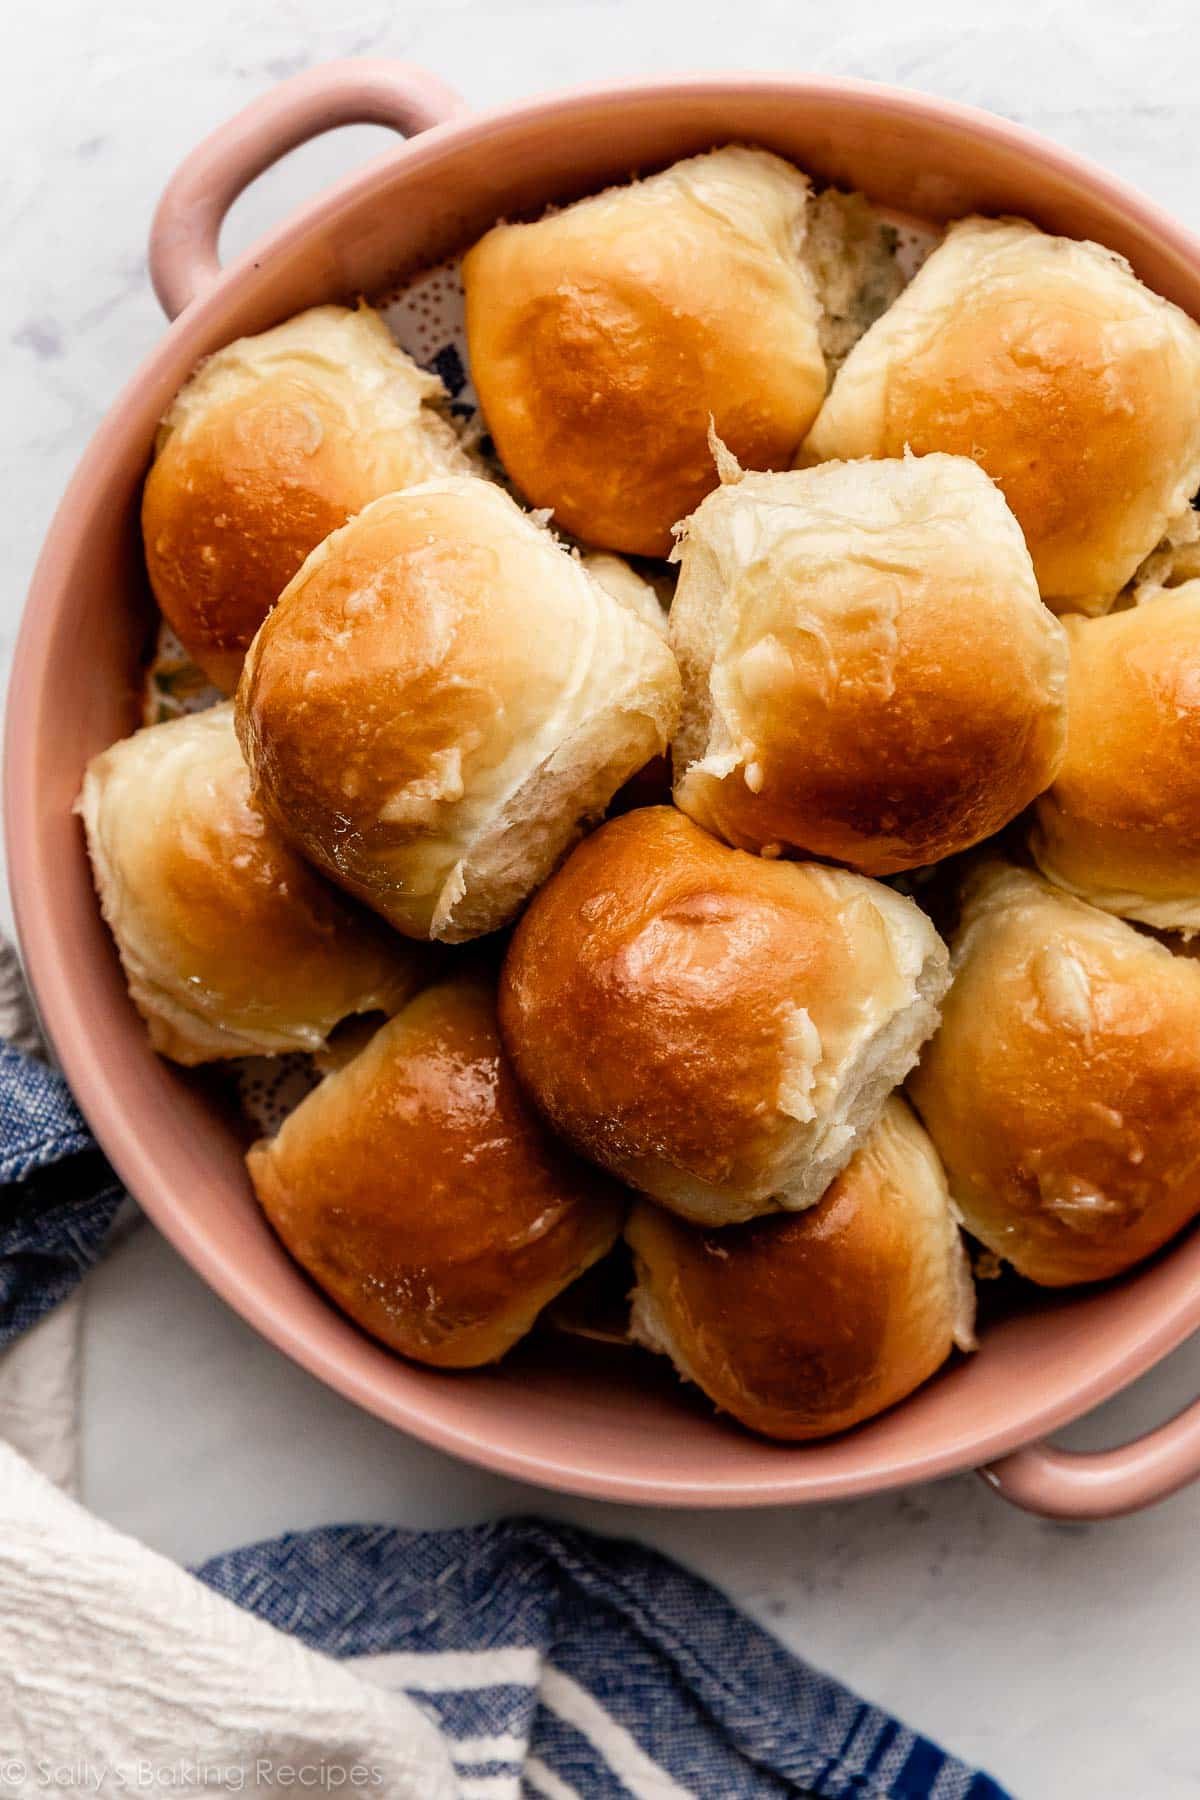
Credit: sallysbakingaddiction.com
Baking The Bread
Butter adds richness and flavor to bread recipes. Mixing butter into the dough creates a soft, moist texture. Enjoy homemade bread with a buttery twist.
Baking bread using butter can transform your kitchen into a cozy haven of delightful aromas. The magic truly happens in the oven where your dough turns into a golden loaf. Understanding the nuances of baking can help you achieve that perfect bread. Whether you’re a seasoned baker or trying your hand for the first time, paying attention to the details can make all the difference. Let’s dive into the specifics of this crucial step. ###Oven Settings
Your oven settings can greatly influence the texture and flavor of your bread. Preheat your oven to 375°F (190°C) for a consistent baking environment. This temperature works well for achieving a crispy crust while keeping the inside tender and soft. A common trick is to place a shallow pan of water on the oven’s bottom rack. This creates steam, giving your bread a beautiful crust. Have you ever thought about how a small tweak like this could enhance your bread’s texture? ###Monitoring Progress
Once your bread is in the oven, resist the temptation to open the door frequently. Each time you do, you let out precious heat and steam. Set a timer and check through the oven window if possible. Use the golden brown color as your visual cue. When the top of your bread turns a rich, inviting shade, it’s time to check if it’s done. Tap the bottom of the loaf lightly—it should sound hollow. This simple test can save you from underbaking your bread. Are you ready to impress your family with a perfectly baked loaf? Remember, every oven is a bit different. You may need to adjust based on your experiences. Have you ever found that your oven runs a bit hotter or cooler than expected? Adjusting your settings accordingly will help you achieve consistent results. Embrace these steps, and you’ll find the art of baking bread with butter both rewarding and delicious.Cooling And Slicing
Baking bread fills your home with a delightful aroma. But cooling and slicing are crucial steps. They ensure your bread tastes perfect and looks amazing. Proper cooling enhances flavor and texture. Correct slicing gives neat, even pieces. Let’s explore these important steps in detail.
Cooling Recommendations
Place your freshly baked bread on a wire rack. This allows air to circulate. It prevents the bottom from becoming soggy. Let it cool for at least one hour. Patience pays off with better flavor. Cutting too soon ruins the texture. Warm bread might seem tempting. But waiting ensures a perfect slice.
Slicing Techniques
Use a serrated knife for best results. A smooth knife squashes the bread. Gently saw back and forth. Avoid pressing down hard. Start from the middle for even slices. Move to the edges with care. For sandwiches, aim for medium-thick slices. For toast, thinner slices work better. Practice makes perfect with slicing.
Serving Suggestions
Spread warm butter on freshly baked bread for a simple delight. Pair it with soups or salads for a cozy meal. Top slices with honey or jam for a sweet touch.
If you’ve just baked a delightful loaf of bread using butter, you might be wondering how to best enjoy it. Freshly baked bread is a versatile staple that can elevate any meal or snack. Let’s explore some practical serving suggestions that will turn your butter bread into a memorable experience.Pairing With Meals
Butter bread pairs beautifully with a variety of meals. Imagine serving it alongside a hearty stew or soup. The bread’s rich flavor complements the warm, comforting dishes perfectly. If you’re hosting a brunch, try adding a touch of honey or jam for a sweet twist. Your guests will appreciate the contrast between the buttery taste and the sweet spread. You can even serve it with a fresh salad to create a balanced meal. Consider making sandwiches with your butter bread. Layer turkey, cheese, and avocado for a delicious lunch. The creamy butter enhances the flavors, making each bite a delight.Storage Tips
Proper storage ensures your bread stays fresh longer. Wrap it in a clean kitchen towel and store in a bread box or airtight container. This keeps it soft and prevents it from drying out. Avoid refrigerating your bread. The cold temperature can make it hard and less flavorful. Instead, keep it at room temperature, away from direct sunlight. If you have extra bread, slice it and store in the freezer. This way, you can enjoy your butter bread anytime. Just thaw and warm it up when you’re ready to indulge. — Serving your butter bread is more than just placing it on the table. What creative ideas do you have for enjoying your fresh loaf?Frequently Asked Questions
Can You Use Butter To Make Bread?
Yes, you can use butter to make bread. It adds richness and improves the bread’s texture.
What Is The Secret To Moist Bread?
The secret to moist bread lies in using the right balance of ingredients. Add fats like butter or oil. Use milk instead of water for added richness. Avoid over-mixing the dough. Ensure proper fermentation time. Bake at the right temperature to prevent drying out.
What Does Adding Egg To Bread Dough Do?
Eggs enrich bread dough, making it softer and more flavorful. They enhance texture, moisture, and color.
What Is Buttercrust Bread?
Buttercrust bread features a crispy, buttery crust with a soft, fluffy interior. Bakers achieve this texture by incorporating butter into the dough and brushing it on top. This bread is perfect for sandwiches or as a side with soups. Its rich flavor and texture make it a popular choice.
Conclusion
Baking bread with butter creates a rich, tasty treat. The butter adds a soft texture and a delightful flavor. This simple recipe can become a family favorite. Perfect for sandwiches or just a snack. Try it today and enjoy homemade bread.
You won’t regret it. Happy baking!