Last Updated on May 22, 2026
Making pie crust by hand is simple and rewarding. You don’t need fancy tools, just basic ingredients and a little patience.
Pie crust is the foundation of any great pie, holding together flavors and textures. Learning to make it by hand connects you to the art of baking. It’s about feeling the dough, understanding its texture, and knowing when it’s just right.
This process transforms simple ingredients into a flaky masterpiece. You’ll gain confidence with each attempt, mastering a skill passed down through generations. Whether for a fruit pie or savory quiche, this easy recipe ensures a delicious crust every time. Dive into the world of homemade pie crust and discover the joy of baking with your own hands.
Introduction To Pie Crust
Making a pie crust by hand can seem like a daunting task, but it’s actually a rewarding experience. With just a few basic ingredients and some patience, you can create a flaky, buttery crust that elevates any pie to perfection. Imagine the satisfaction of pulling a homemade pie from the oven, knowing you crafted it from scratch. It’s a simple pleasure that anyone can achieve with the right guidance.
Importance Of A Good Crust
The crust is more than just a vessel for the filling; it’s the foundation of the pie. A well-made crust adds texture and flavor, enhancing the pie’s overall experience. It’s what separates an average pie from an unforgettable one.
Think about your favorite pie moment. Chances are, the crust played a significant role. A good pie crust should be flaky and tender, complementing the filling without overpowering it. Whether you’re making a classic apple pie or a savory quiche, the crust is crucial.
Common Challenges
Many people face challenges when making pie crust by hand. One common issue is overworking the dough. This can lead to a tough crust that’s hard to enjoy. The key is to mix the ingredients just until they come together, keeping the dough light and airy.
Another challenge is achieving the right consistency. The dough should be firm enough to hold its shape but soft enough to roll out smoothly. It might take a few tries to get it right, but don’t let that discourage you. Each attempt is a learning opportunity.
Finally, maintaining the right temperature is crucial. Warm ingredients can cause the butter to melt, leading to a greasy crust. Keep your ingredients cold to ensure a flaky, delicious result.
Have you ever faced any of these challenges? Remember, even experienced bakers encounter these hurdles. What matters is how you tackle them and the joy of creating something delicious from scratch.
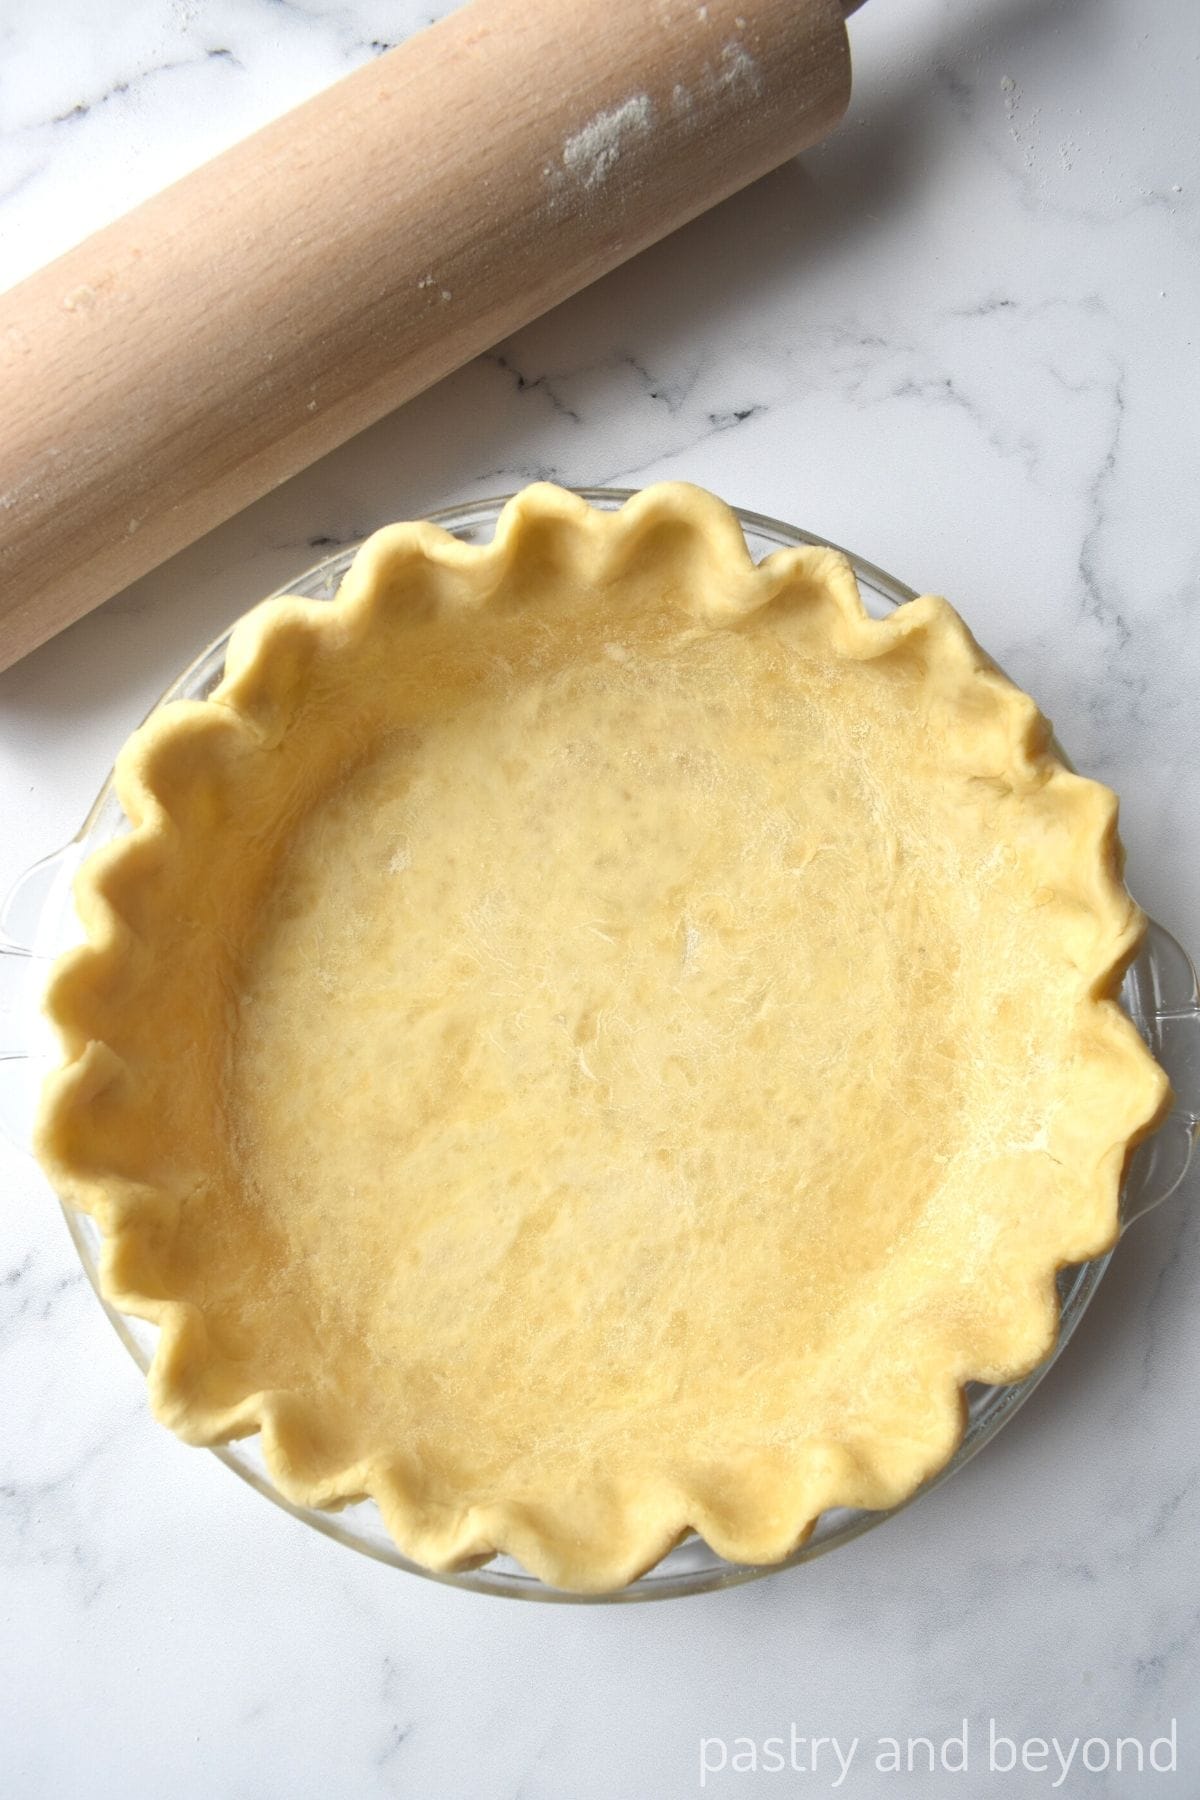
Credit: pastryandbeyond.com
Ingredients Needed
For a simple homemade pie crust, gather flour, butter, salt, and ice water. These ingredients create a flaky, tender base. Ensure butter is cold for a perfect texture. Mix them by hand for a rustic touch.
Creating a pie crust by hand can be a rewarding experience, and it all begins with the right ingredients. You might think it’s just flour and butter, but there’s more to it. Picking the right components can elevate your pie from good to great. Let’s dive into what you need for the perfect pie crust.Basic Ingredients List
To start, you need a few simple ingredients: – Flour: All-purpose flour works best. It gives the crust the right balance of structure and flakiness. – Butter: Unsalted butter is ideal. It allows you to control the salt content in your crust. – Salt: A pinch of salt enhances the flavor. – Water: Cold water is crucial. It helps the butter stay solid, ensuring a flaky texture. Each ingredient plays a unique role. Imagine biting into a pie with a perfectly flaky crust. That’s the magic of using the right ingredients.Choosing Quality Ingredients
Quality matters in pie making. Have you ever wondered why some pies taste better than others? Often, it’s the quality of the ingredients. Choosing fresh, high-quality butter can make a difference. It adds a rich flavor that can’t be matched by substitutes. Consider organic flour for its purity and fewer processing chemicals. Cold water is another key. You might be tempted to use tap water, but filtered water can ensure no minerals alter the taste. Does the idea of experimenting with different brands excite you? It can lead to discovering your perfect pie crust recipe. What if choosing better ingredients could transform your baking experience entirely? By focusing on quality, your pie crust can become the star of your dessert table. You don’t need to be a professional chef to make this happen. Just pay attention to what goes into your mixing bowl. Are you ready to taste the difference? Grab those quality ingredients and start creating a pie crust that makes every bite memorable.Essential Tools
Creating a pie crust by hand is a rewarding experience. The right tools make the process easier and more enjoyable. You don’t need fancy gadgets for a flaky, delicious crust. With a few essential tools, you can achieve perfect results every time.
Must-have Kitchen Tools
A mixing bowl is crucial for combining ingredients. Choose a medium-sized one for easy handling. A pastry cutter is key for cutting butter into flour. This tool helps create a flaky texture. If you don’t have a pastry cutter, two knives work too. A rolling pin is essential to roll out the dough. Opt for a sturdy wooden one. Its weight helps flatten the dough evenly. Measuring cups and spoons ensure accurate ingredient quantities. Precision leads to better results.
Optional Equipment
A silicone baking mat can prevent sticking. It makes cleanup easier too. A pie weight helps maintain crust shape while baking. Use dried beans if you don’t have one. A bench scraper is handy for cutting dough and cleaning surfaces. It speeds up the process. A dough blender can mix ingredients quickly. It’s not necessary but can be useful. A pastry board provides a dedicated rolling surface. This tool offers convenience and cleanliness.
Step-by-step Process
Creating a pie crust by hand is simple and satisfying. Mix flour, salt, and butter until crumbly. Add cold water gradually, blending until dough forms. Roll out dough, ready for your favorite pie filling.
Creating the perfect pie crust by hand can be a rewarding experience. It connects you to the tradition of baking, allowing you to craft something delicious with just a few simple ingredients. Whether you’re a novice baker or a seasoned pro, understanding the step-by-step process can enhance your pie-making skills. Ready to get your hands floury and create a masterpiece? ###Preparing The Ingredients
Before you start mixing, gather all your ingredients. You’ll need flour, salt, butter, and cold water. Ensure your butter is chilled, as this helps create a flaky crust. Measure your ingredients carefully. Precision can make the difference between a tender crust and a tough one. Consider using a kitchen scale for accuracy. It’s a small step that can yield big results. ###Mixing By Hand
Start by adding the flour and salt to a large mixing bowl. Stir them together using a fork or your fingers. Cut the cold butter into small cubes. Add these cubes to the flour mixture, lightly tossing them to coat. Use your fingertips to rub the butter into the flour. Aim for a texture that resembles coarse crumbs with some pea-sized pieces of butter remaining. This step is crucial for flakiness. Gradually add cold water, a tablespoon at a time. Mix gently until the dough just comes together. Avoid overmixing to keep the crust tender. Once the dough holds together when squeezed, gather it into a ball. Flatten it into a disk, wrap it in plastic, and let it rest in the fridge for at least 30 minutes. Have you ever noticed how a little patience can enhance your baking? Letting the dough rest allows the flour to fully hydrate, making it easier to roll out later. Taking the time to mix by hand lets you feel the dough’s texture and adjust as needed. Are you ready to make pie crusts that impress every time? Give it a try and enjoy the satisfaction of a homemade creation.Techniques For Success
Creating a pie crust by hand can be rewarding. The key lies in mastering essential techniques. These methods ensure your crust turns out flaky and flavorful. Focus on achieving the right texture and avoiding common pitfalls.
Achieving Perfect Texture
Texture makes or breaks a pie crust. Start by using cold butter. This helps create layers. Cut butter into small cubes. Mix it with flour gently. Avoid overworking the dough. Overworking makes it tough. Aim for a coarse crumb mixture. Add ice water gradually. Use just enough to bring the dough together. The dough should be slightly sticky. Chill the dough before rolling. This relaxes the gluten. It also firms up the butter. Roll out the dough evenly. Use light pressure to prevent tearing.
Avoiding Common Mistakes
Common mistakes can ruin your pie crust. Too much water makes the dough sticky. Measure carefully. Overmixing leads to tough crust. Mix until combined. Not chilling the dough results in shrinkage. Always refrigerate before baking. Rolling the dough too thin causes it to break. Aim for a quarter-inch thickness. Forgetting to prick the crust leads to bubbles. Use a fork to poke small holes. These steps ensure your crust is perfect every time.
Chilling And Resting
Creating a perfect pie crust involves more than mixing ingredients. The chilling and resting process is crucial. It helps achieve a flaky texture. Chilling the dough relaxes the gluten, making it easier to roll. Resting allows flavors to meld. A well-rested dough results in a tender and delicious crust.
Importance Of Chilling
Chilling the dough is essential. It keeps the butter cold. Cold butter creates flaky layers. A warm dough melts the butter. This leads to a tough crust. Chilling helps maintain the shape. It prevents shrinking during baking. Ensures your pie looks appealing. Helps achieve that golden finish.
Timing Tips
Timing is key to chilling. Chill the dough for at least 30 minutes. Longer chilling enhances flavor. Overnight rest is ideal. Plan ahead for best results. A well-chilled dough is easier to handle. It rolls smoothly without sticking. Ensure even thickness for consistent baking. Don’t rush the chilling process.
Rolling Out The Dough
Creating a pie crust by hand offers a simple and rewarding experience. Mixing flour, butter, and water brings a flaky, delicious foundation for your pies. Enjoy the process of rolling out the dough for a perfect homemade touch.
Rolling out the dough for a pie crust might seem daunting if you’re doing it by hand, but with some patience and a little practice, it can be a wonderfully satisfying experience. Imagine the feeling of transforming a simple mix of flour, fat, and water into a perfectly thin, even crust that will soon cradle your favorite pie filling. Whether you’re preparing a classic apple pie or a savory quiche, mastering the art of rolling out dough by hand is a key step in achieving baking success.Proper Rolling Techniques
Begin with a lightly floured surface to prevent the dough from sticking. Use a rolling pin to gently press the dough into a flat disc before rolling. Make sure your rolling pin is also lightly floured to keep things smooth. Roll the dough outward from the center, applying even pressure. Rotate the dough a quarter turn after each roll to maintain an even thickness and shape. Aim for a 12-inch diameter circle for most pie plates. If the dough starts to stick, sprinkle a little more flour on the surface and the rolling pin. But be careful not to add too much, as excess flour can make the crust tough. How does the dough feel under your hands? Adjust your technique based on its response.Transferring To Pie Plate
Once rolled to the desired size, it’s time to transfer the dough to the pie plate. Fold the dough in half, then in half again, to form a quarter-circle. This makes it easier to lift without tearing. Carefully place the folded dough into the pie plate, centering it. Unfold the dough gently, letting it drape over the edges. Use your fingers to press the dough into the corners and sides of the plate. Trim any excess dough hanging over the edges with a sharp knife. Leave about an inch for crimping or fluting if desired. Have you tried different crimping styles before? Experimenting with different edges can add a personal touch to your pie. Remember, practice makes perfect. Each pie is an opportunity to refine your technique and create something delicious. Embrace the process, and you’ll find that rolling out dough by hand is not just a task, but an enjoyable part of baking.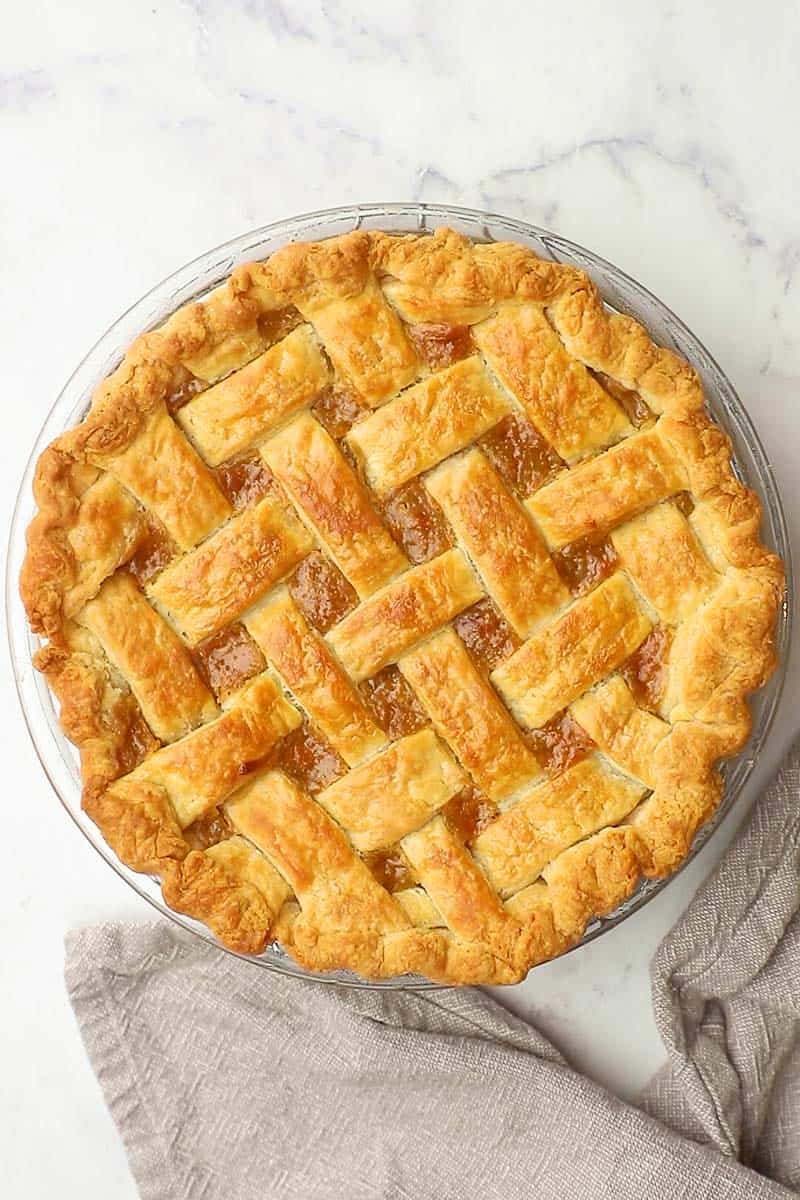
Credit: www.ourhappymess.com
Baking The Crust
Crafting a pie crust by hand is simple and rewarding. Mix flour, butter, and a pinch of salt. Add cold water gradually until dough forms.
Baking the crust is a crucial step in crafting a perfect pie. Achieving the right texture and flavor sets the stage for a delicious pie experience. With the correct method, a homemade pie crust can be both flaky and tender. Let’s dive into how to bake the crust perfectly.Pre-baking Methods
Pre-baking, or blind baking, is important for certain pie types. It ensures the crust is fully cooked and crisp. Start by rolling out your dough to fit the pie pan. Place the dough in the pan, pressing it gently into the corners. Trim any excess dough from the edges. Use a fork to poke holes all over the crust. This prevents air pockets from forming during baking. Cover the crust with parchment paper, then fill with pie weights or dry beans. These weights keep the crust flat and prevent shrinking. Pre-bake the crust to set the shape and texture. This step is crucial for pies with uncooked fillings.Baking Time And Temperature
Set your oven to 400°F (200°C). This temperature ensures a crisp and golden crust. For a partially baked crust, bake for 10-15 minutes. If you need a fully baked crust, extend the time to 20-25 minutes. Keep an eye on the crust’s color. It should be golden and firm to touch. Remove the pie weights halfway through baking for even cooking. This allows the bottom to brown nicely. Check the edges; they should be slightly browned. Adjust the time if needed, depending on your oven’s performance.Troubleshooting Tips
Struggling with pie crusts? Ensure butter stays cold for a flaky texture. If dough crumbles, add a teaspoon of water. Avoid overworking to maintain tenderness.
When making pie crust by hand, issues may arise. Fear not, though. With a few tips, you can fix them easily. This section covers common problems. Plus, easy solutions to keep your pie crust perfect.Fixing Cracks And Tears
Cracks and tears can happen. Don’t worry. They’re simple to fix. First, dampen your fingers with water. Then, gently press the dough together. This seals the cracks. For larger tears, use dough scraps. Dampen the edge of the tear. Press the scrap over it. Smooth the surface with your fingers. This makes the crust even.Dealing With Overbaking
Overbaking makes crusts dry. They become hard, too. To prevent this, keep an eye on the oven. Use a timer. Check the crust’s color often. Light golden brown is perfect. If it starts to brown too much, cover the edges. Use aluminum foil or a crust shield. This protects the crust from heat.
Credit: natashaskitchen.com
Serving Suggestions
Pair the easy pie crust with sweet fillings like apple or cherry for a classic dessert. For savory options, try quiche or pot pies, enhancing flavors with herbs. Serve warm or chilled, depending on the filling, to delight your guests.
Serving a homemade pie crust can transform even the simplest meal into something extraordinary. Whether you’re hosting a dinner party or enjoying a quiet evening at home, how you serve your pie can make a big difference. Let’s dive into some delightful ways to present your pie and pair it with perfect fillings that will leave your taste buds dancing.Pairing With Fillings
Choosing the right filling for your pie crust can elevate its flavor immensely. A classic apple pie filling is always a crowd-pleaser. Its sweet and tart combination complements the buttery crust perfectly. For savory lovers, consider a chicken pot pie with creamy chicken and vegetable filling. The richness of the filling blends beautifully with the flaky texture of the crust. Think about seasonal ingredients. A summer berry pie or a winter squash tart can surprise and delight your guests with fresh flavors.Presentation Ideas
How you present your pie can make it even more inviting. Consider using a lattice top crust for a traditional, rustic look. The crisscross pattern is visually appealing and adds texture. Try personal-sized pies baked in ramekins for an elegant touch. These are perfect for individual servings and create a charming presentation. Add a scoop of vanilla ice cream or a dollop of whipped cream on top. This simple addition can make your pie look more enticing and add a creamy contrast to the crunchy crust. When serving, place the pie on a decorative platter. Adding a few sprigs of mint or a sprinkle of powdered sugar can add a professional touch to your presentation. How do you like to serve your pie crust creations? Engaging with your personal style can turn serving into an art form, making every bite a memorable experience.Frequently Asked Questions
How To Make Pie Dough By Hand For Beginners?
Mix flour, salt, and chilled butter by hand until crumbly. Add cold water gradually, forming a dough. Knead gently. Chill in the fridge for 30 minutes before rolling out. Keep the dough cold for flaky results. Use a light touch to avoid overworking.
Perfect for beginners!
What Is The Basic Formula For Making Pie Crust?
Combine 2 cups of flour, 1 cup of cold butter, and a pinch of salt. Add 6 tablespoons of cold water gradually. Mix until dough forms. Refrigerate for 30 minutes before rolling out. This creates a flaky, delicious pie crust perfect for various fillings.
How To Make Pie Dough With Butter And Flour?
Combine 1 cup flour and 1/2 cup cold butter. Mix until crumbly. Add 2-3 tablespoons ice water, stirring gently. Form a ball and chill for 30 minutes. Roll out to desired thickness. Use for your favorite pie recipe.
Is Pie Crust Better With Butter Or Crisco?
Butter creates a flaky, flavorful pie crust, while Crisco offers tenderness and stability. Personal preference dictates the choice. Both can be combined for balanced texture.
Conclusion
Crafting pie crust by hand is simple and rewarding. No special tools needed. Just flour, butter, salt, and water. Mix, roll, and shape. Feel the dough transform beneath your hands. Enjoy a homemade pie crust that’s flaky and delicious. Perfect for any filling you choose.
Impress your family and friends with your baking skills. Homemade always tastes better. Try this easy recipe today and experience the joy of baking from scratch. Your kitchen will smell amazing, and your taste buds will thank you. Happy baking!