Last Updated on December 14, 2025
If you’ve ever wanted a chopping board that’s sturdy, beautiful, and made just for you, making your own wooden chopping board is the perfect project. Imagine having a kitchen tool that not only feels great in your hands but also lasts for years.
You don’t need fancy tools or expert skills to create something special. In this guide, you’ll discover simple steps to turn raw wood into a chopping board you’ll be proud to use every day. Ready to transform your kitchen experience?
Keep reading, and you’ll be cutting like a pro in no time.

Credit: www.craftsy.com
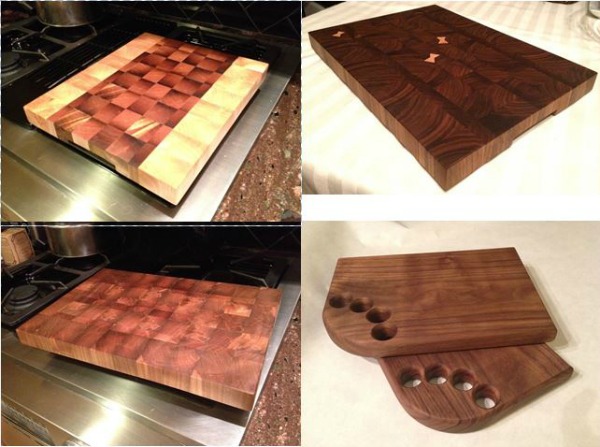
Choosing The Right Wood
Choosing the right wood is key to making a strong, beautiful chopping board. The wood must be hard enough to resist cuts and scratches. It also should be safe for food use and easy to clean. Different woods have different qualities. Knowing these helps you pick the best one.
Hardwood Vs Softwood
Hardwood comes from trees with broad leaves. It is usually denser and tougher. Softwood comes from trees with needles. It tends to be lighter and softer. Hardwoods last longer and resist knife marks. Softwoods can get damaged quickly. For chopping boards, hardwood is better.
Popular Wood Types For Boards
Maple is common for chopping boards. It is hard, smooth, and has a tight grain. Walnut is dark and strong. It looks great and wears well. Cherry wood has a warm color and stays durable. Bamboo is not a wood but a grass. It is hard and eco-friendly. Each type offers a unique look and feel.
Wood Safety Considerations
Wood must be safe for food contact. Avoid woods that release toxins or strong smells. Choose woods that resist bacteria growth. Clean wood boards well after use. Avoid soft woods that can trap food particles. Oil the board regularly to keep it sealed and safe.
Tools And Materials Needed
Before starting your wooden chopping board project, gather all necessary tools and materials. Proper preparation saves time and ensures better results. Using the right items helps you work safely and efficiently.
Essential Tools
You need a few basic tools for making a chopping board. A saw is important to cut the wood pieces. Use a sander or sandpaper to smooth the surface. Clamps hold the wood firmly while you work. A wood glue helps join the pieces together. A measuring tape and pencil keep your cuts accurate. A drill can help make holes if needed for handles.
Recommended Finishes
Finishes protect the wood and make your board safe for food. Food-safe mineral oil is a popular choice. Beeswax adds extra protection and a nice shine. Avoid finishes with chemicals that can harm health. Apply the finish with a clean cloth and let it soak in. Reapply regularly to keep the board in good shape.
Safety Gear
Safety is very important when working with wood. Wear safety glasses to protect your eyes from dust and splinters. Use a dust mask to avoid breathing wood particles. Gloves protect your hands from cuts and splinters. Hearing protection is useful if using loud power tools. Work in a clean, well-lit area to stay safe and focused.
Preparing The Wood
Preparing the wood is a key step in making a wooden chopping board. This stage ensures your board is strong, smooth, and safe to use. Taking time here helps avoid problems later. Follow each step carefully for the best results.
Cutting To Size
Start by choosing a good piece of hardwood. Measure the size you want for your board. Use a saw to cut the wood neatly. Make sure the edges are straight and even. Accurate cuts create a solid base for your board.
Sanding Techniques
Use sandpaper to smooth the wood surface. Begin with rough grit to remove large bumps. Move to finer grit for a soft, smooth finish. Sand all sides, including edges and corners. This step makes the board safe and nice to touch.
Removing Imperfections
Check the wood for cracks, knots, or holes. Fill small holes with wood filler and let dry. Sand the filled areas gently to blend in. Remove any rough spots that could hurt hands. Clean the surface to prepare for finishing touches.
Credit: www.homedepot.com
Assembling The Board
Assembling the wooden chopping board is a key step in the project. It shapes the board and affects its strength. Careful assembly ensures a long-lasting and safe board for kitchen use.
Joining Methods
Choose the right joining method for your wood pieces. Butt joints are simple and quick but less strong. For better strength, use finger joints or tongue and groove. Wood glue is essential for all joints. Apply it evenly for a firm bond.
Clamping Tips
Clamping holds the pieces together while glue dries. Use clamps that cover the entire length of the board. Avoid tight spots to prevent wood damage. Tighten clamps gradually and evenly. Remove excess glue before it dries to keep the board clean.
Ensuring Stability
Check the board for gaps or uneven edges after clamping. Sand the surface smooth for a perfect finish. Let the glue cure fully before using the board. Proper drying time makes the board stable and durable.
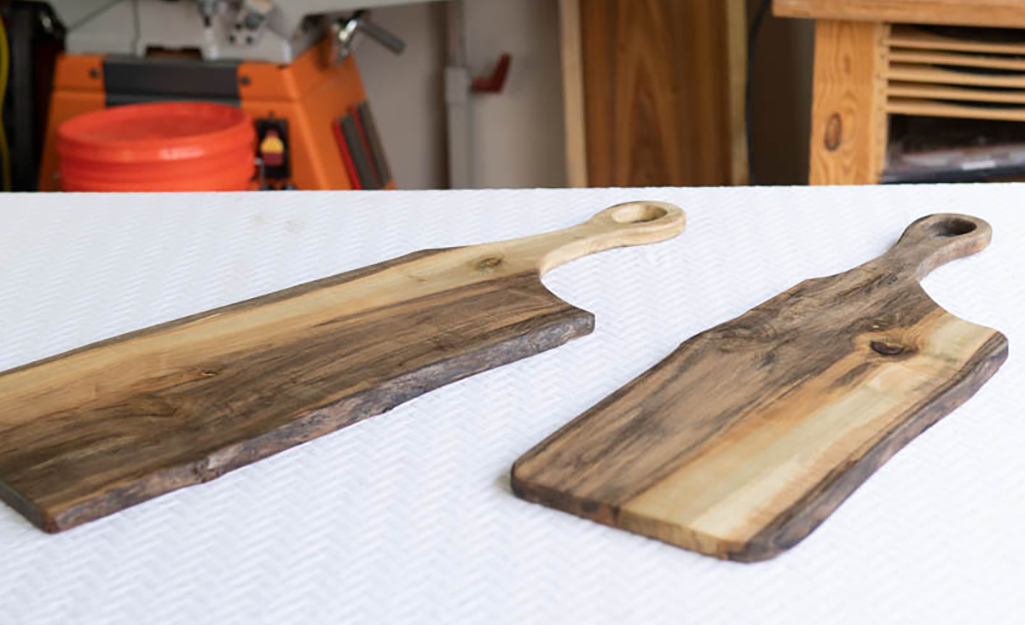
Shaping And Smoothing
Shaping and smoothing are key steps in making a wooden chopping board. This process helps create a safe and comfortable surface for cutting. Proper shaping removes sharp edges that could cause injury. Smoothing prepares the board for finishing, making it look polished and feel good to touch.
Rounding Edges
Start by rounding the edges of the board. Use a sanding block or a router for this step. Rounded edges prevent splinters and give a soft look to the board. Move the tool evenly along each edge. Check for sharp corners and smooth them out carefully.
Final Sanding Steps
Use fine-grit sandpaper to finish sanding the board. Sand in the direction of the wood grain. This technique avoids scratches and uneven surfaces. Wipe the board with a damp cloth to remove dust. Repeat sanding if you find rough spots. The goal is a smooth, clean surface ready for finishing.
Surface Finishing
Apply a food-safe finish to protect the wood. Use mineral oil or beeswax for a natural look. Spread the finish evenly with a clean cloth. Let the finish soak into the wood for several hours. Buff the board to a soft shine after drying. This step makes the board durable and safe for daily use.
Credit: www.craftsy.com
Applying Finish And Seal
Applying finish and seal is an important step in making a wooden chopping board. It protects the wood from water and stains. It also keeps the board safe for food use. A good finish makes your board last longer and look better. Choose the right finish and apply it carefully for the best results.
Choosing Food-safe Oils
Use oils that are safe for contact with food. Mineral oil is a popular choice. It does not go bad or smell. Beeswax mixed with mineral oil adds extra protection. Avoid oils that can spoil, like vegetable or olive oils. These can turn rancid and smell bad. Food-safe oils keep your board safe and clean.
Application Process
Start with a clean, dry board. Use a clean cloth or brush for applying oil. Rub the oil into the wood in small circles. Cover the entire surface, including edges. Let the oil soak into the wood for a few minutes. Wipe off any extra oil with a dry cloth. Repeat this process for best protection.
Drying And Curing Times
Allow the oil to dry fully before use. This can take from 4 to 24 hours. Keep the board in a warm, dry place. After the first coat dries, apply more coats. Usually, 2 to 3 coats are enough. Let the board cure for a few days before heavy use. This ensures the finish is strong and safe.
Maintaining Your Chopping Board
Maintaining your wooden chopping board keeps it safe and long-lasting. Proper care stops cracks, stains, and bad smells. It also keeps the wood strong and smooth. Simple daily habits make a big difference. Follow these steps for a fresh and healthy board.
Cleaning Tips
Wash your board with warm water and mild soap. Use a soft sponge to clean the surface gently. Avoid soaking the board in water to stop warping. Dry it quickly with a clean towel. Let it air dry standing up for good airflow. Never put the board in the dishwasher. The heat and water damage the wood.
Re-oiling Schedule
Oil your board to keep the wood from drying out. Use food-safe mineral oil or beeswax. Apply oil once a month or when the board looks dry. Rub oil in with a clean cloth, covering all surfaces. Let the oil soak in for a few hours. Wipe off any extra oil before using the board. This helps the wood stay strong and water-resistant.
Avoiding Damage
Cut on both sides to spread wear evenly. Avoid using knives with very sharp or damaged blades. Do not use the board as a hot pot holder. Keep it away from direct sunlight to stop cracking. Use a separate board for raw meat to prevent germs. Fix small cracks with wood glue or sandpaper to stop them growing.
Frequently Asked Questions
What Materials Are Needed For Making A Wooden Chopping Board?
You need hardwood like maple or walnut, wood glue, clamps, sandpaper, mineral oil, and food-safe finish. These materials ensure durability and safety for kitchen use.
How Long Does It Take To Make A Wooden Chopping Board?
Making a wooden chopping board typically takes 4 to 6 hours. This includes cutting, gluing, sanding, and finishing processes for a smooth, durable board.
Can I Use Any Wood Type For Chopping Boards?
Not all woods are suitable. Hardwoods like maple, walnut, and cherry are best. They resist knife marks and are food-safe, avoiding harmful chemicals.
How Do I Maintain A Wooden Chopping Board?
Clean with mild soap and water, dry immediately. Regularly apply mineral oil to prevent drying and cracking. Avoid soaking or dishwashers to maintain longevity.
Conclusion
Making a wooden chopping board is simple and rewarding. Choose good wood and follow each step carefully. Sand the board smooth for safety and comfort. Treat the wood with oil to protect it. A handmade board lasts long and looks great.
Enjoy cooking with your new, sturdy chopping board. Try making one for yourself or as a gift. It’s a fun project anyone can do. Keep practicing to improve your woodworking skills.