Last Updated on January 13, 2026
Making pie crust without a food processor is simpler than you think. You just need a few basic tools and ingredients.
By using your hands, you can create a flaky, delicious crust every time. Many people believe a food processor is essential for pie crusts. However, traditional methods work just as well. In fact, they offer a hands-on experience that connects you to the art of baking.
Using your hands allows you to feel the dough’s texture, ensuring perfect consistency. It also gives you control over every ingredient, from butter to flour. Whether you’re a seasoned baker or a beginner, this method is approachable and satisfying. With a little practice, you can master pie crusts without any fancy equipment. So, let’s explore this simple, rewarding process together.
Ingredients For Pie Crust
Making pie crust by hand is simple with basic ingredients. Use flour, butter, salt, and water for a flaky texture. Mix with a fork or your fingers to achieve the desired consistency.
Creating a pie crust without a food processor is easier than you might think. The key to a delicious crust lies in the choice of your ingredients. Let’s explore what makes a perfect pie crust, starting with the essentials.Essential Components
Every pie crust starts with four basic ingredients: flour, fat, salt, and water. These components work together to form a flaky, tender crust. Flour is your base, providing structure. Most recipes use all-purpose flour, as it offers a good balance of softness and strength. Fat gives the crust its flaky texture. Butter is a popular choice for its rich flavor, but shortening or lard can also create a tender, flaky crust. Salt enhances flavor and helps with the dough’s texture. Lastly, water binds everything together. Cold water is essential to keep the fat from melting too soon.Choosing Quality Ingredients
Using high-quality ingredients can make a significant difference in your pie crust. Opt for unbleached flour for a more natural taste. When selecting butter, go for unsalted to control the amount of salt in your recipe. If you prefer shortening, ensure it’s fresh to avoid any off-flavors. The water you add should be ice-cold. You can even chill your mixing bowl and utensils for the best results. Have you ever noticed how different brands of flour or butter can change your baking results? Try experimenting with different types to find your favorite combination. Remember, the right ingredients are the foundation of a great pie crust. By paying attention to these details, you set yourself up for baking success. So, next time you’re in the kitchen, think about what each component brings to the table. Are you ready to take your pie crust to the next level?Tools Needed
Making a pie crust without a food processor? It’s simpler than you think. With the right tools, you can achieve a flaky, delicious crust. You might even discover a new favorite way to bake. Let’s explore the tools you’ll need.
Basic Utensils
Start with a mixing bowl. A medium-sized one works best. You’ll need a fork or pastry cutter. These help blend butter into flour. A rolling pin is essential for shaping the dough. Use a sharp knife for trimming edges. A measuring cup ensures accuracy. Don’t forget a measuring spoon for salt.
Alternative Tools
A cheese grater can replace a pastry cutter. It helps grate cold butter into flour. Use your hands to mix if needed. A clean wine bottle can substitute a rolling pin. Try a pizza cutter for slicing dough strips. A wooden spoon works for stirring. A small towel can cover dough while resting.
Preparing The Dough
Preparing the dough for a pie crust without a food processor can be simple. It requires only a few basic ingredients and some handwork. This method lets you control the texture and consistency of your dough. With patience, you can achieve a perfect pie crust every time. Let’s dive into the steps of making dough by hand.
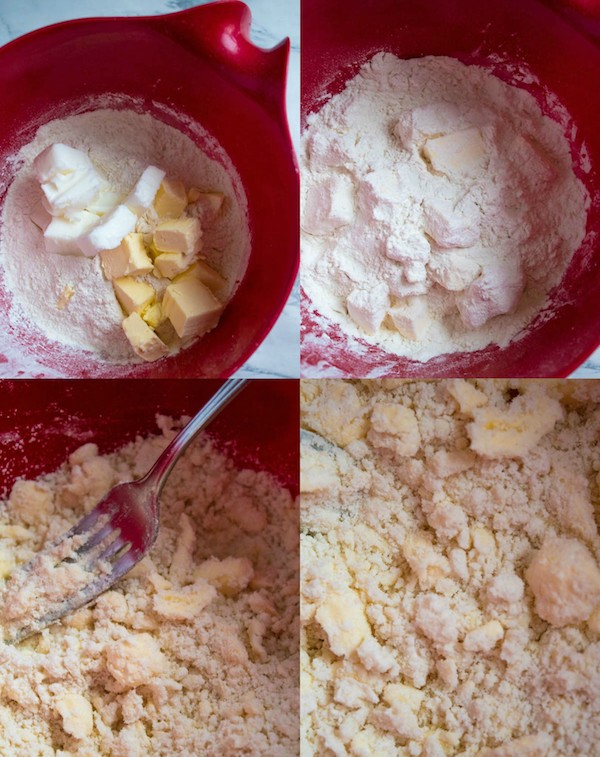
Mixing By Hand
Start with cold butter and flour. Cut the butter into small cubes. Using your fingers, rub the butter into the flour. This step is essential. Aim for a coarse, crumbly mixture. Work quickly to keep the butter from melting. Once you achieve a sandy texture, add cold water. Pour it in small amounts. Mix gently with your hands. The dough should begin to come together.
Achieving The Right Texture
Finding the right texture is key. The dough should not be too sticky. It should also not be too dry. If it’s sticky, add a bit more flour. If it’s dry, add a tiny splash of water. Knead gently until it holds together. Form the dough into a ball. Then, flatten it into a disk. Wrap it in plastic wrap. Let it rest in the fridge for at least an hour. This resting time will enhance the dough’s elasticity.
Chilling The Dough
Chilling the dough is a crucial step in making pie crusts. It ensures the perfect texture and flavor. This step is simple but essential for a flaky crust. Let’s explore why chilling matters and how long is best.
Importance Of Chilling
Chilling dough relaxes the gluten, making it less tough. This helps in achieving a tender crust. Cold dough is also easier to handle and roll out. It prevents the butter from melting too quickly. This results in a flakier texture.
Optimal Chilling Time
For best results, chill the dough for at least 30 minutes. Ideally, aim for 1 to 2 hours. Overnight chilling is also a good option. This allows the dough to firm up properly. It enhances the flavor and texture of the crust.
Rolling Out The Dough
Crafting a pie crust without a food processor can be simple. Mix flour, salt, and butter by hand. Add water slowly. Knead the dough until smooth. Roll it out evenly. Enjoy the satisfying process and delicious result.
Rolling out pie dough can feel like an art form. It’s where you turn a simple mixture into something elegant. The process requires patience and a gentle touch. As you prepare to roll out your dough, consider how the texture and thickness will affect your pie. This step is where you breathe life into your crust, making it ready to cradle your delicious filling.Techniques For Rolling
Rolling dough is all about finding the right balance. Use a rolling pin with a comfortable grip. Start from the center and work your way outwards. Rotate the dough frequently to maintain an even thickness. If you’re new to this, try rolling between sheets of parchment paper. This method helps you control the dough and keep it smooth. Remember, practice makes perfect, and each attempt will make you more adept.Preventing Sticking
Sticking dough can be frustrating, but it’s easily avoidable. Flour is your best friend here. Dust your work surface and rolling pin lightly. You don’t want too much flour, as it can dry out the dough. Another trick is to chill the dough slightly before rolling. Cold dough is less sticky and easier to manage. If you’ve ever struggled with sticky dough, you know the relief that comes with a smooth roll. Have you tried using a silicone mat? It offers a non-stick surface and can be a game-changer.Rolling out the dough is more than just a step in the recipe; it’s where your pie begins to take shape. Each movement is a chance to refine your technique and improve your results. What challenges have you faced in rolling dough, and how did you overcome them?

Credit: wheelofbaking.com
Transferring To Pie Pan
Transferring your pie crust to the pie pan can be tricky. This step is crucial for a perfect pie. A smooth transfer ensures even baking and a neat presentation. Follow simple techniques to make this process easier.
Handling The Dough
Lightly flour your work surface before rolling out the dough. This prevents sticking and eases movement. Use a rolling pin gently. Avoid pressing too hard. Rotate the dough as you roll. This helps maintain an even thickness.
Avoiding Tears And Breaks
Don’t panic if your dough tears. Patch up tears by pressing gently. Use scraps to cover breaks. Smooth them with a little water. Be careful when lifting the dough. Use your forearm or a rolling pin for support.
Slide the rolling pin under the dough. Lift it gently to the pie pan. Center it carefully. Allow the dough to drape over the edges. Trim the excess, leaving some overhang. This prevents shrinking during baking.
Blind Baking The Crust
Blind baking the crust is crucial for perfect pies. It ensures a firm base, preventing sogginess. This technique is essential for pies with unbaked fillings. Without it, the crust might not be fully cooked.
When To Blind Bake
Blind bake when fillings don’t require baking. It’s ideal for custard pies and cream pies. Use it for pies with high moisture content. This prevents a soggy bottom and keeps the crust crispy.
Steps For Blind Baking
Start by rolling out your pie dough. Fit it carefully into your pie pan. Trim excess dough from the edges. Prick the bottom with a fork to prevent bubbling.
Cover the crust with parchment paper. Fill with pie weights or dried beans. This keeps the crust from puffing up. Bake at 375°F until edges are golden.
Remove weights and paper. Return to oven for a short time. This ensures the bottom cooks through. Cool before adding your filling.
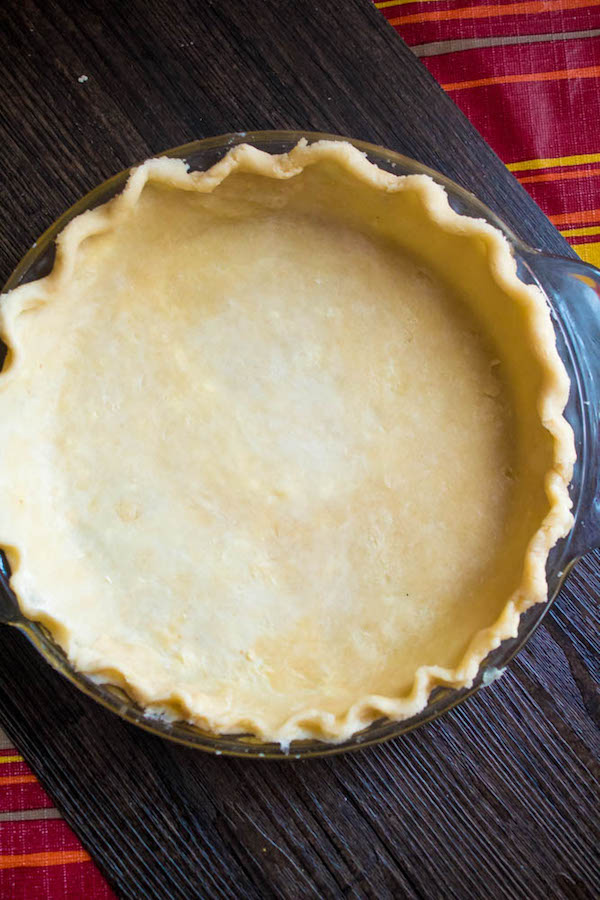
Credit: www.queensleeappetit.com
Common Mistakes And Fixes
Creating a pie crust without a food processor can be tricky. Many bakers face common pitfalls in their dough-making journey. These mistakes can impact the texture and taste of your pie. Understanding and fixing these errors is crucial for a perfect crust. Let’s explore some common mistakes and their fixes.
Troubleshooting Dough
Too much water in the dough makes it sticky. Use a sprinkle of flour to fix this. If your dough cracks, it might be too dry. Add a teaspoon of water slowly. Mix gently until the dough holds together. Overworking the dough leads to toughness. Handle it as little as possible. Keep everything cold to avoid melting the butter. Warm butter can ruin the texture.
Ensuring Perfect Crust
Use cold ingredients for a flaky crust. Butter and water should be chilled. Measure ingredients accurately to maintain balance. Roll the dough evenly for uniform baking. Uneven dough can bake unevenly. Use a gentle hand to avoid compressing the dough. Let the dough rest in the fridge for at least 30 minutes. Resting helps relax the gluten and prevents shrinking.
Credit: www.queensleeappetit.com
Frequently Asked Questions
What Can You Use Instead Of A Food Processor For Dough?
Use a stand mixer with a dough hook or knead by hand to make dough without a food processor. Both methods effectively combine ingredients and develop gluten for perfect texture. Adjust kneading time based on dough type for best results.
Can I Use A Blender Instead Of A Food Processor For Pie Crust?
Yes, you can use a blender instead of a food processor for pie crust. Pulse ingredients briefly to avoid overmixing. Ensure butter remains cold for a flaky texture. A blender may require more manual mixing. Adjust accordingly for best results.
How To Make Dough For Pie By Hand?
Combine flour, salt, and sugar in a bowl. Add cold butter cubes, mix until crumbly. Gradually add ice water, stirring gently. Form a dough, wrap in plastic, and chill for 30 minutes. Roll out on a floured surface for pie crust.
Can You Make Pie Crust In A Mixer?
Yes, you can make pie crust in a mixer. Use the paddle attachment for best results. Mix ingredients until they form a crumbly texture. Avoid overmixing to ensure a flaky crust. A stand mixer simplifies the process and saves time.
Perfect for both beginners and experienced bakers.
Conclusion
Crafting pie crust without a food processor is simple and rewarding. With basic tools and fresh ingredients, you can create a flaky crust. Mixing by hand gives you control over texture. Practice helps improve your skills. Enjoy the process and the delicious results.
Homemade crusts add a personal touch to your pies. Share your creations with friends and family. Baking is a journey of flavors and fun. Start today and explore new pie recipes. Your kitchen skills will grow with each pie.