Last Updated on December 8, 2025
Do you want to make creamy, delicious ice cream right at home? Using an ice cream churner can turn simple ingredients into a tasty treat faster than you think.
If you’ve ever wondered how to get that perfect texture and flavor every time, this guide is for you. Keep reading, and you’ll discover easy steps to master your ice cream churner and impress everyone with homemade ice cream you’ll love.
Choosing The Right Ice Cream Churner
Choosing the right ice cream churner is key for making smooth, creamy ice cream at home. The perfect churner matches your needs and kitchen space. It helps create delicious treats without hassle.
Types Of Ice Cream Churners
There are several types of ice cream churners. Some use rock salt and ice for freezing. Others have built-in freezing units that chill automatically. Some churners require pre-freezing the bowl. Others cool the mixture while stirring. Each type works in a different way to make ice cream.
Manual Vs Electric Models
Manual churners need hand-cranking to mix and freeze the ice cream. They are simple and do not need electricity. These are good for small batches and children’s activities. Electric churners run on power and do the work automatically. They are faster and easier to use. Electric models suit frequent ice cream makers or larger families.
Factors To Consider Before Buying
Think about how often you will use the churner. Check the size and capacity for your typical batch. Consider if you want to freeze the bowl beforehand or have a self-freezing unit. Look at how easy it is to clean and store. Noise level and price may also matter. Choose a churner that fits your budget and kitchen space.
Credit: www.tasteofhome.com
Preparing Ingredients For Ice Cream
Preparing ingredients is the first step to making delicious ice cream. Good preparation helps the ice cream churner work better. Fresh and quality ingredients make your ice cream taste great. Measuring and mixing the right way also matters. Follow simple steps to get ready for churning.
Selecting Quality Ingredients
Choose fresh milk or cream for a smooth base. Use pure sugar to sweeten the mix. Pick natural vanilla or cocoa for real flavor. Avoid artificial colors or flavors. Fresh fruit works well for fruit ice cream. Quality ingredients give rich taste and texture.
Mixing Base Flavors
Start by mixing milk, cream, and sugar in a bowl. Stir until sugar fully dissolves. Add vanilla extract or cocoa powder now. Mix gently but well to combine flavors. Chill the base mixture before churning. A cold base helps the churner freeze ice cream faster.
Adding Mix-ins And Toppings
Prepare nuts, chocolate chips, or fruit pieces as mix-ins. Add them near the end of churning to keep texture. Use toppings like sprinkles or sauce after freezing. Mix-ins and toppings add fun and extra flavor. Measure carefully to avoid overloading the churner.
Setting Up The Ice Cream Churner
Setting up the ice cream churner is the first step to making delicious homemade ice cream. Proper setup ensures smooth operation and better results. Taking time to prepare the churner right can save effort later.
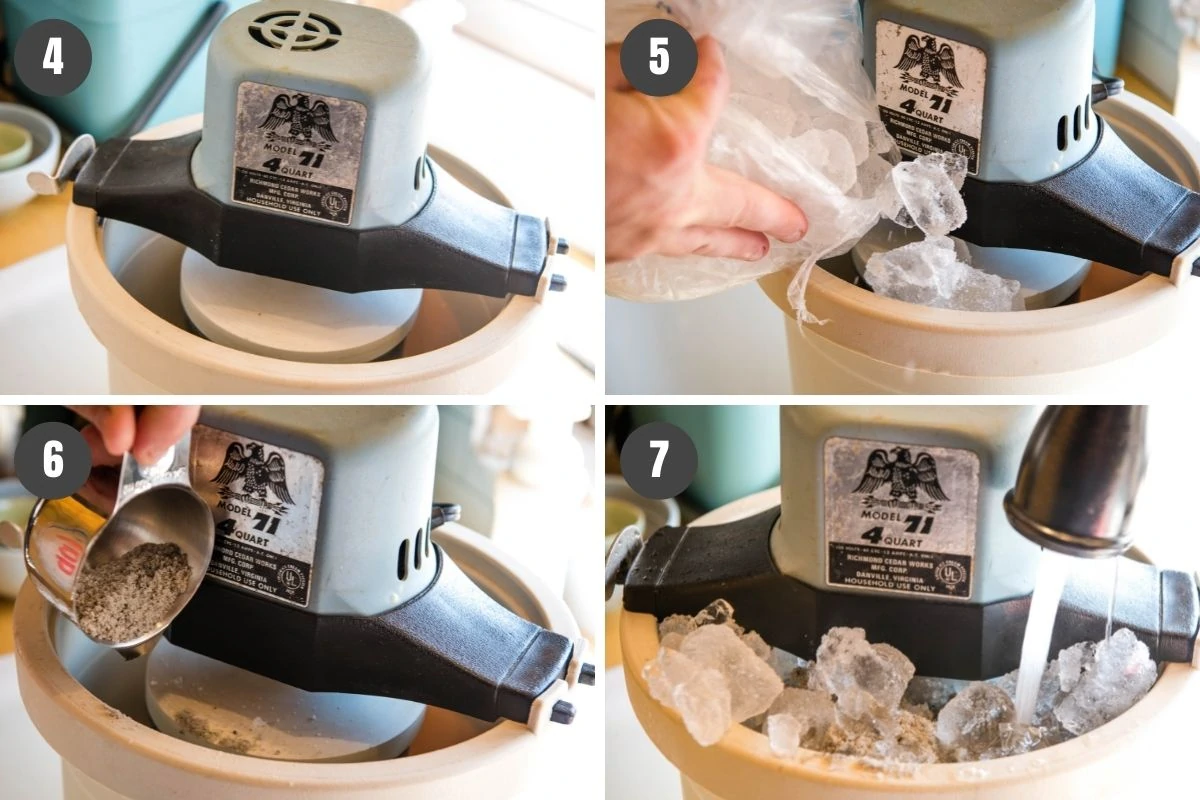
Freezing The Bowl Properly
Start by freezing the churner bowl for at least 12 to 24 hours. A fully frozen bowl helps the ice cream mixture freeze quickly. Keep the bowl in the coldest part of your freezer for best results. Avoid partially frozen bowls as they slow down the churning process.
Assembling The Parts
Carefully put together the churner parts before use. Attach the paddle, lid, and bowl as shown in the manual. Make sure each part fits securely to avoid spills. Check that the paddle moves freely inside the bowl. Proper assembly makes churning easier and more effective.
Ensuring Safety And Cleanliness
Clean all parts thoroughly before use to remove dust and germs. Use warm, soapy water and dry completely. Place the churner on a stable, flat surface during operation. Keep hands and utensils away from moving parts. Following safety steps prevents accidents and keeps ice cream safe to eat.
:max_bytes(150000):strip_icc()/sea-ice-cream-makers-test-cuisinart-ice-100-compressor-gelato-rkilgore-076-5a663530ee594d958d41b3276eddab41.jpeg)
Credit: www.seriouseats.com
Step-by-step Churning Process
The step-by-step churning process is simple and fun. It helps you turn your ice cream mix into a creamy dessert. Follow these easy steps to get the best results using your ice cream churner.
Pouring The Mixture
First, pour your ice cream mixture into the churner’s bowl. Do not fill it more than two-thirds full. This space allows the mix to expand and churn properly.
Make sure the mixture is cold. Cold ingredients churn better and freeze faster. Pour slowly to avoid spills and air bubbles.
Operating The Churner
Turn on the ice cream churner. Set the speed according to the machine’s instructions. Most churners work best on a medium setting.
Keep the lid closed during churning. This keeps the cold air inside and stops splashes. Let the churner work for 20 to 30 minutes.
Monitoring The Texture
Check the texture after 20 minutes. The ice cream should look thick and creamy. It may still be soft, like frozen yogurt.
If it is too soft, churn a little longer. Stop when the ice cream holds its shape. Avoid over-churning to prevent ice crystals.
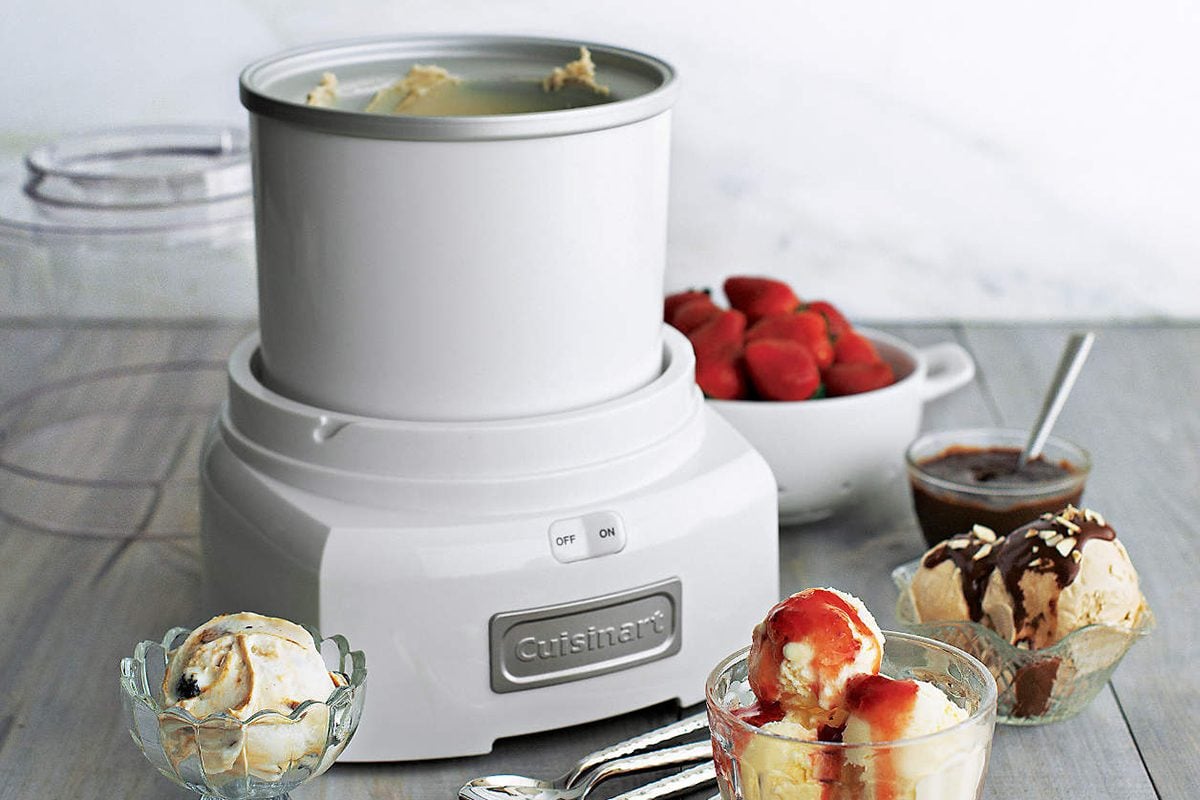
Storing And Serving Homemade Ice Cream
Storing and serving homemade ice cream is as important as making it. Proper storage keeps the ice cream fresh and tasty. Serving it the right way makes the experience enjoyable. This section helps you keep your ice cream perfect and serve it creatively.
Freezing For Firmer Texture
After churning, homemade ice cream is soft. Freeze it in the coldest part of your freezer. Leave it for at least 2 to 4 hours. This makes the ice cream firm and scoopable. Avoid frequent opening of the freezer. It stops ice crystals from forming. For best results, cover the ice cream with plastic wrap before sealing the container.
Best Containers For Storage
Choose containers that keep ice cream cold and fresh. Use airtight plastic or glass containers. Metal containers also work well for quick freezing. Avoid containers that let air inside. Air causes freezer burn and changes flavor. Label containers with the date you made the ice cream. This helps use it before it loses quality.
Creative Serving Ideas
Serve your homemade ice cream in many fun ways. Use waffle cones or bowls for a classic look. Add fresh fruits like strawberries or bananas on top. Sprinkle nuts or chocolate chips for crunch. Try drizzling honey or caramel sauce for extra sweetness. Serve with cookies or brownies for a special treat.
Troubleshooting Common Issues
Troubleshooting common problems with your ice cream churner saves time and frustration. Many issues occur during the freezing and mixing process. Understanding simple fixes helps keep your machine running well. Below are solutions to typical problems users face.
Ice Cream Not Freezing Properly
Check if the bowl is fully frozen before use. The bowl needs at least 12 hours in the freezer. Ensure the freezer is cold enough to freeze the bowl solid. Avoid opening the machine lid often during churning. This lets warm air in and slows freezing. Use the right amount of mixture; too much can stop freezing. Thin mixtures freeze slower. Try chilling the mixture before pouring it into the churner.
Grainy Or Icy Texture
Grainy ice cream may mean the mixture was not cold enough. Chill the mixture in the fridge before churning. Over-churning causes ice crystals, making texture icy. Stop the churner as soon as ice cream thickens. Adding sugar or fat helps create a smooth texture. Avoid using low-fat or no-sugar recipes for creaminess. Store ice cream in the freezer with a tight lid to prevent ice crystals.
Machine Malfunctions
Check if the machine is plugged in and turned on. Clean the churner parts regularly to avoid blockages. Inspect the motor for overheating or strange noises. If the machine stops, let it cool before restarting. Ensure all parts fit properly before use. Follow the manufacturer’s instructions for maintenance. Contact customer support if the problem continues after basic checks.
Cleaning And Maintaining Your Churner
Keeping your ice cream churner clean is very important. Dirt or leftover cream can cause bad tastes or damage the machine. Proper cleaning helps your churner last longer and work well every time.
Regular care also stops germs from growing. This makes your ice cream safe to eat. Follow these simple steps to keep your churner in top shape.
Disassembling For Cleaning
Turn off and unplug the churner before cleaning. Remove the lid, dasher, and bowl carefully. Check the user manual to find all parts that come apart. Take off small pieces gently to avoid breaking them. Wash each part separately to clean better.
Recommended Cleaning Products
Use mild dish soap and warm water for cleaning. Avoid harsh chemicals or abrasive cleaners. These can damage the churner’s surface. Soft sponges or cloths work best for scrubbing. Rinse parts well to remove soap residue. Dry everything fully before putting back together.
Regular Maintenance Tips
Clean the churner after every use to stop build-up. Check moving parts for signs of wear or damage. Lubricate any parts if the manual suggests it. Store the churner in a dry, cool place to avoid rust. Inspect the power cord regularly for safety. These steps keep your machine running smoothly.
Credit: flouronmyfingers.com
Frequently Asked Questions
How Do I Prepare The Ice Cream Churner Before Use?
Clean all parts thoroughly and assemble the churner as per instructions. Pre-freeze the bowl if required for better results.
What Ingredients Work Best In An Ice Cream Churner?
Use fresh cream, milk, sugar, and flavorings. Avoid ingredients that freeze too hard or affect the churner’s motor.
How Long Does It Take To Churn Ice Cream?
Typically, churning takes 20-40 minutes. Time varies based on recipe and churner model used.
Can I Make Sorbet Or Frozen Yogurt In It?
Yes, ice cream churners work well for sorbet and frozen yogurt recipes, ensuring smooth texture.
Conclusion
Using an ice cream churner makes homemade ice cream easy and fun. You control the flavors and ingredients. The process is simple and quick. Just follow the steps and enjoy creamy, fresh ice cream. Perfect for family treats or small parties.
Experiment with fruits, nuts, or chocolate for variety. Keep your churner clean after each use. This tool brings joy and tasty results every time. Try it today and enjoy homemade ice cream anytime you want.